LLM Zoomcamp FAQ
Table of Contents
General Course-Related Questions
# I just discovered the course. Can I still join?
Yes, but if you want to receive a certificate, you need to submit your project while we’re still accepting submissions.
# Course: I have registered for the LLM Zoomcamp. When can I expect to receive the confirmation email?
You don't need it. You're accepted. You can also just start learning and submitting homework (while the form is open) without registering. It is not checked against any registered list. Registration is just to gauge interest before the start date.
# What is the video/zoom link to the stream for the “Office Hours” or live/workshop sessions?
The zoom link is only published to instructors/presenters/TAs.
Students participate via YouTube Live and submit questions to Slido (link is pinned in the chat when live). The video URL should be posted in the announcements channel on Telegram & Slack before it begins. You can also watch live on the DataTalksClub YouTube Channel.
Don’t post questions in chat as they may be missed if the room is very active.
# Cloud alternatives with GPU
Check the quota and reset cycle carefully. Is the free hours limit per month or per week? Usually, if you change the configuration, the free hours quota might also be adjusted, or it might be billed separately.
Potential options include:
- Google Colab
- Kaggle
- Databricks (possibly)
Consider using GPTs to discover more options. Be aware that some platforms might have restrictions on what you can and cannot install, so ensure to read what is included in the free vs paid tier.
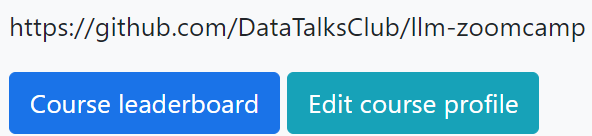
# Leaderboard: I am not on the leaderboard / how do I know which one I am on the leaderboard?
When you set up your account, you are automatically assigned a random name, such as “Lucid Elbakyan.” Click on the "Jump to your record on the leaderboard" link to find your entry.
If you want to see what your Display name is, click on the "Edit Course Profile" button.
- First field: This is your nickname/displayed name. You can change it if you want to be known by your Slack username, GitHub username, or any other nickname of your choice. This is useful if you want to remain anonymous.
- Second field: Change this to your official name as in your identification documents—passport, national ID card, driver's license, etc. This is mandatory if you do not want "Lucid Elbakyan" on your certificate. This name will appear on your Certificate!
# Certificate: Can I follow the course in a self-paced mode and get a certificate?
No, you can only get a certificate if you finish the course with a "live" cohort.
We don't award certificates for the self-paced mode. The reason is you need to peer-review 3 capstone(s) after submitting your project.
You can only peer-review projects at the time the course is running; after the form is closed and the peer-review list is compiled.
# I missed the first homework - can I still get a certificate?
Yes, you need to pass the Capstone project to get the certificate. Homework is not mandatory, though it is recommended for reinforcing concepts, and the points awarded count towards your rank on the leaderboard.
# Homework: Why does the content keep changing?
This course is being offered for the first time, and things will keep changing until a given module is ready, at which point it shall be announced. Working on the material or homework in advance will be at your own risk, as the final version could be different.
# When will the course be offered next?
Summer 2025.
# Are there any lectures/videos? Where are they?
Please check the bookmarks and pinned links, especially DataTalks.Club’s YouTube account.
# WSL2: ResponseError: model requires more system memory (X.X GiB) than is available (Y.Y GiB). My system has more than X.X GiB.
Your WSL2 is set to use Y.Y GiB, not all your computer memory. To allocate more RAM, follow these steps:
Create a
.wslconfigfile under your Windows user profile directory:C:\Users\YourUsername\.wslconfig.Include the desired RAM allocation in the file:
[wsl2]
memory=8GB
Restart WSL using the command:
wsl --shutdownRun the
freecommand in WSL to verify the changes.
For more details, read this article.
# Server Error (500) When logging in to course homework using GitHub
Additional error text seen:
Third-Party Login Failure

An error occurred while attempting to login via your third-party account.
The current solution is to use Google or Slack to log in and submit homework answers, as the root cause analysis for the GitHub issue is sporadic and doesn’t impact all users.
# What other alternatives to ElasticSearch are there?
You could use some of these free alternatives to Elasticsearch:
Milvus: An open-source library with similar functionalities to Elasticsearch.
OpenSearch: Another free open-source library that provides the same functionalities as Elasticsearch.
Additional Considerations:
If you start using multi-qa-distilbert-cos-v1 from huggingface.co and create embeddings to index them, consider the following:
If the model is updated by the author, the indexed embeddings may become incompatible, requiring re-indexing.
To prevent this, save the model locally. This ensures that your code continues to work even if the cloud model changes.
Module 1: Introduction
# Why are we not using Langchain in the course?
Langchain is a framework for building LLM-powered apps. We're not using it to learn the basics; think of it like learning HTML, CSS, and JavaScript before learning React or Angular.
# OpenAI: Error when running OpenAI chat.completions.create command
You may receive the following error when running the OpenAI chat.completions.create command due to insufficient credits in your OpenAI account:
OpenAI API Error: Insufficient credits
# OpenAI: Error: RateLimitError: Error code: 429 -
RateLimitError: Error code: 429 - {'error': {'message': 'You exceeded your current quota, please check your plan and billing details. For more information on this error, read the docs: [https://platform.openai.com/docs/guides/error-codes/api-errors.](https://platform.openai.com/docs/guides/error-codes/api-errors.)', 'type': 'insufficient_quota', 'param': None, 'code': 'insufficient_quota'}
The above errors are related to your OpenAI API account’s quota. There is no free usage of OpenAI’s API, so you will need to add funds using a credit card (see pay-as-you-go in the OpenAI settings at platform.openai.com). Once added, re-run your Python command and you should receive a successful return code.
Steps to resolve:
Add credits to your account here (min $5).
In
chat.completions.create(model='gpt-4o', …)specify one of the models available to you: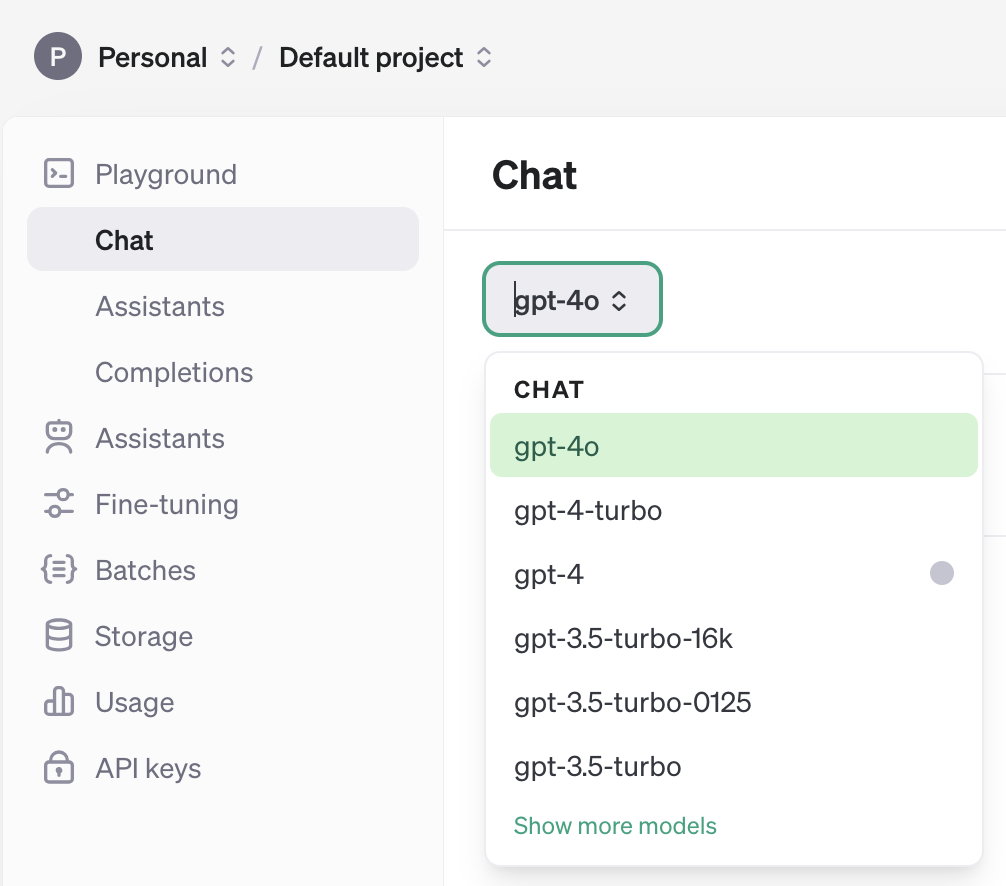
You might need to recreate an API key after adding credits to your account and update it locally.
# OpenAI: Error: 'Cannot import name OpenAI from openai'; How to fix?
Update openai version from 0.27.0 to any 1.x version.
# OpenAI: How much will I have to spend to use the Open AI API?
Using the OpenAI API does not cost much. You can recharge starting from $5. For initial usage, it might cost as little as 5 cents.
# OpenAI: Do I have to subscribe and pay for Open AI API for this course?
No, you don't have to pay for this service in order to complete the course homeworks. You could use some of the free alternatives listed in the course GitHub.
llm-zoomcamp/01-intro/open-ai-alternatives.md at main · DataTalksClub/llm-zoomcamp (github.com)
# ElasticSearch: ERROR: BadRequestError: BadRequestError(400, 'media_type_header_exception', 'Invalid media-type value on headers [Content-Type, Accept]', Accept version must be either version 8 or 7, but found 9.
Reason: ElasticSearch client and server are on different versions.
Solution:
Upgrade ElasticSearch on Docker to version 9:
docker run -it \
--rm \
--name elasticsearch \
-p 9200:9200 \
-p 9300:9300 \
-e "discovery.type=single-node" \
-e "xpack.security.enabled=false" \
elasticsearch:9.0.1
If upgrading to version 9 doesn’t work, check the client version (Python module) using:
pip show elasticsearchThen install that specific version of ElasticSearch on Docker. Check if it worked using:
curl http://localhost:9200/
Example output of pip show elasticsearch:
Name: elasticsearch
Version: 9.0.2
Summary: Python client for Elasticsearch
Home-page: [GitHub](https://github.com/elastic/elasticsearch-py)
Author:
Author-email: Elastic Client Library Maintainers <client-libs@elastic.co>
License-Expression: Apache-2.0
Location: /home/codespace/.python/current/lib/python3.12/site-packages
Requires: elastic-transport, python-dateutil, typing-extensions
Required-by:
# Fix BadRequestError: BadRequestError(400, 'media_type_header_exception', 'Invalid media-type value on headers [Content-Type, Accept]', Accept version must be either version 8 or 7, but found 9. Accept=application/vnd.elasticsearch+json; compatible-with=9)
When trying to connect to the Elasticsearch server/node version 8.17.6 running within a Docker container with the Python client Elasticsearch version 9.x or more, you may encounter the following BadRequestError:
BadRequestError(400, 'media_type_header_exception', 'Invalid media-type value on headers [Content-Type, Accept]', Accept version must be either version 8 or 7, but found 9. Accept=application/vnd.elasticsearch+json; compatible-with=9)
This issue arises because pip install elasticsearch installs Elasticsearch 9.x Python client, which is incompatible with Elasticsearch 8.17.6. To resolve this issue, use the following command to install a compatible Elasticsearch client version:
pip install "elasticsearch>=8,<9"
# ElasticSearch: ERROR: Elasticsearch exited unexpectedly
If you encounter the error "Elasticsearch exited unexpectedly," it's likely due to insufficient RAM allocated to Elasticsearch.
Solution 1: Specify RAM Size
Specify the RAM size in the configuration:
docker run -it \
  --rm \
  --name elasticsearch \
  -m 4GB \
  -p 9200:9200 \
  -p 9300:9300 \
  -e "discovery.type=single-node" \
  -e "xpack.security.enabled=false" \
  docker.elastic.co/elasticsearch/elasticsearch:8.4.3
You can also try using -m 2GB.
Solution 2: Set Memory Lock to False
Another possible solution is to set the memory_lock to false:
docker run -it \
  --rm \
  --name elasticsearch \
  -p 9200:9200 \
  -p 9300:9300 \
  -e "discovery.type=single-node" \
  -e "xpack.security.enabled=false" \
  -e "ES_JAVA_OPTS=-Xms512m -Xmx512m" \
  -e "bootstrap.memory_lock=false" \
  docker.elastic.co/elasticsearch/elasticsearch:8.4.3
# ElasticSearch: ERROR: Elasticsearch.index() got an unexpected keyword argument 'document'
Instead of document as used in the course video, use doc.
# Docker: How do I store data persistently in Elasticsearch?
When you stop the container, the data you previously added to Elasticsearch will be gone. To avoid this, add volume mapping:
Create a Docker volume:
docker volume create elasticsearch_dataRun the Elasticsearch container with volume mapping:
docker run -it \
--rm \
--name elasticsearch \
-p 9200:9200 \
-p 9300:9300 \
-v elasticsearch_data:/usr/share/elasticsearch/data \
-e "discovery.type=single-node" \
-e "xpack.security.enabled=false" \
docker.elastic.co/elasticsearch/elasticsearch:8.4.3
# Authentication: Safe and easy way to store and load API keys
You can store your different API keys in a YAML file that you will add to your .gitignore file. Be careful to never push or share this file.
For example, create a new file named api_keys.yml in your repository.
Then, add it to your .gitignore file:
#api_keys

api_keys.yml
Fill your api_keys.yml file:
OPENAI_API_KEY: "sk[...]"
GROQ_API_KEY: "gqk_[...]"
Save your file.
You will need the pyyaml library to load your YAML file, so run this command in your terminal:
pip install pyyaml
Now, open your Jupyter notebook.
You can load your YAML file and the associated keys with this code:
import yaml

# Open the file
with open('api_keys.yml', 'r') as file:
    # Load the data from the file
    data = yaml.safe_load(file)

# Get the API key (Groq example here)
groq_api_key = data['GROQ_API_KEY']
Now, you can easily replace the api_key value directly with the loaded values without loading your environment variables.
# How to store and load API keys using .env file
Store the API key in a .env file, then use the following steps to load it:
Import the necessary modules:
import os
from dotenv import load_dotenv
Load the
.envfile:load_dotenv(os.path.abspath("<path-to-.env>"))Retrieve the API key:
os.getenv("API_KEY_abc")
- Ensure to add the
.envfile to your.gitignoreto prevent it from being checked into version control.
# Authentication: Why is my OPENAI_API_KEY not found in the Jupyter notebook?
There are two options to resolve this issue:
Option 1: Using direnv
- Create a
.envrcfile and add your API key. - Run
direnv allowin the terminal.
If you encounter the error:
OpenAIError: The api_key client option must be set either by passing api_key to the client or by setting the OPENAI_API_KEY environment variable
Install
dotenvby running:pip install python-dotenvAdd the following to a cell in the notebook:
from dotenv import load_dotenv

load_dotenv('.envrc')
Option 2: Using Codespaces Secrets
- Log in to your GitHub account and navigate to Settings > Codespaces.
- In the Secrets section, create a secret like
OPENAI_API_KEYand select the repositories for which the secret should be available. - Once set up, the key will be available in your Codespaces session.
# OpenSource: I am using Groq, and it doesn't provide a tokenizer library based on my research. How can we estimate the number of OpenAI tokens asked in homework question 6?
The question asks for the number of tokens in the GPT-4o model. tiktoken is a Python library that can be used to get the number of tokens. You don't need an OpenAI API key to get the number of tokens. You can use the code provided in the question to get the number of tokens.
# OpenSource: Can I use Groq instead of OpenAI?
You can use any LLM platform for your experiments and your project. The homework is designed so that you don’t need access to any paid services and can complete it locally. However, you will need to adjust the code for that platform. Refer to their documentation pages.
# OpenSource: Can I use open-source alternatives to OpenAI API?
Yes. See module 2 and the open-ai-alternatives.md in the module 1 folder.
# Homework: Returning Empty list after filtering my query (HW Q3)
This is likely to be an error when indexing the data. First, you need to add the index settings before adding the data to the indices, then you will be good to go applying your filters and query.
# ModuleNotFoundError on import docx in parse-faq.ipynb
The correct package name for docx is python-docx, not docx. Make sure to install the package using:
pip install python-docx
# OpenAI: Why does my token count differ from what OpenAI reports?
When using tiktoken.encode() to count tokens in your prompt, you might see a difference compared to OpenAI’s API response. For instance, you might get 320 tokens, while OpenAI reports 327. This is due to internal tokens added by OpenAI’s chat formatting.
Here’s what happens:
- Each message in a
chat.completions.create()call (e.g.,{role: "user", content: "..."}) adds 4 structural tokens (role, content, separators). - The API adds 2 tokens globally to mark the start of assistant response generation.
- Extra newlines, whitespace, or uncommon Unicode characters in your content may slightly increase the token count.
Thus, even if your visible text is 320 tokens, OpenAI may count 327 due to these internal additions.
# Ollama: How to install Ollama?
First, install Ollama by visiting https://ollama.com/download and choosing your operating system:
macOS: Download the
.pkgand install it.Windows: Download the
.msiand install it.Linux: Run the following command in the terminal:
curl -fsSL https://ollama.com/install.sh | sh
Once installed, open a terminal and type:
ollama run llama3
This command will:
- Download the LLaMA 3 model (~4GB).
- Start the model locally.
- Open a chat-like interface where you can type questions.
To test the Ollama local server, run the following command:
curl http://localhost:11434
You should receive a response similar to:
{"models": [...]}
Then, install the Python client with:
pip install ollama
Here is a minimal Python example:
import ollama

response = ollama.chat(
    model='llama3',
    messages=[{"role": "user", "content": your_prompt}]
)

print(response['message']['content'])
# Homework: When I re-run the code in Jupyter notebook multiple times for homework#1, the index building code snippet fails.
To resolve this issue, you can delete any existing index with the same name before creating a new one.
# Check if the index exists and delete it if it does
if es_client.indices.exists(index=index_name):
    print(f"Deleting existing index: {index_name}")
    es_client.indices.delete(index=index_name)
    print(f"Index {index_name} deleted.")
If you encounter issues with the index getting messed up and seeing different score outputs, follow these steps:
- Go to Docker Desktop and stop the Elasticsearch container.
- Delete the container image and re-initiate the Elasticsearch container by following the instructions in '1.6 Searching with ElasticSearch'.
- Change the name of the index in your code to something other than
index_name = "course-questions".
# Question
Answer
Module 2: Vector Search
# SSL Error when connecting to locally running ElasticSearch instance via SDK:
The issue is likely that you’re trying to use HTTPS instead of HTTP when you call local.
To remove ES authentication constraints, set xpack.security.enabled=false in the ES docker settings.
# What are embeddings?
Embeddings refer to the process of converting non-numerical data into numerical data while preserving meaning and context. When similar non-numerical data is input into an embedding algorithm, it should yield similar numerical data. The proximity of these numerical values allows for the use of mathematical semantic similarity algorithms. Related concepts include the "vector space model" and "dimensionality reduction."
# Find maximum of a numpy array (of any dimension):
max_value = numpy_array.max()
# What is the cosine similarity?
Cosine similarity is a measure used to calculate the similarity between two non-zero vectors, often used in text analysis to determine how similar two documents are based on their content. This metric computes the cosine of the angle between two vectors, which are typically word counts or TF-IDF values of the documents. The cosine similarity value ranges from -1 to 1, where 1 indicates that the vectors are identical, 0 indicates that the vectors are orthogonal (no similarity), and -1 represents completely opposite vectors.
# Can I use another vector db for running RAGs vector search?
Yes, there are other vector databases. For example, Milvus, which is open sourced. You can see the documentation here: Milvus Documentation
# Why does cosine similarity reduce to a matrix multiplication between the embeddings and the query vector?
Cosine similarity measures how aligned two vectors are, regardless of their magnitude. When all vectors (including the query) are normalized to unit length, their magnitudes no longer matter. In this case, cosine similarity is equivalent to simply taking the dot product between the query and each document embedding. This allows us to compute similarities efficiently using matrix multiplication.
# Why am I getting `docker: invalid reference format` when trying to run Qdrant with a volume in Windows?
If you're running the docker run command on Windows (especially Command Prompt or PowerShell) and you use $(pwd) to mount a volume, you'll likely get the following error:
docker: invalid reference format.
The expression $(pwd) is a Unix-style command used to get the current working directory. It won’t work in Windows, which causes Docker to misinterpret the image name or the -v argument, hence the “invalid reference format” error.
Solution:
Use the full absolute path instead of
$(pwd), for example:docker run -p 6333:6333 -p 6334:6334 \ -v C:/Users/youruser/path/to/qdrant_storage:/qdrant/storage:z \ qdrant/qdrantAlternatively, use a named volume:
docker volume create qdrant_storage

docker run -p 6333:6333 -p 6334:6334 \
-v qdrant_storage:/qdrant/storage \
qdrant/qdrant
# ImportError: DLL load failed while importing onnxruntime_pybind11_state: A dynamic link library (DLL) initialization routine failed.
If you encounter this error while using Anaconda or Miniconda, try re-installing onnxruntime with the following command:
conda install -c conda-forge onnxruntime
To create an environment for using qdrant-client[fastembed]>=1.14.2, which may trigger this error, follow these steps:
Create a Conda Environment
conda create --name llm-zoomcamp-env python=3.10Activate the Environment
conda activate llm-zoomcamp-envInstall the Dependency
pip install "qdrant-client[fastembed]>=1.14.2"Use the Environment
- Jupyter Notebook: Activate the environment before launching Jupyter.
- VSCode/Cursor: Use
Ctrl+Shift+P(orCmd+Shift+Pon Mac), then select "Python Interpreter" and choose "llm-zoomcamp-env".
Module 3: Evaluation
# To set up a Qdrant client, when to use `client = QdrantClient("http://localhost:6333")` vs `client = QdrantClient(":memory:")`?
Use the former if you are running Qdrant in Docker locally and need to connect your notebook to the Qdrant server running in Docker.
The latter option creates an in-memory Qdrant instance that runs inside your Python process. This means:
- It's only for testing or prototyping.
- It is not connected to your Docker-based Qdrant.
- It is wiped clean when the notebook or script stops.
# I'm getting the error “cannot import name 'VectorSearch' from 'minsearch'” even though I installed the latest version of minsearch. How can I fix it?
If you're working with Jupyter notebooks, make sure the kernel you're using has the correct version of minsearch. You can check the version in your kernel with:
minsearch.__version__
You can also try installing the latest version directly from a notebook cell using:
%pip install -U minsearch
%pip is a Jupyter magic command that ensures the package gets installed in the same environment your notebook kernel is using. This can prevent issues that arise with !pip, which might install it in a different environment.
# Why was .dot(...) used directly to compute cosine similarity in the lesson, but normalization is emphasized in the homework?
In the lesson, .dot(...) was used under the assumption that the embeddings returned by the model (e.g., model.encode(...) from OpenAI) are already normalized to have unit length. In that case, the dot product is mathematically equivalent to cosine similarity.
In the homework, however, we use classic embeddings like TF-IDF + SVD, which are not normalized by default. This means that the dot product does not represent cosine similarity unless we manually normalize the vectors.
Module 4: Monitoring
# Question
Answer
# Warning: 'model "multi-qa-mpnet-base-dot-v1" was made on sentence transformers v3.0.0 bet' how to suppress?
To suppress the warning, upgrade sentence-transformers to version 3.0.0 or higher. You can do this by running the following command:
pip install sentence-transformers>=3.0.0
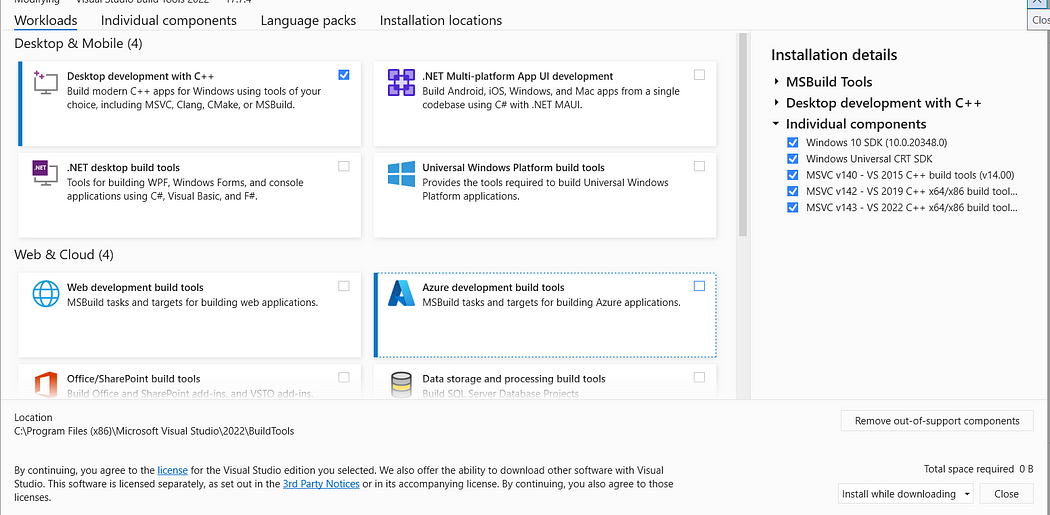
# In Windows OS: OSError: [WinError 126] The specified module could not be found. Error loading "C:\Users\USER\AppData\Local\Programs\Python\Python310\lib\site-packages\torch\lib\fbgemm.dll" or one of its dependencies.
Solution 1: Install Visual C++ Redistributable.
Solution 2: Install Visual Studio, not Visual Studio Code.
For more details, please follow this link: discuss.pytorch.org
# OperationalError when running python prep.py: psycopg2. OperationalError: could not translate host name "postgres" to address: No such host is known. How do I fix this issue?
To resolve this error, update the .env file:
- Change the
POSTGRES_HOSTvariable tolocalhost.
POSTGRES_HOST=localhost
# How set Pandas to show entire text content in a column. Useful to view the entire Explanation column content in the LLM-as-judge section of the offline-rag-evaluation notebook
By default, Pandas truncates text content in a column to 50 characters. To view the entire explanation provided by the judge LLM for a non-relevant answer, use the following instruction:
pd.set_option('display.max_colwidth', None)
Explanation:
- Option:
display.max_colwidth - Type:
intorNone - Description: Sets the maximum width in characters of a column in the representation of a pandas data structure. When a column overflows, a "..." placeholder is used in the output. Setting it to 'None' allows unlimited width.
- Default: 50
Refer to the official documentation for more details.

# How to normalize vectors in a Pandas DataFrame column (or Pandas Series)?
To normalize vectors in a Pandas DataFrame column, you can use the following approach:
import numpy as np

normalize_vec = lambda v: v / np.linalg.norm(v)

df["new_col"] = df["org_col"].apply(normalize_vec)
# How to compute the quantile or percentile of Pandas DataFrame column (or Pandas Series)?
To compute the 75% percentile or 0.75 quantile:
quantile = df["col"].quantile(q=0.75)
# How can I remove all Docker containers, images, and volumes, and builds from the terminal?
- Delete all containers (including running ones):
docker rm -f $(docker ps -aq)
- Remove all images:
docker rmi -f $(docker images -q)
- Delete all volumes:
docker volume rm $(docker volume ls -q)
# Session State: I want the user to only be able to give feedback once per submission (+1 or -1). When I submit text using the ask button, the buttons should be disabled if `st.session.submitted` is False. The issue is mainly with `st.session.submitted`, which gets reassigned to True again despite one feedback button being pressed.
Module 6: X
# Docker: When trying to run a streamlit app using docker-compose, I get: Error response from daemon: failed to create task for container: failed to create shim task: OCI runtime create failed: runc create failed: unable to start container process: exec: "streamlit": executable file not found in $PATH: unknown. The app runs fine outside of docker-compose
To resolve this issue:
Ensure you have created a
Dockerfile.Add
streamlitto thedocker-composeconfiguration.Run the following command to rebuild and start the application:
docker-compose up --build
# Question
Answer
Capstone Project
# Question
Answer
# Is it a group project?
No, the capstone is a solo project.
# Do we submit 2 projects, what does attempt 1 and 2 mean?
You only need to submit one project. If the submission at the first attempt fails, you can improve it and re-submit during the attempt#2 submission window.
- If you want to submit two projects for the experience and exposure, you must use different datasets and problem statements.
- If you can’t make it to the attempt#1 submission window, you still have time to catch up to meet the attempt#2 submission window.
Remember that the submission does not count towards the certification if you do not participate in the peer-review of three peers in your cohort.
# Does the competition count as the capstone?
No, it does not. You can participate in the math-kaggle-llm-competition as a group if you want to form teams; but the capstone is an individual attempt.
# How is my capstone project going to be evaluated?
Each submitted project will be evaluated by three randomly assigned students who have also submitted the project.
You will also be responsible for grading the projects from three fellow students yourself. Please be aware that not complying with this rule implies you may fail to achieve the Certificate at the end of the course.
The final grade you receive will be the median score of the grades from the peer reviewers. The peer review criteria for evaluation must follow the guidelines defined here (TBA for link).
# When and how will we be assigned projects for review/grading?
After the submission deadline has passed, an Excel sheet will be shared with 3 projects being assigned to each participant.
# I’ve already submitted my project. Why can’t I review any projects?
Once the project submission deadline has passed, projects will be assigned to you for evaluation. You can't choose which projects to evaluate, and you can’t review before the list has been released.
# How can I find some good ideas or datasets for the project?
Please check this GitHub page for several ideas and datasets that could be used for the project, along with tips and guidelines.
# Do I have to use ElasticSearch or X library?
No, you don’t have to use ElasticSearch. You can use any library you want. Just make sure it is documented so your peer-reviewers can reproduce your project.
Workshops: dlthub
# Question
Answer
# Can I use the workshop materials for my own projects or share them with others?
Since dlt is open-source, you can use the content of this workshop for a capstone project. As the main goal of dlt is to load and store data easily, you can even use it for other Zoomcamps (like the MLOps Zoomcamp project). Feel free to ask questions or use it directly in your projects.
# How to set up a new dlt project when loading from cloud?
Start with the following command on the command line:
dlt init filesystem duckdb
More directions can be found at dlthub.com
# There is an error when opening the table using `dbtable = db.open_table("notion_pages___homework")`: `FileNotFoundError: Table notion_pages___homework does not exist. Please first call db.create_table(notion_pages___homework, data)`
The error indicates that you have not changed all instances of "employee_handbook" to "homework" in your pipeline settings.
# There is an error when running main(): FileNotFoundError: Table notion_pages___homework does not exist. Please first call db.create_table(notion_pages___homework, data)
Make sure you open the correct table in line 3:
dbtable = db.open_table("notion_pages___homework")
# How do I know which tables are in the db?
You can use the db.table_names() method to list all the tables in the database.
# Does DLT have connectors to ClickHouse or StarRocks?
Currently, DLT does not have connectors for ClickHouse or StarRocks but is open to contributions from the community to add these connectors.
# Notebook does not have secret access or 401 Client Error: Unauthorized for url: [api.notion.com](https://api.notion.com/v1/search)
If you encounter this error, it typically indicates an authorization issue with the Notion API. Here’s how you can resolve it:
- Check API Key: Ensure that you are using the correct API key with appropriate permissions.
- Verify API Endpoint: Confirm that you are hitting the correct Notion API endpoint.
- Token Expiry: Check if your token has expired and regenerate it if necessary.
- Configurations: Double-check all access configurations in your application.
If the error persists, review the API documentation and make sure all necessary authentication steps are correctly implemented.
# Error: How to fix requests library only installs v2.28 instead of v2.32 required for lancedb?
If you encounter a 401 Client Error, it may indicate the need to grant access to the key or that the key is incorrect.
To install the correct version directly from the source, use the following command:
pip install "requests @ https://github.com/psf/requests/archive/refs/tags/v2.32.3.zip"

Workshops: Agents
# What is the approximate cost of running the workshop notebook (DLT + Cognee)?
The total cost is approximately $0.09 USD, based on pricing as of July 7, 2025.
This estimate includes all API calls to OpenAI for generating embeddings and relationship extraction, as well as local operations for loading data into Qdrant and Kuzu.
# Connection refused error on prompting the ollam RAG?
If you encounter this error while doing the homework, you can resolve it by restarting the Ollama server using the following command:
!nohup ollama serve > nohup.out 2>&1 &
Make sure to rerun the cell containing ollama serve if you stop and restart the notebook cell.
# Error: Connecting to Elasticsearch at [elasticsearch:9200](http://elasticsearch:9200)
Try removing the driver bridge from the configuration.
# Evaluation: Multiple retrieval approaches are evaluated, and the best one is used (2 points). I am trying to evaluate a project. The person used only minsearch for evaluation but applied boosting and posted the boosting parameter. Do they get one mark?
The evaluation criteria state that to receive 2 points, multiple RAG approaches must be evaluated, and the best one must be used. Since the individual is using only minsearch for evaluation, despite applying boosting, this does not qualify as evaluating multiple RAG approaches.
Therefore, they would receive only 1 point for utilizing a single RAG approach (minsearch) in their evaluation, even though they incorporated a boosting parameter. Boosting itself does not constitute a separate approach; it is simply an enhancement applied to the single method being used.
# Elasticsearch version error
Elasticsearch version error
Error:
elasticsearch.BadRequestError: BadRequestError(400, 'media_type_header_exception', 'Invalid media-type value on headers [Content-Type, Accept]', Accept version must be either version 8 or 7, but found 9. Accept=application/vnd.elasticsearch+json; compatible-with=9)
Fix:
- Uninstall the current Elasticsearch package:
pip uninstall elasticsearch - Install the correct version (8.10.0) of the Elasticsearch package:
pip install elasticsearch==8.10.0
# AppendableIndex error in minsearch
Error
ImportError: cannot import name 'AppendableIndex' from 'minsearch'
Fix
Run the following command to upgrade:
pip install --upgrade minsearchEnsure you are using minsearch version 0.0.4.
Restart the Jupyter kernel after the upgrade.
# AppendableIndex error in minsearch (not resolved by upgrading minsearch)
Error:
ImportError: cannot import name 'AppendableIndex' from 'minsearch'
Fix:
from minsearch.append import AppendableIndex
# AppendableIndex error in minsearch (not resolved by upgrading minsearch or importing from minsearch.append)
Error:
ImportError: cannot import name 'AppendableIndex' from 'minsearch'
Fix:
- Rename the previously downloaded
minsearch.pyfile to avoid conflicts. - Reinstall
minsearchusing pip so the import works correctly.
# Any free models with tool use support?
Several Groq models offer tool use, such as Deepseek R1 or Llama 4, all of which can be used for free for development.
For more details, please visit: Groq Tool Use Documentation
# I passed a float to my tool, but got a validation error saying it expected a number. Isn’t float a number?
Yes — in Python, float is a numeric type. But when working with FastMCP, tool inputs are validated against JSON Schema, which uses the term "number" to represent any numeric value (integers or floats).
The important thing is not the type you use in Python, but whether the JSON you send matches the tool's declared input schema.
Example:
"inputSchema": {
  "type": "object",
  "properties": {
    "temp": {
      "type": "number"
    }
  },
  "required": ["temp"]
}
Make sure the values in "arguments" match the types declared in the tool’s schema — not Python types, but JSON types (string, number, boolean, etc.).
# Install MCP Inspector
Ensure Node.js is installed.
To install the MCP Inspector, run the following command in your terminal:
npm i @modelcontextprotocol/inspector
# Run MCP Inspector
To run the MCP Inspector, execute the following command in the terminal:
npx @modelcontextprotocol/inspector
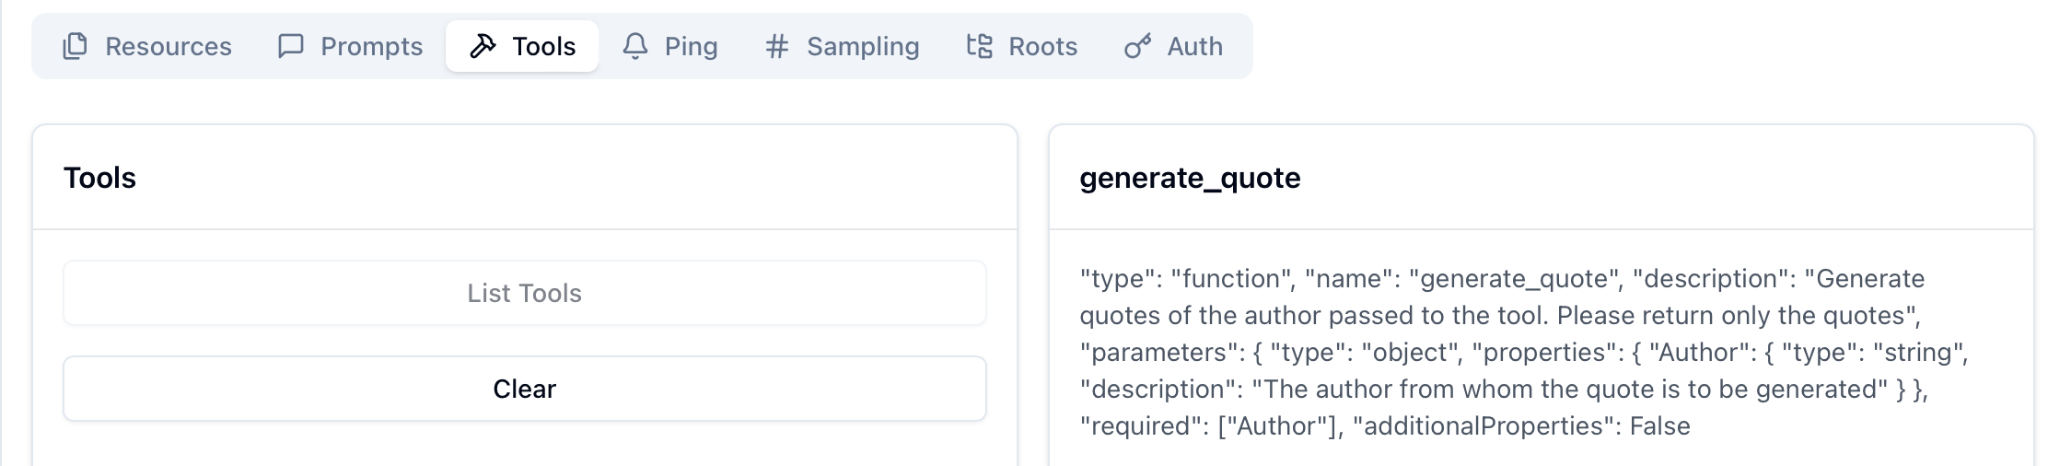
# Inspect MCP Server
Connect to the MCP Server
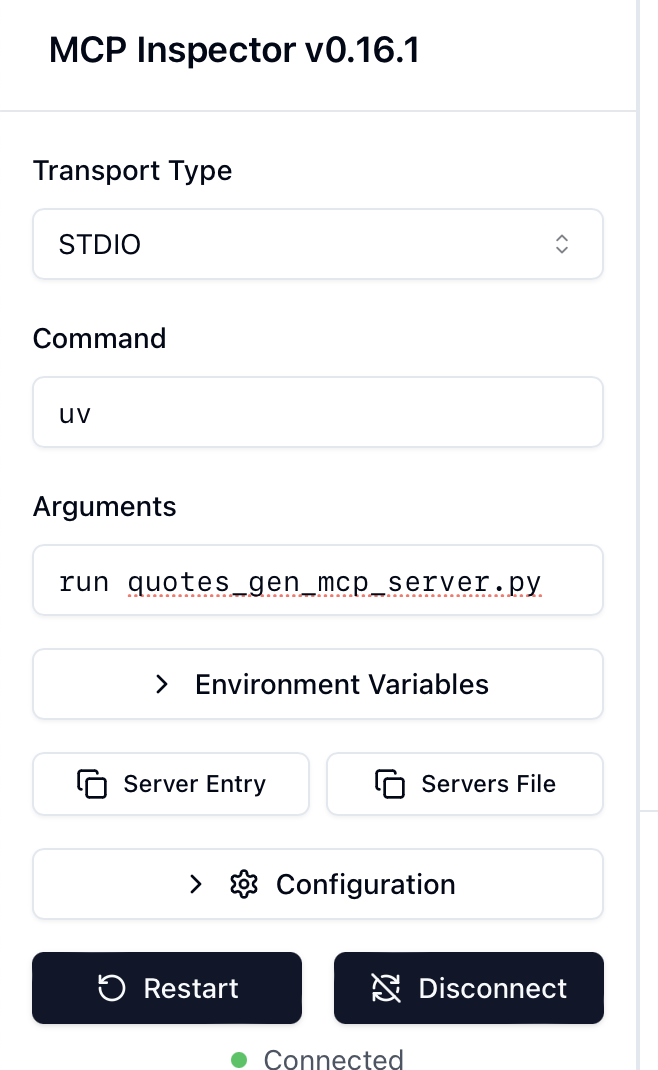
The inspector can list tools, templates, resources, and prompts from the MCP Server
Reference:
https://medium.com/@anil.goyal0057/how-to-test-your-mcp-server-using-mcp-inspector-c873c417eec1
# How to Solve "RuntimeError: Already running asyncio in this thread"
Jupyter notebooks already run an event loop in the main thread to handle asynchronous code. For this reason, when you try to call asyncio.run() inside a cell, you get the following error:
RuntimeError: asyncio.run() cannot be called from a running event loop
Instead of using asyncio.run(), simply use await directly in the notebook cell.
Incorrect:
import asyncio

async def main():
    async with Client(weather_server.mcp) as mcp_client:
        # your code here

# This will cause the RuntimeError
result = asyncio.run(main())
Correct:
async def main():
    async with Client(weather_server.mcp) as mcp_client:
        # your code here

# Use await directly
result = await main()
Jupyter notebooks automatically create an asyncio event loop when they start. Since asyncio.run() attempts to create a new event loop, it conflicts with the existing loop. By using await directly, you leverage the already running event loop.
# I am using Azure OpenAI and I am still getting an error of Error code: 400 - {'error': {'message': "Missing required parameter: 'tools[0].function'.", 'type': 'invalid_request_error', 'param': 'tools[0].function', 'code': 'missing_required_parameter'}}?
Modify the get_weather_tool JSON to be the following:
get_weather_tool = {
    "type": "function",
    "function": {
        "name": "get_weather",
        "description": "Get the current weather for a specific city or generate fake data",
        "parameters": {
            "type": "object",
            "properties": {
                "city": {
                    "type": "string",
                    "description": "The name of the city to get the weather for."
                }
            },
            "required": ["city"],
            "additionalProperties": false
        }
    }
}