Data Engineering Zoomcamp FAQ
Table of Contents
- General Course-Related Questions
- Environment & Setup
- Module 1: Taxi Data (download & handling)
- Module 1: Docker
- Module 1: Postgres, pgAdmin & Python ingestion
- Module 1: GCP setup & VM
- Module 1: Terraform
- Module 2: Workflow Orchestration
- Module 3: Data Warehousing
- Module 4: Analytics Engineering with dbt
- Module 5: Data Platforms (Bruin)
- Module 6: Spark
- Module 7: Streaming
- Project
- Workshop 1 - dlthub
General Course-Related Questions
# Course: When does the course start?
A new cohort runs roughly January–April every year. For the current cohort's exact start date and registration link, check the course repo README.
- Register via the link in the course repo before the cohort starts.
- Join the course Telegram channel for announcements.
- Join DataTalks.Club's Slack and the
#course-data-engineeringchannel.
# Course: What are the prerequisites for this course?
To get the most out of this course, you should have:
- Basic coding experience
- Familiarity with SQL
- Experience with Python (helpful but not required)
No prior data engineering experience is necessary. See Readme on GitHub.
If you have these basics, you're ready to start — you don't need to master everything up front. The course covers Git and GitHub (see How do I use Git/GitHub for this course?), and you'll pick up the command-line/Linux basics you need during the setup modules.
# Course: Can I still join the course after the start date?
Yes, even if you don't register, you're still eligible to submit the homework.
Be aware, however, that there will be deadlines for turning in homeworks and the final projects. So don't leave everything for the last minute.
# Course: I have registered for the Data Engineering Bootcamp. When can I expect to receive the confirmation email?
You don't need a confirmation email. You're accepted. You can start learning and submitting homework without registering. Registration was just to gauge interest before the start date.
# Course: What can I do before the course starts?
Get the basic environment ready ahead of time:
- Google Cloud account (free trial — see the GCP setup FAQ).
- Google Cloud SDK (
gcloudCLI). - Python 3 — install via your OS package manager or
uv(recommended for managing Python versions and project venvs). - Terraform.
- Git.
Then look over the prerequisites and syllabus to see if you're comfortable with the topics.
# Course: how many Zoomcamps run in a year?
DataTalks.Club runs several Zoomcamps every year. The roster and approximate timing:
- Data Engineering: Jan – Apr
- Stock Market Analytics: Apr – May
- MLOps: May – Aug
- LLM: Jun – Sep
- Machine Learning: Sep – Jan
For the up-to-date list and current dates, see the DataTalks.Club guide to free courses.
Each Zoomcamp has one "live" cohort per year — that's the only window in which you can earn the certificate. Outside the live cohort you can still take the course self-paced (materials stay open), but no certificate.
# Course: Is the current cohort going to be different from the previous cohort?
Most of the syllabus stays consistent year to year, but the tooling for some modules evolves between cohorts — especially the orchestrator (Module 2) and analytics engineering (Module 4) tools. For the current cohort's exact tooling and any new lessons, check the course repo README and the cohorts/ folder — it lists what changed for each year.
Past tool changes have included Airflow → Prefect → Mage → Kestra for orchestration. Old cohort materials remain available, so you can still follow them if you find an older video easier to learn from, but the homework is graded against the current cohort's stack.
# Course - Can I follow the course after it finishes?
Yes, we will keep all the materials available, so you can follow the course at your own pace after it finishes.
You can also continue reviewing the homeworks and prepare for the next cohort. You can also start working on your final capstone project.
# Course: Can I get support if I take the course in the self-paced mode?
Yes, the Slack channel remains open and you can ask questions there. However, always search the channel first and check the FAQ, as most likely your questions are already answered here.
You can also tag the bot @ZoomcampQABot to help you conduct the search, but don’t rely on its answers 100%.
# Course: Which YouTube playlist should I follow?
The canonical place to find the videos is the DATA ENGINEERING ZOOMCAMP main playlist. It always points at the current cohort's lessons.
The course repo README embeds the up-to-date video links per module — that's the easiest way to navigate to the right video for each lesson.
Per-cohort playlists (with office-hour recordings and any cohort-specific extras) are linked from the cohorts/ folder in the repo.
# Course: How many hours per week am I expected to spend on this course?
It depends on your background and previous experience with modules. It is expected to require about 5 - 15 hours per week.
You can also calculate it yourself using this data and then update this answer.
# Office Hours: I can’t attend the “Office hours” / workshop, will it be recorded?
Yes! Every "Office Hours" will be recorded and available a few minutes after the live session is over; so you can view (or rewatch) whenever you want.
# Edit Course Profile.
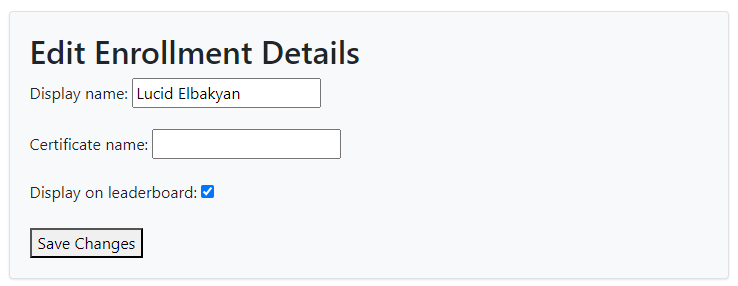
The display name listed on the leaderboard is an auto-generated randomized name. You can edit it to be a nickname or your real name if you prefer. Your entry on the Leaderboard is the one highlighted in light green.
The Certificate name should be your actual name that you want to appear on your certificate after completing the course.
The "Display on Leaderboard" option indicates whether you want your name to be listed on the course leaderboard.
# Certificate: Do I need to do the homeworks to get the certificate?
No, as long as you complete the peer-reviewed capstone projects on time, you can receive the certificate. You do not need to do the homeworks if you join late, for example.
# Certificate - Can I follow the course in a self-paced mode and get a certificate?
No, you can only get a certificate if you finish the course with a “live” cohort. We don't award certificates for the self-paced mode. The reason is you need to peer-review capstone(s) after submitting a project. You can only peer-review projects at the time the course is running.
# Homework: What are homework and project deadlines?
Deadlines are published per cohort. Find them in:
- The current cohort's folder in the course repo.
- The course website (link is in the cohort folder's README).
- The course Google Calendar (also linked from the cohort folder).
Also keep an eye on @Au-Tomator posts in Slack for extension announcements. The submission form may show an updated deadline if instructors have changed it.
# Homework: Are late submissions of homework allowed?
No, late submissions are not allowed. However, if the form is still open after the due date, you can still submit the homework. Confirm your submission by checking the date-timestamp on the Course page. Ensure you are logged in.
# Homework: What is the homework URL in the homework link?

Answer: In short, it’s your repository on GitHub, GitLab, Bitbucket, etc.
In long, your repository or any other location where you have your code, and a reasonable person would look at it and think, yes, you went through the week and exercises. Think of it like a portfolio you could present to an employer.
# Leaderboard: how do I find myself on the leaderboard?
When you set up your account, you're automatically assigned a random display name (like "Lucid Elbakyan"). To see your display name, change it, or set your certificate name:
- Go to your enrollment / profile page on the cohort's course site (
https://courses.datatalks.club/de-zoomcamp-<year>/enrollment). The exact URL for the current cohort is linked from the cohort's folder in the course repo. - Log in.
- Your display name is shown — edit it if you want.
- Set your certificate name to your real name (this is what will appear on the certificate).
# Besides the “Office Hour” which are the live zoom calls?
We will probably have some calls during the Capstone period to clear some questions, but it will be announced in advance if that happens.
See Google Calendar
# How can we contribute to the course?
- Star the repository.
- Share it with friends if you find it useful.
- Create a pull request (PR) if you can improve the text or structure of the repository.
- Update this FAQ.
# Any books or additional resources you recommend?
Yes to both! Check out this document: Awesome Data Engineering Resources
# Project: What is Project Attempt #1 and Project Attempt #2 exactly?
You will have two attempts for a project.
- If the first project deadline is over and you’re late, or you submit the project and fail the first attempt, you have another chance to submit the project with the second attempt.
# How do I use Git / GitHub for this course?
After you create a GitHub account, clone the course repo to your local machine using the process outlined in this video:
Git for Everybody: How to Clone a Repository from GitHub.
Having this local repository on your computer will make it easy to access the instructors’ code and make pull requests if you want to add your own notes or make changes to the course content.
You will probably also create your own repositories to host your notes and versions of files. Here is a great tutorial that shows you how to do this:
How to Create a Git Repository.
Remember to ignore large databases, .csv, and .gz files, and other files that should not be saved to a repository. Use .gitignore for this:
Important:
NEVER store passwords or keys in a git repo (even if the repo is set to private). Put files containing sensitive information (.env, secret.json, etc.) in your .gitignore.
This is also a great resource: Dangit, Git!?!
# How do I get my certificate?
There will be two announcements in the course Telegram and Slack channels:
- To verify your name is correct on the certificate (edit it in your course profile under "Edit Course Profile" if not).
- When grading is complete and the certificate is ready.
After the second announcement, log into your enrollment page on the cohort's course site (https://courses.datatalks.club/de-zoomcamp-<year>/enrollment — the current cohort's URL is in the course repo) and follow the instructions in certificates.md to generate the certificate document.
# Homework and Leaderboard: how does the points system work?
After you submit a homework, it's graded based on the number of questions in that assignment. The points you earn appear at the top of the homework page. The leaderboard for the current cohort sums up:
- Homework points (varies per assignment by number of questions).
- FAQ contributions (max 1 point per week).
- Learning in Public (1 point per link, max 7 per week).
The leaderboard URL for the current cohort is at https://courses.datatalks.club/de-zoomcamp-<year>/leaderboard — the exact link is in the cohort's folder in the course repo.
For a walkthrough, see this explainer video.
# Certificate - I submitted the project, so why isn't my certificate available yet?
Submitting the project isn't the same as passing it. Your project has to pass based on other participants' peer reviews, so a leaderboard score of zero right after you submit is normal while reviews are still open.
Certificates are generated in batches once peer review closes — this is a manual process, so expect a delay between passing your project and seeing your certificate. You'll know it's ready from the course announcement that grading is complete and the certificate is ready; then generate it from your enrollment page (see How do I get my certificate? for the steps).
If no certificate appears in your profile after that announcement, it usually means the project wasn't passed. If you believe that's a mistake, ask in the course Slack channel.
Environment & Setup
# Environment: which Python version should I use?
Python 3.10 or 3.11 is a safe default — it works with the libraries used across the course (pandas, SQLAlchemy, dbt, dlt, PySpark with recent Spark releases, etc.).
If you're following older recorded videos that use Python 3.9, that still works for everything except the very latest library versions; troubleshooting against the videos is easier on the version they use.
If a specific module uses a stricter requirement, the course repo's module README will say so.
# Where should I run the course: local machine, GitHub Codespaces, or a GCP VM?
You have three good options. Pick whichever suits you:
- Local machine (laptop / PC). Easiest if you're already comfortable with Docker locally. Windows users should use WSL2 from the start.
- GitHub Codespaces. A free Linux dev environment with Docker, Python, and many CLI tools pre-installed. Useful if your laptop is underpowered, or if you switch between home and office machines. Ports for things like Kestra/pgAdmin are exposed via Codespaces' forwarded URL — not
http://localhost. - Google Cloud VM. The course videos demonstrate this setup. Useful if you want a persistent remote environment to SSH into, especially while staying logged in across machines.
You don't need both Codespaces and a GCP VM — pick one. You will need a GCP account regardless because the course uses BigQuery (in Module 3 and the project), but GCP for compute is optional.
# Environment - Could not establish connection to "MyServerName": Got bad result from install script
This issue occurs when attempting to connect to a GCP VM using VSCode on a Windows machine. You can resolve it by changing a registry value in the registry editor.
Open the Run command window:
- Use the shortcut keys
Windows + R, or - Right-click "Start" and click "Run".
Open the Registry Editor:
- Type
regeditin the Run command window, then press Enter.
Change the registry value:
- Navigate to
HKEY_CURRENT_USER\Software\Microsoft\Command Processor. - Change the "Autorun" value from "if exists" to a blank.
Alternatively, you can delete the saved fingerprint within the known_hosts file:
In Windows, locate the file at C:\Users\<your_user_name>\.ssh\known_hosts and remove the entry for the server.
# Why does the course use GCP and not AWS or Azure?
For uniformity across the cohort. The course uses BigQuery, which is GCP-only, and most students already have a Google account that works for sign-up. The concepts (data warehouse, object storage, IaC) translate to AWS/Azure, but the lessons are recorded against GCP.
You can use a different cloud for your project — see the AWS/Snowflake/Azure FAQ for the tradeoffs.
# Environment: shell scripts (*.sh) don't work for Windows users without WSL
Several modules use shell scripts (*.sh) for setup or runtime tasks. Most Windows users running them outside WSL will hit issues — Git Bash and MINGW64 are not always sufficient. Set up a WSL environment from the start to avoid getting blocked partway through the course.
# How to troubleshoot issues and ask good questions
Try to solve it yourself first
- Read the error message carefully — it usually includes a line number, a stack trace, and a description of what went wrong.
- Search the message: copy the most specific part of the error (not the whole stack trace) into Google. The format
<tool> <error message>works well, e.g.pgcli error column c.relhasoids does not exist. - Check the official documentation of the tool you're using.
- Use Ctrl+F in this FAQ and in Slack channel pinned messages.
- Restart the process / container / shell / VM and try once more — many transient errors resolve this way.
- If you suspect the install is broken, uninstall first, then reinstall. Reinstalling on top of a broken install rarely helps.
Asking for help in Slack / forums
When the troubleshooting steps don't help and you need another pair of eyes, include enough info that someone can actually help without going back and forth:
- Operating system and version (e.g. Windows 11 + WSL Ubuntu 24.04, Mac M2, Linux Ubuntu 22.04).
- Which lesson / video you're following, and which command failed.
- The exact command and the exact error — paste both as text inside triple-backtick code blocks. Don't paste screenshots of text.
- What you've already tried. If you skip this, helpers' first suggestions will be the things you already tried.
- Stay in one thread. Reply to your own question; don't open a new post for a follow-up.
If the same problem recurs, post in the same thread with what changed in your environment since last time.
Help others by contributing back
If your problem isn't yet covered in this FAQ, consider opening a PR so the next student doesn't have to debug it from scratch.
# Git Bash: Backslash as an escape character in Git Bash for Windows
For those who wish to use the backslash as an escape character in Git Bash for Windows, type the following in the terminal:
bash.escapeChar=\
(Note: There is no need to include this in your .bashrc file.)
# VS Code: Tab using spaces
Error:
Makefile:2: *** missing separator. Stop.
Solution:
Tabs in documents should be converted to Tab instead of spaces. Follow this stack.
# Opening an HTML file with a Windows browser from Linux running on WSL
If you’re running Linux on Windows Subsystem for Linux (WSL) 2, you can open HTML files from the guest (Linux) with any Internet Browser installed on the host (Windows). Just install wslu and open the page using wslview:
wslview index.html
You can customize which browser to use by setting the BROWSER environment variable first. For example:
export BROWSER='/mnt/c/Program Files/Firefox/firefox.exe'
# GitHub Codespaces: How to store secrets
Instruction on how to store secrets that will be available in GitHub Codespaces. See Managing your account-specific secrets for GitHub Codespaces - GitHub Docs.
# Set up Chrome Remote Desktop for Linux on Compute Engine
This tutorial shows you how to set up the Chrome Remote Desktop service on a Debian Linux virtual machine (VM) instance on Compute Engine. Chrome Remote Desktop allows you to remotely access applications with a graphical user interface.
# GitHub Codespaces: Running pgadmin in Docker
Running pgAdmin in Docker behind GitHub Codespaces reverse proxy can result in a blank screen after logging in. This is typically due to session or proxy issues when running behind Codespaces' reverse proxy. Resolve with two options:
Option 1: Set the following environment variables to configure the proxy handling:
PGADMIN_CONFIG_PROXY_X_HOST_COUNT: 1
PGADMIN_CONFIG_PROXY_X_PREFIX_COUNT: 1
This allows pgAdmin to work properly with Codespaces' reverse proxy.
Option 2 (if the gray screen persists): Try disabling enhanced cookie protection and CSRF checks, and adjusting cookie settings:
PGADMIN_CONFIG_ENHANCED_COOKIE_PROTECTION: "False"
PGADMIN_CONFIG_WTF_CSRF_CHECK_DEFAULT: "False"
PGADMIN_CONFIG_WTF_CSRF_ENABLED: "False"
PGADMIN_CONFIG_SESSION_COOKIE_SAMESITE: "'None'"
PGADMIN_CONFIG_SESSION_COOKIE_SECURE: "True"
This configuration relaxes session and CSRF settings and is known to resolve rendering issues when using pgAdmin in Docker inside Codespaces.
Notes:
- Option 1 is safer as it preserves CSRF protection.
- Option 2 should be used only if the blank screen persists after Option 1.
- Always restart the pgAdmin container after changing environment variables.
# VMs: What do I do if my VM runs out of space?
- Delete intermediate data you saved on the VM during ETLs (raw extracts, parquet outputs you've already pushed elsewhere, downloaded archives).
- Kill processes still holding deleted files (their disk space isn't reclaimed until the process exits —
lsof | grep deletedshows them). - Install
ncdu(sudo apt install ncdu) and use it to walk the filesystem visually:sudo ncdu / - Common culprits: Docker images and volumes (
docker system prune -af --volumes), pipeline working/cache directories, and old logs (sudo journalctl --vacuum-time=7d). - If a pipeline tool's cache keeps regrowing (e.g. orchestrator working dir, dbt
target/, dlt staging), consider disabling caching or pruning it on a schedule rather than only when the disk fills.
# How to run Python as a startup script?
You need to redefine the Python environment variable to that of your user account.
# SSH Error: ssh: Could not resolve hostname linux: Name or service not known
To resolve this, ensure that your config file is in C/User/Username/.ssh/config.
# Jupyter: Install nbconvert, fix 'Failed to spawn' nbconvert error, and convert notebook to Python script (including uv integration)
Install and upgrade nbconvert
First, ensure nbconvert is installed and upgraded:
pip install nbconvert --upgrade
Resolve 'Failed to spawn: nbconvert' error (uv-based workflow)
If the issue persists, add nbconvert support to uv and then run nbconvert:
uv add jupyter nbconvert
uv run jupyter nbconvert --to=script notebook.ipynb
Alternative: Convert Jupyter Notebook to Python Script (nbconvert)
You can also convert directly using nbconvert without uv:
python3 -m jupyter nbconvert --to=script <your_notebook.ipynb>
Replace <your_notebook.ipynb> with the actual notebook filename, e.g. notebook.ipynb.
# Alternative way to convert Jupyter notebook to Python script (via jupytext)
If you keep getting errors with nbconvert after executing:
jupyter nbconvert --to script <your_notebook.ipynb>
You could try converting your Jupyter notebook using another tool called Jupytext. Jupytext is an excellent tool for converting Jupyter Notebooks to Python scripts, similar to nbconvert.
Install Jupytext
pip install jupytextConvert your Notebook to a Python script
jupytext --to py <your_notebook.ipynb>
# Should I use Anaconda for this course?
No. The officially recommended way now is uv for both installing Python and managing project dependencies.
Quick start:
# Install uv (one-line installer; see https://docs.astral.sh/uv/ for your OS):
curl -LsSf https://astral.sh/uv/install.sh | sh

# Install a Python version:
uv python install 3.11

# Create a project venv:
uv venv --python 3.11
source .venv/bin/activate    # Linux / macOS
.venv\Scripts\activate       # Windows

# Add packages:
uv add pandas sqlalchemy "psycopg[binary]"
uv replaces the parts of Anaconda we previously used: Python version management, virtual environments, and dependency installation. It's faster, smaller, and has no licensing concerns.
# Which operating systems does the course support?
Linux, macOS, and Windows all work. Students in the most recent cohorts have completed the course on all three. Linux is the smoothest by default.
On Windows, install WSL2 and run everything inside a WSL distro from the start. Git Bash and MINGW64 are not always sufficient for the shell scripts used in later modules.
# Can I use AWS / Snowflake / Azure instead of GCP for the project?
Yes. The capstone project is graded on creating a data pipeline and producing a visualization — it doesn't mandate any specific cloud. A few things to keep in mind:
- The lessons are recorded against GCP, so you'll need to translate steps yourself.
- You may need to explain your choice during peer review.
- Fewer fellow students will be using AWS/Azure, so help in Slack may be slower.
If you only want to run the course locally without any cloud, you can do that for everything except Module 3's BigQuery homework, which requires GCP.
# Do I have to pay for GCP?
No. GCP offers a free trial with $300 in credits for new accounts. The course materials fit comfortably within that budget if you destroy unused resources (VMs, datasets, buckets) after each module. Check your billing dashboard daily, especially after spinning up Compute Engine VMs.
To sign up for the free trial you need a valid credit/debit card; GCP uses it to verify identity but doesn't charge it without your consent.
# GCP Free Trial vs Sandbox: which one should I use for the course?
GCP has two free options. They are not equivalent for this course:
- Free Trial ($300 credit, 90 days). Required for the course — gives you VMs, GCS buckets, and full BigQuery functionality.
- Sandbox (free, no credit card). Limited services. It does not include VMs or GCS, and BigQuery features are restricted, so you cannot complete the course on Sandbox alone.
Use the Free Trial.
# My country isn't supported by GCP / my card is rejected. What can I do?
GCP isn't available in some countries, and some cards are rejected even where it is. Workarounds students have used:
- Try a different card. Cards from some banks (e.g. Kazakhstan-based Kaspi) sometimes don't work; cards from other banks/countries (e.g. TBC in Georgia) do.
- Pyypl and similar virtual cards have worked for some.
- If you can't get a GCP account at all, you can still complete most of the course locally — only Module 3's homework strictly requires BigQuery.
# GitHub Codespaces: what uses up memory and storage?
Most of what you add across the modules barely touches your Codespace. The one exception is data files.
- Terraform doesn't consume Codespace memory or storage. It only makes API calls to provision infrastructure on GCP - the resources it creates live in the cloud, not on your machine, so you free nothing by moving it to another repo.
- Code files are tiny (kilobytes), so accumulating notebooks and scripts across modules is a non-issue. You don't need a separate repo per module - keep everything in one repo.
- Data files (CSV, Parquet, JSON) are what actually take up space. Keep them out of git with
.gitignore(see How do I use Git/GitHub for this course?). - Running Docker containers do use Codespace RAM while they're up, so stop the containers you've finished with for a module rather than leaving them idling.
Module 1: Taxi Data (download & handling)
# Taxi Data: Yellow Taxi Trip Records downloading error
When attempting to download the 2021 data from the TLC website, you may encounter the following error:
ERROR 403: Forbidden

We have a backup, so use it instead: nyc-tlc-data
So the link should be yellow_tripdata_2021-01.csv.gz.
Note: Make sure to unzip the "gz" file (no, the "unzip" command won’t work for this).
# Taxi Data: How to handle *.csv.gz taxi data files?
In this video, the data file is stored as output.csv. If the file extension is csv.gz instead of csv, it won't store correctly.
To handle this:
Replace
csv_name = "output.csv"with the file name extracted from the URL. For example, for the yellow taxi data, use:url = "https://github.com/DataTalksClub/nyc-tlc-data/releases/download/yellow/yellow_tripdata_2021-01.csv.gz" csv_name = url.split("/")[-1]When you use
csv_namewithpandas.read_csv, it will work correctly becausepandas.read_csvcan directly read files with thecsv.gzextension.
Example:
import pandas as pd
url = "https://github.com/DataTalksClub/nyc-tlc-data/releases/download/yellow/yellow_tripdata_2021-01.csv.gz"
csv_name = url.split("/")[-1]
data = pd.read_csv(csv_name)
# Taxi Data: Data Dictionary for NY Taxi data?
Yellow Trips: Data Dictionary
Green Trips: Data Dictionary - LPEP Trip Records May 1, 2018
# Taxi Data: Unzip csv.gz file
You can gunzip the downloaded csv.gz file from the command line. The result is a CSV file which can be imported with pandas using pd.read_csv() as shown in the videos.
gunzip green_tripdata_2019-09.csv.gz
or you can read the gzipped file directly with pandas
Solution for Using Parquet Files Directly in Python Script ingest_data.py
In the
def main(params), add this line:parquet_name = 'output.parquet'Edit the code which downloads the files:
os.system(f"wget {url} -O {parquet_name}")Convert the downloaded
.parquetfile to CSV and rename it tocsv_nameto keep it relevant to the rest of the code:df = pd.read_parquet(parquet_name) df.to_csv(csv_name, index=False)
# wget is not recognized as an internal or external command
If you encounter the error "wget is not recognized as an internal or external command," wget needs to be installed.
This error may also cause messages like "No such file or directory: 'output.csv.gz'."
Installation Instructions:
On Ubuntu:
sudo apt-get install wgetOn macOS:
Use Homebrew:
brew install wgetOn Windows:
Use Chocolatey:
choco install wgetAlternatively, download a binary from GnuWin32 and place it in a location that is in your PATH (e.g.,
C:/tools/).
Alternative Windows Installation:
- Download the latest wget binary for Windows from eternallybored.
- If you downloaded the zip, extract all files (use 7-zip if the built-in utility gives an error).
- Rename the file
wget64.exetowget.exeif necessary. - Move
wget.exeto yourGit\mingw64\bin\directory.
Python Alternative:
Use the Python wget library:
First, install using pip:
pip install wgetUse it with Python:
python -m wget
You can also paste the file URL into your web browser to download normally, then move the file to your working directory.
Additional Recommendation:
Consider using the Python library requests for loading gz files.
# wget - ERROR: cannot verify <website> certificate (MacOS)
Firstly, make sure that you add ! before wget if you’re running your command in a Jupyter Notebook or CLI. Then, you can check one of these two things (from CLI):
Using the Python library wget installed with pip:
python -m wget <url>Use the usual command and add
--no-check-certificateat the end:!wget <website_url> --no-check-certificate
# CURL: curl: (6) Could not resolve host: output.csv
os.system(f"curl {url} --output {csv_name}")
# Why does wget fail to download the CloudFront parquet file even with --no-check-certificate, and how can I work around network blocks?
The download may fail not because of SSL verification but because the network blocks requests to the CloudFront domain. In some networks, requests to the dataset URL are redirected to a block page such as https://blocked.sbmd.cicc.gov.ph/.
Solution 1 — Skip certificate check (SSL verification disabled)
!wget --no-check-certificate https://d37ci6vzurychx.cloudfront.net/trip-data/yellow_tripdata_2025-11.parquet
Solution 2 — If your network blocks CloudFront entirely, connect to a VPN and run the original command again:
!wget https://d37ci6vzurychx.cloudfront.net/trip-data/yellow_tripdata_2025-11.parquet
Using a VPN successfully bypassed the network block.
Module 1: Docker
# Docker: Cannot connect to Docker daemon at unix:///var/run/docker.sock. Is the Docker daemon running?
Make sure you're able to start the Docker daemon. Check the issue immediately as described below:
Ensure the Docker daemon is running.
Update WSL in PowerShell with the following command:
wsl --update
# Docker - error during connect: In the default daemon configuration on Windows, the docker client must be run with elevated privileges
If you get this error:
docker: error during connect: In the default daemon configuration on Windows, the docker client must be run with elevated privileges to connect.: Post "http://%2F%2F.%2Fpipe%2Fdocker_engine/v1.24/containers/create": open //./pipe/docker_engine: The system cannot find the file specified.
See 'docker run --help'.
To resolve it on Windows, follow these guidelines based on your version:
Windows 10 Pro / 11 Pro Users:
- Ensure Hyper-V is enabled, as Docker can use it as a backend.
- Follow the Enable Hyper-V Option on Windows 10 / 11 tutorial.
Windows 10 Home / 11 Home Users:
- The 'Home' version doesn't support Hyper-V, so use WSL2 (Windows Subsystem for Linux).
- Refer to install WSL on Windows 11 for detailed instructions.
If you encounter the "WslRegisterDistribution failed with error: 0x800701bc" error:
- Update the WSL2 Linux Kernel by following the guidelines at GitHub: WSL Issue 5393.
# Docker: docker pull dbpage
Whenever a docker pull is performed (either manually or by docker-compose up), it attempts to fetch the given image name from a repository. If the repository is public, the fetch and download occur without any issues.
For instance:
docker pull postgres:13
docker pull dpage/pgadmin4
Be Advised: The Docker images we'll be using throughout the Data Engineering Zoomcamp are all public, unless otherwise specified. This means you are not required to perform a docker login to fetch them.
If you encounter the message:
docker login': denied: requested access to the resource is denied.
This is likely due to a typo in your image name. For instance:
$ docker pull dbpage/pgadmin4
This command will throw an exception:
Error response from daemon: pull access denied for dbpage/pgadmin4, repository does not exist or may require 'docker login': denied: requested access to the resource is denied
This occurs because the actual image name is dpage/pgadmin4, not dbpage/pgadmin4.
How to fix it:
$ docker pull dpage/pgadmin4
Extra Notes: In some professional environments, the Docker image may be in a private repository that your DockerHub username has access to. In this case, you must:
- Execute:
$ docker login - Enter your username and password.
- Then perform the
docker pullagainst that private repository.
# docker + Postgres: permission errors on the data directory (chown / could not change permissions / could not create / build context errors)
When you start the Postgres container with a host-bind mount (-v $(pwd)/ny_taxi_postgres_data:/var/lib/postgresql/data), the Postgres process inside the container runs as the postgres user (UID 999) and tries to chown the data dir. If the host filesystem doesn't permit that — common on macOS, Windows file systems mounted into WSL, certain Linux configurations, and when your build context picks up the same dir — you'll see one of:
initdb: error: could not change permissions of directory "/var/lib/postgresql/data": Operation not permitted
chown /path/to/ny_taxi_postgres_data: permission denied
docker: Error response from daemon: error while creating mount source path
docker build error checking context: can't stat '/path/to/ny_taxi_postgres_data'
failed to read dockerfile: error from sender: open ny_taxi_postgres_data: permission denied
You may also be unable to delete the host folder later because it's owned by UID 999.
Recommended fix: use a named Docker volume instead of a host-bind mount
Named volumes are managed by Docker and don't have the cross-OS permission problems:
docker volume create --name dtc_postgres_volume_local
docker run -it \
  -e POSTGRES_USER=root -e POSTGRES_PASSWORD=root -e POSTGRES_DB=ny_taxi \
  -v dtc_postgres_volume_local:/var/lib/postgresql/data \
  -p 5432:5432 \
  postgres:16
In docker-compose.yml:
services:
  postgres:
    image: postgres:16
    environment:
      POSTGRES_USER: root
      POSTGRES_PASSWORD: root
      POSTGRES_DB: ny_taxi
    volumes:
      - "pg-data:/var/lib/postgresql/data"
    ports:
      - "5432:5432"

volumes:
  pg-data:
The volume's data lives inside Docker's storage area (find it with docker volume inspect pg-data).
If you must use a host-bind mount (Linux)
Grant the container access to the directory:
sudo chown -R 999:999 ny_taxi_postgres_data/
# or
sudo chmod -R 755 ny_taxi_postgres_data/
Use 777 only as a last resort and only on local dev paths — it makes the dir world-writable.
To delete a folder that Docker created (now owned by UID 999):
sudo rm -rf ny_taxi_postgres_data/
On macOS specifically
If you see the chown error and you're using Rancher Desktop or another Docker alternative, switch to Docker Desktop. Some non-Docker-Desktop runtimes don't handle the chown into bind mounts.
"directory ... exists but is not empty"
initdb: error: directory "/var/lib/postgresql/data" exists but is not empty
This means the volume already has Postgres data from a previous run with different superuser/password settings. Either:
- Clear the volume and let Postgres re-initialise it:
docker volume rm dtc_postgres_volume_local(ordocker compose down -vfor a compose volume). - Or use the same
POSTGRES_USER/POSTGRES_PASSWORDyou used the first time the data was initialised. ThePOSTGRES_*env vars only take effect on first init — after that they're ignored.
"build error checking context"
If docker build fails with can't stat '.../ny_taxi_postgres_data' or "permission denied" on the data folder, the build context (the directory you ran docker build from) includes the data dir, and the build can't read it.
Either move the data folder out of the build context, or add it to .dockerignore:
ny_taxi_postgres_data/
Even better, use a named volume (above) so the data never lives in your project directory in the first place.
# Docker: Docker won't start or is stuck in settings (Windows 10 / 11)
Ensure you are running the latest version of Docker for Windows. Download the updated version from Docker's official site. If the upgrade option in the menu doesn't work, uninstall and reinstall with the latest version.
If Docker is stuck on starting, try switching the containers by right-clicking the docker symbol from the running programs, and switch the containers from Windows to Linux or vice versa.
For Windows 10 / 11 Pro Edition:
# Docker: Should I run docker commands from the windows file system or a file system of a Linux distribution in WSL?
If you're running a Home Edition, you can still make it work with WSL2 (Windows Subsystem for Linux) by following the tutorial here.
If even after making sure your WSL2 (or Hyper-V) is set up accordingly, Docker remains stuck, you can try the following options:
- Reset to Factory Defaults
- Perform a fresh install.
# Docker: The input device is not a TTY (Docker run for Windows)
You may encounter this error:
$ docker run -it ubuntu bash
the input device is not a TTY. If you are using mintty, try prefixing the command with 'winpty'
Solution:
Use
winptybefore the Docker command:$ winpty docker run -it ubuntu bashAlternatively, create an alias:
echo "alias docker='winpty docker'" >> ~/.bashrcor
echo "alias docker='winpty docker'" >> ~/.bash_profile
Source: Stack Overflow
# Docker: Cannot pip install on Docker container (Windows)
You may encounter this error:
Retrying (Retry(total=4, connect=None, read=None, redirect=None, status=None)) after connection broken by 'NewConnectionError('<pip._vendor.urllib3.connection.HTTPSConnection object at 0x7efe331cf790>: Failed to establish a new connection: [Errno -3] Temporary failure in name resolution')': /simple/pandas/
Possible solution:
Run the following command:
winpty docker run -it --dns=8.8.8.8 --entrypoint=bash python:3.9
# docker on Windows: volume mount path syntax (Git Bash, MINGW, paths with spaces, "ny_taxi_postgres_data is empty")
Mounting host paths on Windows is the single biggest source of week 1 confusion. Symptoms:
ny_taxi_postgres_dataappears empty even though Postgres started.Docker: invalid reference format: repository name must be lowercaseError response from daemon: invalid mode: \Program Files\Git\var\lib\postgresql\data- A folder with a weird name like
ny_taxi_postgres_data;Cis created.
Root cause
Git Bash / MINGW64 mangles Unix-style paths into Windows-style paths before passing them to Docker, and the rules differ depending on quoting, leading slashes, and whether your path contains spaces. The cleanest workaround on Windows is to skip the host-bind mount entirely (see the named-volume FAQ) — but if you need the bind mount, here's what tends to work.
Use a path without spaces
Move your project out of any directory with spaces (e.g. from C:\Users\Alexey Grigorev\git\... to C:\git\...). Many of the path-syntax issues simply go away once the path is clean.
Try these -v syntax variants in order
# 1. Forward slashes, with leading slash on the drive letter:
-v "/c/Users/me/project/ny_taxi_postgres_data:/var/lib/postgresql/data"

# 2. Double leading slashes (some MINGW versions need this):
-v "//c/Users/me/project/ny_taxi_postgres_data:/var/lib/postgresql/data"

# 3. With a colon after the drive letter:
-v "/c:/Users/me/project/ny_taxi_postgres_data:/var/lib/postgresql/data"

# 4. Backslashes in quotes:
-v "c:\Users\me\project\ny_taxi_postgres_data:/var/lib/postgresql/data"

# 5. Use $(pwd) — wrap in quotes:
-v "$(pwd)/ny_taxi_postgres_data:/var/lib/postgresql/data"
Also try winpty
If the command appears to do nothing or hangs:
winpty docker run -it ...
If Docker: invalid reference format: repository name must be lowercase
This usually means the shell didn't substitute $(pwd) properly and inserted a literal \Program Files\Git\... into the path. Use one of the explicit paths above instead of $(pwd).
If you see a folder called ny_taxi_postgres_data;C get created
The volume mount string was misparsed. Delete the bogus folder and retry with //c/... (double leading slash) instead of /c/....
On Mac, just wrap $(pwd) in quotes
docker run -it \
  -e POSTGRES_USER=root -e POSTGRES_PASSWORD=root -e POSTGRES_DB=ny_taxi \
  -v "$(pwd)/ny_taxi_postgres_data:/var/lib/postgresql/data" \
  -p 5432:5432 \
  postgres:16
Last resort: use a named volume
If none of the bind-mount syntaxes work, switch to a named volume. The data still persists, you just don't see it in your project folder:
-v ny_taxi_postgres_data:/var/lib/postgresql/data
This is the recommended approach on Windows.
# Docker: Setting up Docker on Mac
For setting up Docker on macOS, you have two main options:
Download from Docker Website:
- Visit the official Docker website and download the Docker Desktop for Mac as a
.dmgfile. This method is generally reliable and avoids issues related to licensing changes.
- Visit the official Docker website and download the Docker Desktop for Mac as a
Using Homebrew:
Be aware that there can be conflicts when installing with Homebrew, especially between Docker Desktop and command-line tools. To avoid issues:
- Install Docker Desktop first.
- Then install the command line tools.
Commands:
brew install --cask dockerbrew install docker docker-composeFor more detailed issues related to
brew install, refer to this Issue.
For more details, you can check the article on Setting up Docker in macOS.
# How can I back up and restore PostgreSQL data stored in a Docker volume?
Method 1: Docker volume backup
List Docker volumes:
docker volume ls
Backup while the container is running:
docker run --rm \
    -v ny_taxi_postgres_data:/data \
    -v $(pwd):/backup \
    ubuntu tar czf /backup/postgres_backup.tar.gz /data
Restore:
docker run --rm \
    -v ny_taxi_postgres_data:/data \
    -v $(pwd):/backup \
    ubuntu tar xzf /backup/postgres_backup.tar.gz -C /
Method 2: Using pg_dump
Backup:
docker exec -t postgres_container pg_dump -U root -d ny_taxi > ny_taxi_backup.sql
Restore:
docker exec -i postgres_container psql -U root -d ny_taxi < ny_taxi_backup.sql
Method 3: Copying the host directory
When using a host-mounted directory in docker-compose.yaml:
cp -r ./ny_taxi_postgres_data ./ny_taxi_postgres_data_backup
# Docker: ERRO[0000] error waiting for container: context canceled
You might have installed Docker via snap. Run the following command to verify:
sudo snap status docker
If you receive the response:
error: unknown command "status", see 'snap help'.
Then uninstall Docker and install it via the official website.
Error message: "Bind for 0.0.0.0:5432 failed: port is already allocated."
# Docker: Docker network name
Get the network name via:
docker network ls
For more details, refer to the Docker network ls documentation.
# Docker: Error response from daemon: Conflict. The container name "pg-database" is already in use by container "xxx". You have to remove (or rename) that container to be able to reuse that name.
Sometimes, when you try to restart a Docker container configured with a network name, the error message appears.
To resolve this issue:
If the container is in a running state, stop it using:
docker stop <container_name>Then remove the container:
docker rm pg-database
Alternatively, you can use docker start instead of docker run to restart the Docker container without removing it.
# docker compose: "could not translate host name pgdatabase / pg-database to address" — hostname does not resolve
This error means your container is looking for another service by name on a Docker network, but they aren't on the same network. Common variants:
sqlalchemy.exc.OperationalError: could not translate host name "pgdatabase" to address: Name or service not known
Unable to connect to server: could not translate host name 'pg-database' to address: Name does not resolve
network <hash> not found
What's happening
Docker network DNS only resolves service names within the same network. Two reasons it might fail:
The ingestion container was started with
--network <name>but<name>doesn't match the network compose actually created. By default,docker composecreates a network named after the project directory plus_default(e.g.2docker_default).Your ingestion script is hardcoded to use a host name like
pgdatabase, but the compose service is actually calledpgdatabase-1, or you're running the script outside Docker entirely.List networks and confirm the actual name compose created:
docker network lsPass that exact name when running the ingestion container:
docker run --network=<actual_network_name> taxi_ingest:v001 ...Or pin the network name in your
docker-compose.ymlso it doesn't depend on the directory name:networks: pg-network: name: pg-networkMake the host name in your script match the compose service name. If your service is called
pgdatabase, the script should use--pg_host=pgdatabase(when running inside Docker) or--pg_host=localhost(when running on the host).Avoid hostnames with dashes when possible —
pgdatabaseis more reliable thanpg-databaseacross some networks/DNS configs.If
docker network lsshows a stale network from a previous run, prune it:docker network prune(after stopping the relevant containers).
Working compose snippet
services:
pgdatabase:
image: postgres:16
environment:
POSTGRES_USER: root
POSTGRES_PASSWORD: root
POSTGRES_DB: ny_taxi
volumes:
- "pg-data:/var/lib/postgresql/data"
ports:
- "5432:5432"
networks:
- pg-network
pgadmin:
image: dpage/pgadmin4
environment:
PGADMIN_DEFAULT_EMAIL: admin@admin.com
PGADMIN_DEFAULT_PASSWORD: root
ports:
- "8080:80"
networks:
- pg-network
networks:
  pg-network:
    name: pg-network
volumes:
pg-data:
# Docker: Cannot install docker on MacOS/Windows 11 VM running on top of Linux (due to Nested virtualization).
Before starting your VM, you need to enable nested virtualization. Run the following commands based on your CPU:
For Intel CPU:
modprobe -r kvm_intel
modprobe kvm_intel nested=1
For AMD CPU:
modprobe -r kvm_amd
modprobe kvm_amd nested=1
# Docker: Connecting from VS Code
It’s very easy to manage your Docker container, images, network, and compose projects from VS Code.
Install the official extension and launch it from the left side icon.
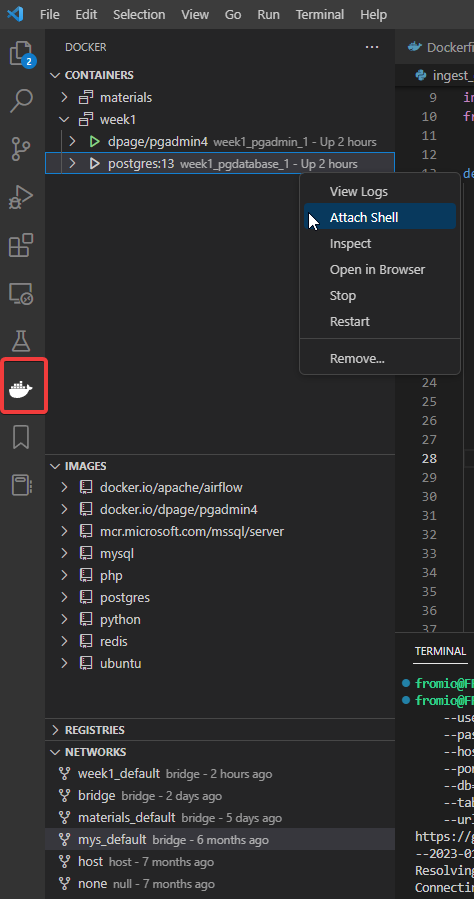
It will work even if your Docker runs on WSL2, as VS Code can easily connect with your Linux.
# Docker: How to stop a container?
Use the following command:
docker stop <container_id>
# Docker: Docker not installable on Ubuntu
On some versions of Ubuntu, the snap command can be used to install Docker.
sudo snap install docker
# What's the difference between -i and -t in docker run -it?
## Difference between -i and -t in docker run (-it)

When running containers interactively, Docker provides two commonly used flags:

- `-i` (interactive): keeps the container’s STDIN open, even if it is not attached to a terminal. This allows you to send input to the process inside the container.
  Example:
  ```bash
  echo "print(2+2)" | docker run -i python
-t(tty): allocates a pseudo-terminal (TTY) for the container. This provides proper terminal formatting (line breaks, colors, prompts). Example:docker run -t ubuntu date
Using both flags together (-it) gives you both an open input stream and a real terminal interface. This is typically what you want for an interactive shell session:
docker run -it ubuntu bash
In short:
-i= keep STDIN open-t= allocate a TTY-it= both, for interactive shells
# Docker-Compose: PgAdmin – no database in PgAdmin
When you log into PgAdmin and see an empty database, the following solution can help:
Run:
docker-compose up
And at the same time run:
docker build -t taxi_ingest:v001 .

# NETWORK NAME IS THE SAME AS THAT CREATED BY DOCKER COMPOSE
docker run -it \
  --network=pg-network \
  taxi_ingest:v001 \
  --user=postgres \
  --password=postgres \
  --host=db \
  --port=5432 \
  --db=ny_taxi \
  --table_name=green_tripdata \
  --url=${URL}
It's important to use the same --network as stated in the docker-compose.yaml file.
The docker-compose.yaml file might not specify a network, as shown below:
services:
  db:
    container_name: postgres
    image: postgres:17-alpine
    environment:
      ...
    ports:
      - '5433:5432'
    volumes:
      - ...
  pgadmin:
    container_name: pgadmin
    image: dpage/pgadmin4:latest
    environment:
      ...
    ports:
      - '8080:80'
    volumes:
      - ...

volumes:
  vol-pgdata:
    name: vol-pgdata
  vol-pgadmin_data:
    name: vol-pgadmin_data
If the network name is not specified, it is generated automatically: The name of the directory containing the docker-compose.yaml file in lowercase + _default.
You can find the network’s name when running docker-compose up:
pg-database Pulling pg-database Pulled
Network week_1_default  Creating
Network week_1_default  Created
# pgAdmin: persist server / connection settings across container restarts
By default, the dpage/pgadmin4 image stores its config (registered servers, query history, etc.) inside the container — so it's lost every time you docker compose down.
To persist it, mount /var/lib/pgadmin to a Docker volume. Use a named volume rather than a host-bind, because pgAdmin runs as user 5050 and host permissions tend to fight you:
services:
  pgadmin:
    image: dpage/pgadmin4
    environment:
      - PGADMIN_DEFAULT_EMAIL=admin@admin.com
      - PGADMIN_DEFAULT_PASSWORD=root
    volumes:
      - "pgadmin-data:/var/lib/pgadmin"
    ports:
      - "8080:80"

volumes:
  pgadmin-data:
After this, your pgAdmin servers and dashboards survive docker compose down and docker compose up.
If you really want a host-bind mount
You'll need to fix permissions before mounting. pgAdmin's container user is 5050:
mkdir -p ./pgadmin_data
sudo chown -R 5050:5050 ./pgadmin_data
Then:
volumes:
  - "./pgadmin_data:/var/lib/pgadmin"
If you skip the chown step, pgAdmin will fail to start with a permission error.
On GCP / cloud VMs
Same approach works — use a named volume rather than host-bind to avoid filesystem permission quirks on the cloud disk.
# Docker: Docker engine stopped_failed to fetch extensions
The Docker engine may crash continuously and fail to work after restart. You might see error messages like "docker engine stopped" and "failed to fetch extensions" repeatedly on the screen.
Solution:
- Check if you have the latest version of Docker installed. Update Docker if necessary.
- If the problem persists, consider reinstalling Docker.
- Note: You will need to fetch images again, but there should be no other issues.
# docker compose: installation problems (binary not found, exec format error, credentials error, dial unix /var/run/docker.sock)
Most "docker-compose" installation problems on Linux/WSL fall into a small handful of categories.
"docker-compose: command not found" / "still not available"
The downloaded file from the docker/compose releases page has a long platform-suffixed name like docker-compose-linux-x86_64. Rename it and put it on your PATH:
sudo mv docker-compose-linux-x86_64 /usr/local/bin/docker-compose
sudo chmod +x /usr/local/bin/docker-compose
Modern Docker (20.10+) ships compose v2 as docker compose (with a space). If you have a recent Docker install, you may not need a separate docker-compose binary at all — just use docker compose up.
Picking the right binary for your platform
Use uname to determine which file to download:
uname -s   # operating system, usually 'Linux'
uname -m   # architecture, e.g. 'x86_64' or 'aarch64'
Then download the matching release, e.g.:
sudo curl -L "https://github.com/docker/compose/releases/latest/download/docker-compose-$(uname -s)-$(uname -m)" \
  -o /usr/local/bin/docker-compose
sudo chmod +x /usr/local/bin/docker-compose
Pin a specific release if you need reproducibility (substitute latest/download with download/<version>).
"cannot execute binary file: Exec format error"
The architecture doesn't match. ARM64 machines (Apple Silicon, ARM Linux, some VMs) need the aarch64 binary, not x86_64. Re-download with uname -m substituted correctly.
"error getting credentials" / "docker-credential-desktop not found"
Docker is looking for a credential helper that isn't installed. Two fixes:
# Quick: install pass (resolves it on most Linux distros)
sudo apt install pass
Or edit ~/.docker/config.json and rename credsStore to credStore (the helper-less default), or remove the line entirely.
"dial unix /var/run/docker.sock: connect: permission denied"
Your user isn't in the docker group. Add it:
sudo groupadd docker
sudo usermod -aG docker $USER
# log out and back in for the group change to apply
# Docker-Compose: Errors pertaining to docker-compose.yml and pgadmin setup
For those experiencing problems with Docker Compose, getting data in PostgreSQL, and similar issues, follow these steps:
- Create a new volume on Docker, either using the command line or Docker Desktop app.
- Modify your
docker-compose.ymlfile as needed to fix any setup issues. - Set
low_memory=Falsewhen importing the CSV file using pandas:
df = pd.read_csv('yellow_tripdata_2021-01.csv', nrows=1000, low_memory=False)
- Use the specified function in your
upload-data.ipynbfor better tracking of the ingestion process.
from time import time

counter = 0
time_counter = 0

while True:
    t_start = time()

    df = next(df_iter)

    df.tpep_pickup_datetime = pd.to_datetime(df.tpep_pickup_datetime)
    df.tpep_dropoff_datetime = pd.to_datetime(df.tpep_dropoff_datetime)

    df.to_sql(name='yellow_taxi_data', con=engine, if_exists='append')

    t_end = time()

    t_elapsed = t_end - t_start

    print('Chunk Insertion Done! Time taken: %.2f seconds' %(t_elapsed))

    counter += 1
    time_counter += t_elapsed

    if counter == 14:
        print('All Chunks Inserted! Total Time Taken: %.2f seconds' %(time_counter))
        break
Order of Execution:
- Open the terminal in the
2_docker_sqlfolder and run:docker compose up - Ensure no other containers are running except the ones you just executed (pgAdmin and pgdatabase).
- Open Jupyter Notebook and begin the data ingestion.
- Open pgAdmin and set up a server. Make sure you use the same configurations as your
docker-compose.ymlfile, such as the same name (pgdatabase), port, and database name (ny_taxi).
# Docker: Postgres container fails to launch with exit code (1) when attempting to compose
This issue arises because the Postgres database is not initialized before executing docker-compose up -d. While there are other potential solutions discussed in this thread, you can resolve it by initializing the database first. Then, the Docker Compose will work as expected.
docker run -it \
  -e POSTGRES_USER="root" \
  -e POSTGRES_PASSWORD="root" \
  -e POSTGRES_DB="ny_taxi" \
  -v $(pwd)/ny_taxi_data:/var/lib/postgresql/data \
  -p 5432:5432 \
  --network=pg-network \
  --name=pg_database \
  postgres:13
# WSL: Insufficient system resources exist to complete the requested service.
Cause:
This error occurs because some applications are not updated. Specifically, check for any pending updates for Windows Terminal, WSL, and Windows Security updates.
Solution:
To update Windows Terminal:
- Open the Microsoft Store.
- Go to your library of installed apps.
- Search for Windows Terminal.
- Update the app.
- Restart your system to apply the changes.
For updating Windows Security updates:
- Go to Windows Updates settings.
- Check for any pending updates, especially security updates.
- Restart your system once the updates are downloaded and installed successfully.
# WSL: WSL integration with Ubuntu unexpectedly stopped with exit code 1
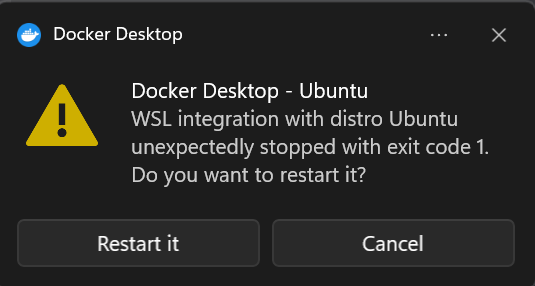
If WSL integration keeps stopping with exit code 1, try these in order.
Toggle the DNS cache service
This Reddit fix works for some users:
reg add "HKLM\System\CurrentControlSet\Services\Dnscache" /v "Start" /t REG_DWORD /d "4" /f
Restart Windows, then re-enable it:
reg add "HKLM\System\CurrentControlSet\Services\Dnscache" /v "Start" /t REG_DWORD /d "2" /f
Restart Windows again.
Switch Docker Desktop to Linux containers
Right-click the Docker tray icon and choose "Switch to Linux containers" if it isn't already.
# WSL: Permissions too open at Windows
Issue when trying to run the GPC VM through SSH via WSL2, likely because WSL2 isn’t looking for .ssh keys in the correct folder. The command attempted:
ssh -i gpc [username]@[my external IP]
Use
sudoCommandTry using
sudobefore executing the command:sudo ssh -i gpc [username]@[my external IP]Change Permissions
Navigate to your folder and change the permissions for the private key SSH file:
chmod 600 gpcCreate a
.sshFolder in WSL2Navigate to your home directory:
cd ~Create a
.sshfolder:mkdir .sshCopy the content from the Windows
.sshfolder to the newly created.sshfolder:cp -r /mnt/c/Users/YourUsername/.ssh/* ~/.ssh/Adjust the permissions of the files and folders in the
.sshdirectory if necessary.
# WSL: Could not resolve host name
WSL2 may not be referencing the correct .ssh/config path from Windows. You can create a config file in the home directory of WSL2 by following these steps:
Navigate to your home directory:
cd ~Create the
.sshdirectory:mkdir .sshCreate a
configfile in the.sshfolder with the following content:HostName [GPC VM external IP] User [username] IdentityFile ~/.ssh/[private key]
# Error: error starting userland proxy: listen tcp4 0.0.0.0:8080: bind: address already in use
Resolution: You need to stop the service using the port.
Run the following:
sudo kill -9 `sudo lsof -t -i:<port>`
Replace <port> with 8080 in this case. This will free up the port for use.
# Can I run Docker Engine directly in WSL2 (Ubuntu) without Docker Desktop?
Yes. You can install and run Docker Engine directly inside WSL2 (Ubuntu) without Docker Desktop. This approach works well if you only need core Docker functionality (Docker CLI, Docker Compose, containers).
# Docker: Docker-compose takes infinitely long to install zip unzip packages for linux, which are required to unpack datasets.
To resolve the issue, you can try the following solutions:
Add the
-Yflag toapt-getto automatically agree to install additional packages.sudo apt-get install -y zip unzipUse the Python
ZipFilepackage, which is included in all modern Python distributions. This can bypass the need to installzipandunzippackages.from zipfile import ZipFile with ZipFile('file.zip', 'r') as zip_ref: zip_ref.extractall('destination_folder')
Module 1: Postgres, pgAdmin & Python ingestion
# pgcli / Postgres: troubleshooting connection failures (FATAL: password auth, role does not exist, database does not exist, connection refused, port in use)
The various Postgres connection errors students hit in week 1 almost always trace back to one of three problems. Before changing anything, identify which:
connection failed: connection to server at "localhost" port 5432 failed: Connection refused
FATAL: password authentication failed for user "root"
FATAL: role "root" does not exist
FATAL: database "ny_taxi" does not exist
psycopg2.OperationalError: connection to server at "localhost" (::1), port 5432 failed
Step 1: confirm the right Postgres is reachable
Run:
docker ps
You should see the postgres:13 (or postgres:16/postgres:18) container with port mapping 0.0.0.0:5432->5432/tcp. If not, start it:
docker compose up -d
# or, for the standalone docker run:
docker run -it -e POSTGRES_USER=root -e POSTGRES_PASSWORD=root -e POSTGRES_DB=ny_taxi \
  -v ny_taxi_postgres_data:/var/lib/postgresql/data -p 5432:5432 postgres:16
Step 2: check whether port 5432 is already taken on your host
A locally installed Postgres ("Postgres.app", apt install postgresql, the Windows installer, the Mac Homebrew formula) often listens on 5432. When you map the Docker container to the same port, the connection silently goes to the wrong instance — which is usually the source of "FATAL: password authentication failed for user root" or "role root does not exist" (the local install doesn't know about the root user).
Linux/Mac:
sudo lsof -i :5432
Windows: open Services (services.msc) and look for any postgresql-x64-XX service.
You have two options:
Stop the local Postgres:
- Linux:
sudo service postgresql stop - Mac (Homebrew):
launchctl unload -w ~/Library/LaunchAgents/homebrew.mxcl.postgresql.plist - Windows: stop the
postgresql-x64-XXservice in Services.
- Linux:
Or change the Docker mapping to a different host port and connect to that port:
-p 5433:5432
# then
pgcli -h localhost -p 5433 -u root -d ny_taxi
Step 3: match host names between the script and the runtime
If the connection error mentions a host name like pgdatabase or pg-database and says "could not translate host name", you are running an ingestion script that points at a Docker service name from outside the Docker network. Pick one:
- Run the script from inside the same Docker network and use the service name (
pgdatabase). - Run the script from your host machine and use
localhost(or127.0.0.1).
For the Dockerized ingestion job the course shows, both the container and the Postgres container must share a Docker network — --network=pg-network on docker run, or the implicit network in docker compose.
Step 4: persistent data corruption / "database ny_taxi does not exist"
If the database existed before but the FATAL: database ny_taxi does not exist error appears now, your Postgres container probably started with an empty data directory. Two common reasons:
- The volume mount path is wrong, so a new empty data dir is being initialised every time.
- Volumes were pruned (e.g.
docker compose down -v).
Either restore data from backup, or wipe the volume and re-ingest:
docker compose down -v
docker compose up -d
# then re-run the ingestion script
Step 5: client-side issues (pgcli specifically)
If pgcli prints ImportError: no pq wrapper available, it can't find libpq — install the binary psycopg:
uv add "psycopg[binary]"
# or
pip install "psycopg[binary]"
If pgcli appears to hang at the password prompt on Windows Git Bash, prefix it with winpty:
winpty pgcli -h localhost -p 5432 -u root -d ny_taxi
Or use Windows Terminal / VS Code's integrated terminal instead of Git Bash.
Quick reference
Connection refused→ Postgres isn't running, or it's on a different port. Checkdocker ps.FATAL: password authentication failed for user "root"→ almost always a port collision with a locally-installed Postgres.FATAL: role "root" does not exist→ same as above (local install doesn't have arootuser).FATAL: database "ny_taxi" does not exist→ Postgres init didn't run, or the volume is empty.could not translate host name "pgdatabase"→ wrong host name for where you're connecting from (host vs container network).
# How do I ensure that the ingestion pipeline runs successfully and in what order should I build and run the containers?
Step 1: Create a common network
Ensure that you have created a common network (pg-network). This allows several containers to communicate with each other. On top of this network you will run:
- Postgres container
- The Dockerized ingestion script container
- pgAdmin container
docker network create pg-network
Step 2: Run the Postgres container
Once you’ve created the network, start running each container one by one. First, run the Postgres container:
docker run -it \
    -e POSTGRES_USER="root" \
    -e POSTGRES_PASSWORD="root" \
    -e POSTGRES_DB="ny_taxi" \
    -v ny_taxi_postgres_data:/var/lib/postgresql \
    -p 5432:5432 \
    --network=pg-network \
    --name pgdatabase \
    postgres:16
If postgres:18 causes issues, use postgres:16 as shown above.
Step 3: Build the Docker container for the pipeline
Ensure your current working directory is /pipeline, then build:
docker build -t taxi_ingest:v001 .
Step 4: Run the ingestion container
docker run -it \
    --network=pg-network \
    taxi_ingest:v001 \
    --pg_user=root \
    --pg_pass=root \
    --pg_host=pgdatabase \
    --pg_port=5432 \
    --pg_db=ny_taxi \
    --year=2021 \
    --month=1 \
    --target_table=yellow_taxi_trips
Make sure that you use the parameters in the command exactly as defined in your script. For example, if your script uses --pg_user then use --pg_user; if it uses --user then change the command accordingly.
Step 5 (Optional): Validate the ingested records
To check if your records reached the Postgres table, run pgcli:
uv run pgcli -h localhost -p 5432 -u root -d ny_taxi
List tables:
\dt
Check row count:
SELECT COUNT(*) FROM yellow_taxi_trips;
# PGCLI: Should we run pgcli inside another docker container?
In this section of the course, the 5432 port of PostgreSQL is mapped to your computer’s 5432 port. This means you can access the PostgreSQL database via pgcli directly from your computer.
So, no, you don’t need to run it inside another container. Your local system will suffice.
# pgcli: PermissionError: [Errno 13] Permission denied: '~/.config/pgcli'
PermissionError: [Errno 13] Permission denied: '/Users/<you>/.config/pgcli'
This means pgcli can't write its config dir. Two common causes.
Cause 1: someone ran pgcli with sudo earlier
Running sudo pgcli ... once creates ~/.config/pgcli owned by root. Subsequent runs as your normal user can't write there. Fix the ownership:
sudo chown -R "$USER" ~/.config/pgcli
Going forward, install and run pgcli without sudo — install it into a project venv (recommended) or pip install --user pgcli so you don't need root.
Cause 2: pgcli installed into a system Python you can't write to
Install pgcli into an isolated environment instead. Recommended path is uv:
uv add pgcli "psycopg[binary]"
uv run pgcli -h localhost -p 5432 -u root -d ny_taxi
Or with a plain venv:
python3 -m venv .venv
source .venv/bin/activate
pip install pgcli "psycopg[binary]"
Either way, run pgcli from inside the activated environment (or via uv run pgcli) — never with sudo.
# PGCLI - pgcli: command not found
If you have already installed pgcli but Bash or the Windows Terminal doesn't recognize the command:
- On Git Bash:
bash: pgcli: command not found - On Windows Terminal:
pgcli: The term 'pgcli' is not recognized…
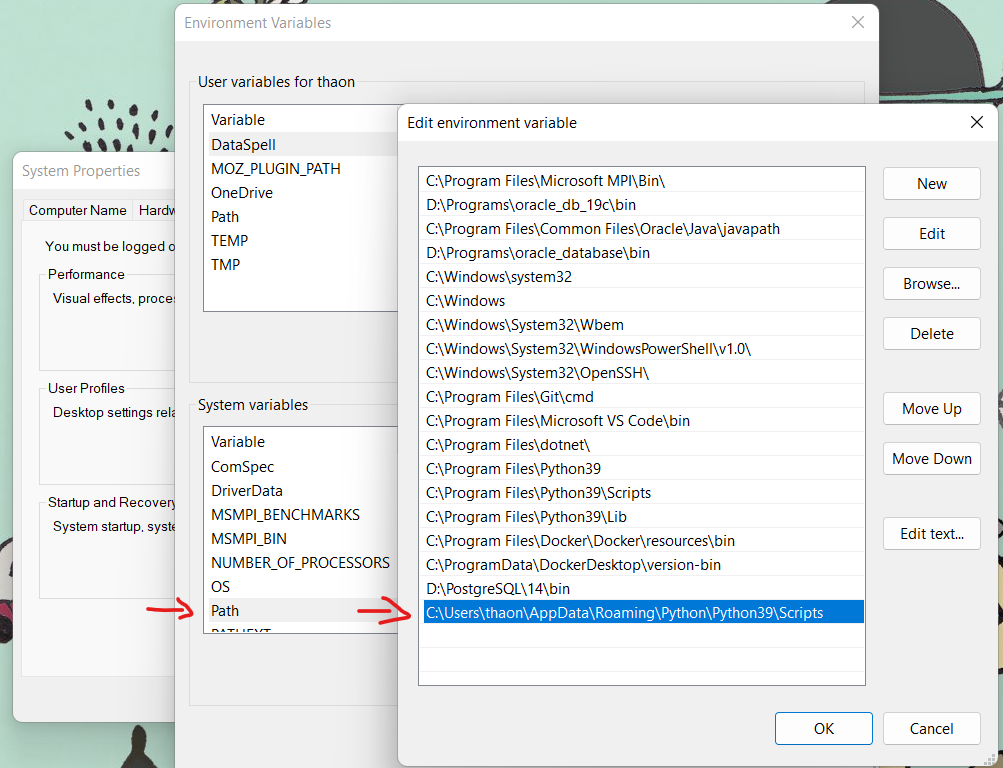
Try adding the Python path to the Windows PATH variable:
- Use the command to get the location:
pip list -v - Copy the path, which looks like:
C:\Users\...\AppData\Roaming\Python\Python39\site-packages - Replace
site-packageswithScripts:C:\Users\...\AppData\Roaming\Python\Python39\Scripts
It might be that Python is installed elsewhere. For example, it could be under:
c:\python310\lib\site-packages
In that case, you should add:
c:\python310\lib\Scriptsto PATH.
Instructions
- Add the determined path to
Path(orPATH) in System Variables.
# PGCLI - running in a Docker container
If running pgcli locally causes issues or you do not want to install it on your machine, you can use it within a Docker container instead.
Below is the usage with values used in the course videos for:
- Network name (Docker network)
- Postgres-related variables for pgcli
- Hostname
- Username
- Port
- Database name
docker run -it --rm --network pg-network ai2ys/dockerized-pgcli:4.0.1
Then execute the following pgcli command:
pgcli -h pg-database -U root -p 5432 -d ny_taxi
You'll be prompted for the password for the user root.
Example Output:
Server: PostgreSQL 16.1 (Debian 16.1-1.pgdg120+1)
Version: 4.0.1
Home: [pgcli.com](http://pgcli.com)
To list tables:
root@pg-database:ny_taxi> \dt

+--------+------------------+-------+-------+
| Schema | Name             | Type  | Owner |
|--------+------------------+-------+-------|
| public | yellow_taxi_data | table | root  |
+--------+------------------+-------+-------+

SELECT 1
Time: 0.009s
root@pg-database:ny_taxi>
# RRPGCLI: Case sensitive use of “Quotations” around columns with capital letters
PULocationID will not be recognized, but "PULocationID" will be. This is because unquoted identifiers are case insensitive. See docs.
# PGCLI - error column c.relhasoids does not exist
When using the command \d <database name> you get the error column c.relhasoids does not exist.
Resolution:
- Uninstall pgcli.
- Reinstall pgcli.
- Restart your PC.
# Postgres: bind: address already in use
When attempting to start the Docker Postgres container, you may encounter the error message:
Error - postgres port is already in use.
Option 1: Identify and Stop the Service
Determine which service is using the port by running:
sudo lsof -i :5432Stop the service that is using the port:
sudo service postgresql stop
Option 2: Map to a Different Port
For a more long-term solution, consider mapping to a different port:
- Map local port 5433 to container port 5432 in your Docker configuration (
Dockerfileordocker-compose.yml). - If using a VM, ensure that port 5433 is forwarded in the host machine configuration.
This approach prevents conflicts and allows the Docker Postgres container to run without interruption.
# Postgres: "Column does not exist" but it actually does (Pyscopg2 error in MacBook Pro M2)
In join queries, if you mention the column name directly or enclose it in single quotes, you'll encounter an error saying "column does not exist".
Solution: Enclose the column names in double quotes, and it will work correctly.
# pgAdmin: Create server dialog does not appear
pgAdmin has a new version. The create server dialog may not appear. Try using Register -> Server instead.
# pgAdmin: CSRF session token is missing error – how to fix in a Docker setup?
The CSRF session token missing error usually indicates CSRF protection is out of sync between the client and server. If you’re running pgAdmin in Docker, you can fix this with a combination of quick browser steps and container configuration changes.
Immediate browser fixes
- Refresh the page (F5, Ctrl+Shift+R, or Cmd+Shift+R) to regenerate cookies and obtain a new CSRF token.
- Clear the site's cookies/cache for pgAdmin in your browser settings.
- Try an Incognito/Private window to avoid cached credentials.
Docker configuration fixes (apply in your docker-compose.yaml or via environment vars, then restart the container)
- Add these environment variables to the pgAdmin service:
- PGADMIN_DEFAULT_EMAIL=admin@admin.com
- PGADMIN_DEFAULT_PASSWORD=root
- PGADMIN_CONFIG_ENHANCED_COOKIE_PROTECTION=False
- PGADMIN_CONFIG_WTF_CSRF_ENABLED=False
- PGADMIN_CONFIG_WTF_CSRF_CHECK_DEFAULT=False
- PGADMIN_CONFIG_SESSION_COOKIE_SAMESITE='Lax'
- PGADMIN_CONFIG_SESSION_COOKIE_SECURE=False
- Then recreate containers:
docker compose down -v
docker compose up -d --force-recreate
Notes
- Disabling CSRF protection reduces security; use these settings for development or debugging. When possible, fix the underlying cause and re-enable CSRF protections for production environments.
- If you already have a working setup, ensure that your environment variables are applied to the running container and that you’re reconnecting to the correct pgAdmin instance.
# pgAdmin - Can not access/open the PgAdmin address via browser
I am using a Mac Pro device and connect to the GCP Compute Engine via Remote SSH - VSCode. But when trying to run the PgAdmin container via docker run or docker compose, I couldn't access the PgAdmin address via my browser. After modifications, I was able to access it.
Solution #1:
Modify the docker run command:
docker run --rm -it \
  -e PGADMIN_DEFAULT_EMAIL="admin@admin.com" \
  -e PGADMIN_DEFAULT_PASSWORD="pgadmin" \
  -e PGADMIN_CONFIG_WTF_CSRF_ENABLED="False" \
  -e PGADMIN_LISTEN_ADDRESS=0.0.0.0 \
  -e PGADMIN_LISTEN_PORT=5050 \
  -p 5050:5050 \
  --network=de-zoomcamp-network \
  --name pgadmin-container \
  --link postgres-container \
  -t dpage/pgadmin4
Solution #2:
Modify the docker-compose.yaml configuration and use the docker compose up command:
pgadmin:
  image: dpage/pgadmin4
  container_name: pgadmin-container
  environment:
    - PGADMIN_DEFAULT_EMAIL=admin@admin.com
    - PGADMIN_DEFAULT_PASSWORD=pgadmin
    - PGADMIN_CONFIG_WTF_CSRF_ENABLED=False
    - PGADMIN_LISTEN_ADDRESS=0.0.0.0
    - PGADMIN_LISTEN_PORT=5050
  volumes:
    - "./pgadmin_data:/var/lib/pgadmin/data"
  ports:
    - "5050:5050"
  networks:
    - de-zoomcamp-network
  depends_on:
    - postgres-container
# Python: Ingestion with Jupyter notebook - missing 100000 records
If you follow the video 1.2.2 - Ingesting NY Taxi Data to Postgres and execute the same steps, you will ingest all the data (~1.3 million rows) into the table yellow_taxi_data. However, running the whole script in the Jupyter notebook for a second time from top to bottom will result in missing the first chunk of 100,000 records. This occurs because a call to the iterator appears before the while loop, leading to the second chunk being ingested first.
- Remove the cell
df=next(df_iter)located higher up in the notebook than the while loop. - Ensure the first
w(df_iter)call is within the while loop.
📔 Note: The notebook is used to test the code and is not intended to be run top to bottom. The logic is organized in a later step when inserted into a .py file for the pipeline.
# IPython - Pandas parsing dates with "read_csv"
Pandas can interpret "string" column values as "datetime" directly when reading the CSV file using pd.read_csv with the parse_dates parameter. This can include a list of column names or column indices, eliminating the need for conversion afterward.
Reference: pandas.read_csv documentation
Example from Week 1:
import pandas as pd

df = pd.read_csv(
    'yellow_tripdata_2021-01.csv',
    nrows=100,
    parse_dates=['tpep_pickup_datetime', 'tpep_dropoff_datetime']
)

df.info()
Output:
<class 'pandas.core.frame.DataFrame'>
RangeIndex: 100 entries, 0 to 99
Data columns (total 18 columns):
 #   Column                 Non-Null Count  Dtype
---  ------                 --------------  -----
 0   VendorID               100 non-null    int64
 1   tpep_pickup_datetime   100 non-null    datetime64[ns]
 2   tpep_dropoff_datetime  100 non-null    datetime64[ns]
 3   passenger_count        100 non-null    int64
 4   trip_distance          100 non-null    float64
 5   RatecodeID             100 non-null    int64
 6   store_and_fwd_flag     100 non-null    object
 7   PULocationID           100 non-null    int64
 8   DOLocationID           100 non-null    int64
 9   payment_type           100 non-null    int64
 10  fare_amount            100 non-null    float64
 11  extra                  100 non-null    float64
 12  mta_tax                100 non-null    float64
 13  tip_amount             100 non-null    float64
 14  tolls_amount           100 non-null    float64
 15  improvement_surcharge  100 non-null    float64
 16  total_amount           100 non-null    float64
 17  congestion_surcharge   100 non-null    float64
dtypes: datetime64[ns](2), float64(9), int64(6), object(1)
memory usage: 14.2+ KB
# Python: Python can't ingest data from the GitHub link provided using curl
os.system(f"curl -LO {url} -o {csv_name}")
# Python: Pandas can read *.csv.gzip
When a CSV file is compressed using Gzip, it is saved with a ".csv.gz" file extension. This file type is also known as a Gzip compressed CSV file. To read a Gzip compressed CSV file using Pandas, you can use the read_csv() function.
Here is an example of how to read a Gzip compressed CSV file using Pandas:
import pandas as pd

df = pd.read_csv('file.csv.gz',
                 compression='gzip',
                 low_memory=False)
# Python: How to iterate through and ingest parquet file
Contrary to pandas’ read_csv method, there’s no simple way to iterate through and set chunksize for parquet files. We can use PyArrow (Apache Arrow Python bindings) to resolve that.
import pyarrow.parquet as pq
from sqlalchemy import create_engine
import time

output_name = "https://d37ci6vzurychx.cloudfront.net/trip-data/yellow_tripdata_2021-01.parquet"

parquet_file = pq.ParquetFile(output_name)
parquet_size = parquet_file.metadata.num_rows

engine = create_engine(f'postgresql://{user}:{password}@{host}:{port}/{db}')

table_name = "yellow_taxi_schema"

# Clear table if exists
pq.read_table(output_name).to_pandas().head(n=0).to_sql(name=table_name, con=engine, if_exists='replace')

# Default (and max) batch size
index = 65536

for i in parquet_file.iter_batches(use_threads=True):
    t_start = time.time()
    print(f'Ingesting {index} out of {parquet_size} rows ({index / parquet_size:.0%})')
    i.to_pandas().to_sql(name=table_name, con=engine, if_exists='append')
    index += 65536
    t_end = time.time()
    print(f'\t- it took %.1f seconds' % (t_end - t_start))
# SQLAlchemy / psycopg: ImportError or NoSuchModuleError when calling create_engine
Symptoms when running from sqlalchemy import create_engine in a notebook:
ImportError: cannot import name 'TypeAliasType' from 'typing_extensions'
ModuleNotFoundError: No module named 'psycopg2'
TypeError: 'module' object is not callable
NoSuchModuleError: Can't load plugin: sqlalchemy.dialects:postgresql.psycopg
These all come from a few related causes.
Missing or out-of-date typing_extensions
ImportError: cannot import name 'TypeAliasType' from 'typing_extensions'
Upgrade to 4.6+:
pip install --upgrade typing_extensions
Missing the Postgres driver
ModuleNotFoundError: No module named 'psycopg2'
Install one of the binary distributions (avoids needing libpq dev headers):
pip install psycopg2-binary
# or, for SQLAlchemy 2.x with psycopg 3:
pip install "psycopg[binary]"
If pip install psycopg2 fails with pg_config not found, you don't have libpq dev headers installed — use psycopg2-binary (or, on Mac, brew install postgresql).
Connection-string dialect mismatch
create_engine('postgresql://...') works with both psycopg2 and psycopg, but to be explicit:
# psycopg2 (most common)
"postgresql+psycopg2://root:root@localhost:5432/ny_taxi"

# psycopg (v3)
"postgresql+psycopg://root:root@localhost:5432/ny_taxi"
If you see NoSuchModuleError: Can't load plugin: sqlalchemy.dialects:postgresql.psycopg, your installed psycopg version doesn't match the dialect string — install the matching driver or change the URL prefix.
'module' object is not callable
You probably did import sqlalchemy and then called sqlalchemy(...) instead of sqlalchemy.create_engine(...). Fix:
from sqlalchemy import create_engine
engine = create_engine("postgresql+psycopg://root:root@localhost:5432/ny_taxi")
Stacked virtual environments
If you've nested virtualenvs (for example a PyCharm-generated .venv inside a project that already had its own venv), imports may resolve from a different env than you think. Cleanest fix: rm -rf .venv, create a single venv with uv venv (or python -m venv), and install dependencies there.
# Python - SQLAlchemy - read_sql_query() throws "'OptionEngine' object has no attribute 'execute'"
First, check the versions of SQLAlchemy and pandas — pip install --upgrade sqlalchemy pandas (or uv add --upgrade sqlalchemy pandas).
Then, try to wrap the query using text:
from sqlalchemy import text

query = text("SELECT * FROM tbl")
df = pd.read_sql_query(query, conn)
# SQL: SELECT * FROM zones_taxi WHERE Zone='Astoria Zone'; Error Column Zone doesn't exist
For this issue, you can use the following solution:
SELECT * FROM zones AS z WHERE z."Zone" = 'Astoria Zone';
Columns that start with uppercase sometimes need to be enclosed in double quotes.
Additionally, check your dataset for the existence of 'Astoria Zone'. You might find only 'Astoria':
SELECT * FROM zones AS z WHERE z."Zone" = 'Astoria';
# SQL: SELECT Zone FROM taxi_zones Error Column Zone doesn't exist
It is inconvenient to use quotation marks all the time, so it is better to put the data in the database all in lowercase. In Pandas, after:
import pandas as pd

df = pd.read_csv('taxi+_zone_lookup.csv')
Add the row:
df.columns = df.columns.str.lower()
# Postgres fails to start after upgrading from postgres:16 to postgres:18 in Docker
Postgres 18 changes how the data directory is structured inside Docker containers. While Postgres ≤16 stored data under /var/lib/postgresql/data, Postgres 18 expects the volume to be mounted at /var/lib/postgresql. If an existing volume created with an older Postgres version is reused without updating the mount path, Postgres 18 will detect an incompatible layout and exit during startup. This can appear as DNS resolution errors or failed connections from pgAdmin or ingestion jobs. For Week 1 setups, the fix is to update the volume mount path, remove the old volume, and recreate the containers so Postgres 18 can initialize a new data directory.
Proposed Fix (Week 1 setups)
- Update the volume mount path to /var/lib/postgresql (instead of /var/lib/postgresql/data).
- Remove the old volume that was created with Postgres 16.
- Recreate the containers so Postgres 18 initializes a fresh data directory.
Example commands
- Running with docker run (adjust as needed):
docker run -it \
  -e POSTGRES_USER="root" \
  -e POSTGRES_PASSWORD="admin" \
  -e POSTGRES_DB="ny_taxi" \
  -v "/path/to/ny_taxi_postgres_data":"/var/lib/postgresql" \
  -p 5432:5432 \
  postgres:18
- For docker-compose, mount the volume to /var/lib/postgresql:
volumes:
  ny_taxi_postgres_data:

services:
  postgres:
    image: postgres:18
    environment:
      POSTGRES_USER: root
      POSTGRES_PASSWORD: admin
      POSTGRES_DB: ny_taxi
    volumes:
      - ny_taxi_postgres_data:/var/lib/postgresql
- Remove the old volume (list and remove):
docker volume ls
docker volume rm <old-volume-name>
- Recreate containers:
docker-compose down
docker-compose up -d
- Ensure you have a backup of any important data before removing volumes.
- After restarting, verify that Postgres starts and the data directory is initialized under /var/lib/postgresql.
# How to fix “connection failed: connection to server at "127.0.0.1", port 5432 failed” error when setting up Postgres connection in pgAdmin?
Instead of using “localhost” as the host name/address, try “postgres”, or “host.docker.internal” instead.
Alternative Solution:
If you have installed Postgres locally and disabled persist data on the Postgres container in Docker (i.e., volume: removed), use a Postgres port other than 5432, such as 5433.
For the pgAdmin host name/address, if 'localhost', 'postgres', or 'host.docker.internal' are not working, you can use your own IPv4 Address.
To find your IPv4 Address on Windows OS:
Open Command Prompt.
Run the command:
ipconfigLook under Wireless LAN adapter WiFi 2 for the IPv4 Address. For example:
IPv4 Address. . . . . . . . . . . : 192.168.0.148
# Why is my table not being created in PostgreSQL when I submit a job?
There could be a few reasons for this issue:
Race Conditions: If you're running multiple processes in parallel.
Database Connection Issues: The job might not be connecting to the correct PostgreSQL database, or there could be authentication or permission issues preventing table creation.
Missing Table Creation Logic: The code responsible for creating the table might not be properly included or executed in the job submission process.
As a best practice, it's generally recommended to pre-create tables in PostgreSQL to avoid runtime errors. This ensures the database schema is properly set up before any jobs are executed.
Extra: Use CREATE TABLE IF NOT EXISTS in your code. This will prevent errors if the table already exists and ensure smooth job execution.
Module 1: GCP setup & VM
# GCP: Static vs Ephemeral IP / Setting up static IP for VM
When you set up a VM in Google Cloud Platform (GCP), it initially uses an ephemeral IP address, which changes each time you start or stop the VM. If you need a consistent IP for your configuration file, you should set up a static IP address.
Steps to Set Up a Static IP Address
- Navigate to VPC Network > IP addresses in the GCP console.
- Allocate a new static IP address.
- Attach the static IP to your VM instance.
Note: You are charged for a static IP if it is not allocated to a specific VM, so make sure it is attached to avoid extra fees.
For detailed instructions, consult the GCP documentation.
# GCP: "The installer is unable to automatically update your system PATH" on Windows
The Google Cloud SDK Windows installer occasionally fails to update PATH automatically:
The installer is unable to automatically update your system PATH. Please add C:\tools\google-cloud-sdk\bin
Add the SDK's bin/ directory to PATH manually:
Right-click "This PC" → Properties → Advanced system settings → Environment Variables.
Under "User variables" (or "System variables"), select
Path→ Edit → New.Paste the directory the installer mentioned, e.g.
C:\tools\google-cloud-sdk\bin.Click OK in all dialogs.
Open a new terminal (existing ones won't pick up the change) and verify:
gcloud --version
Tips for a smoother Windows shell setup
The course's command-line examples assume a Unix-like shell. On Windows the easiest options are:
- WSL2 (recommended). Install via
wsl --install, then run all course commands inside the WSL distro. - Git Bash. During the Git for Windows installer, check "Add Git Bash to Windows Terminal" and "Use Git and optional Unix tools from the command prompt". Then make Git Bash the default profile in Windows Terminal (Settings → Default profile).
Either way, restart your terminal after editing PATH so the new value is picked up.
# GCP: Project creation failed: HttpError accessing … Requested entity already exists
When creating a project in GCP, you may encounter the following error:
WARNING: Project creation failed: HttpError accessing cloudresourcemanager.googleapis.com: response: {
  'content-type': 'application/json; charset=UTF-8',
  'status': 409
}, content {
  "error": {
    "code": 409,
    "message": "Requested entity already exists",
    "status": "ALREADY_EXISTS"
  }
}
This error occurs when the project ID you are trying to use is already taken. Project IDs are unique across all GCP projects. If any user ever had a project with that ID, you cannot use it.
- Choose a different, more unique project ID. Avoid common names like
testprojectas they are likely to be already in use.
For more details, refer to the discussion: Stack Overflow
# GCP: The project to be billed is associated with an absent billing account
If you receive the error:
Error 403: The project to be billed is associated with an absent billing account., accountDisabled
It is most likely because you did not enter your project ID correctly. The value you enter should be unique to your project. You can find this value on your GCP Dashboard when you log in.
Another possibility is that you have not linked your billing account to your current project.
# GCP: OR-CBAT-15 ERROR Google cloud free trial account
If Google refuses your credit/debit card, try using a different one. For instance, a card from Kaspi (Kazakhstan) might not work, but a card from TBC (Georgia) does.
Unfortunately, support assistance might not be highly effective in resolving this issue.
Additionally, a Pyypl web-card can be a viable alternative.
ny-rides.json
# GCP: Where can I find the “ny-rides.json” file?
The ny-rides.json is your private file in Google Cloud Platform (GCP). Here’s how to find it:
- Navigate to GCP and select the project with your instance.
- Go to IAM & Admin.
- Select the Service Accounts tab.
- Click the Keys tab.
- Add a key, choosing JSON as the key type, then click Create.
Note: Once in the Service Accounts, click the email associated to access the KEYS tab where you can add a key as a JSON key type.
# GCP: "Failed to load" when accessing Compute Engine’s metadata section (e.g., to add a SSH key)
You likely didn’t enable the Compute Engine API.
# GCP: Do I need to delete my instance in Google Cloud?
In this lecture, Alexey deleted his instance in Google Cloud. Do I have to do it?
No, do not delete your instance in Google Cloud Platform. Otherwise, you will have to set it up again for the week 1 readings.
# GCP: SSH public key error - multiple users / usernames
Initially, I could not SSH into my VM from my Windows laptop. I thought it was because I did not follow the tutorial exactly. Instead of generating the SSH key using MINGW/git bash with the Linux-style command, I did it in Command Prompt using the Windows-style command. I kept getting a public key error.
Permanent Solution:
It turns out it wasn’t an issue with the key generation at all! The problem was with the username. I had given my SSH key a different username than what appeared in my VM (my Google account username). So, I had been trying to log in with googleacctuser@[ipaddr] instead of mySSHuser@[ipaddr]. Here's how I resolved it:
- Retraced my steps to check the SSH key setup in the GCP console, where it showed the user and SSH key.
- Changed the username to the correct one (googleacctuser) in my config file.
- Updated the config file and used
mySSHuserto log in.
Now, the issue was that I had created two users. I made all the installations and permissions on googleacctuser, not accessible from mySSHuser. Since I didn't need mySSHuser, I edited the SSH key to change the username at the end and updated the GCP console and config file accordingly.
Then, I planned to delete the mySSHuser account in the VM terminal to keep things clean (though I got a bit attached, so I skipped this).
Temporary Solution:
Before figuring out my issue, I used a shortcut by SSH'ing into the VM in the browser, which worked nicely for a while. But eventually, I needed to use VSCode.
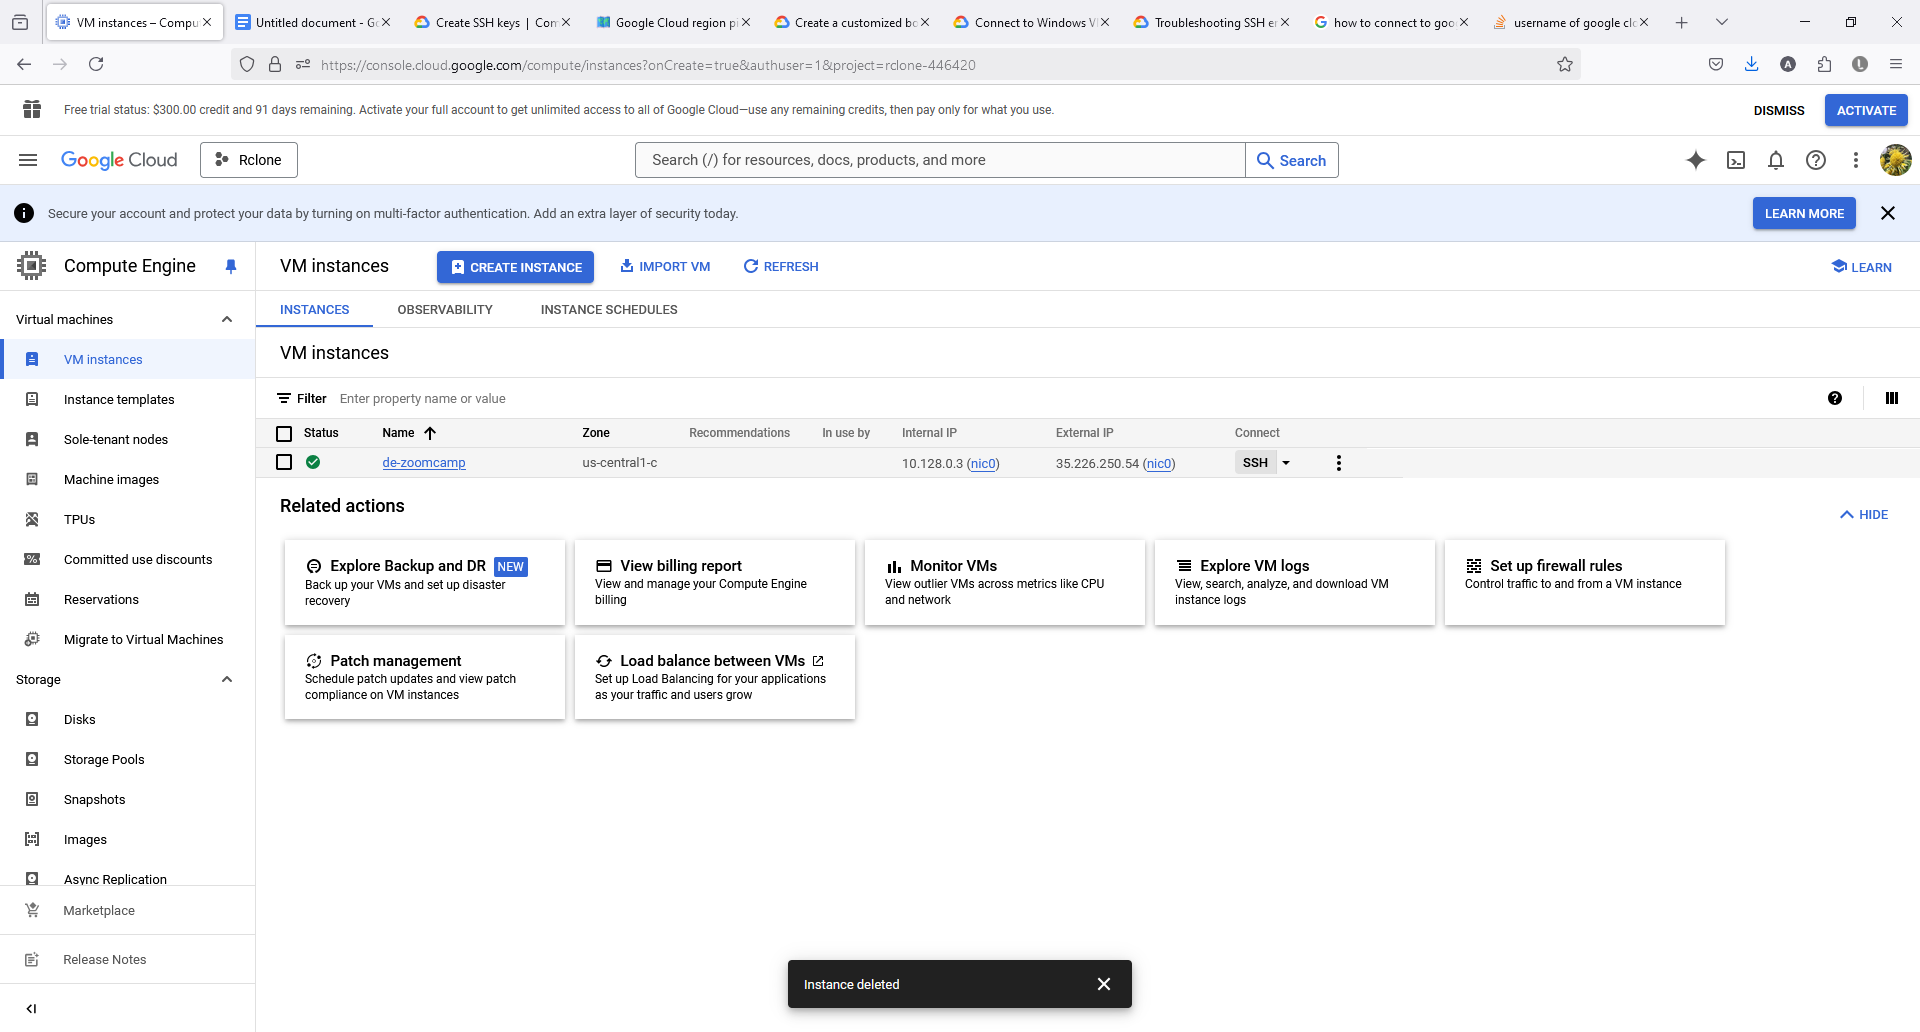
# GCP: Virtual Machine (VM) Size, Slow, Clean Up
If you are progressing through the course and find that your VM is starting to become slow, you can run the following commands to inspect and detect areas where you can improve:
Recommended VM Size
- Start with a 60GB machine. A 30GB machine may not be sufficient, as you might need to restart the project with a larger size.
Commands to Inspect the Health of Your VM
System Resource Usage
top
htop
Shows real-time information about system resource usage, including CPU, memory, and processes.
free -hDisplays information about system memory usage and availability.
df -hShows disk space usage of file systems.
du -h <directory>Displays disk usage of a specific directory.
Running Processes
ps auxLists all running processes along with detailed information.
Network
ifconfig
ip addr show
Shows network interface configuration.
netstat -tulnDisplays active network connections and listening ports.
Hardware Information
lscpuDisplays CPU information.
lsblkLists block devices (disks and partitions).
lshwLists hardware configuration.
User and Permissions
whoShows who is logged on and their activities.
wDisplays information about currently logged-in users and their processes.
Package Management
apt list --installedLists installed packages (for Ubuntu and Debian-based systems).
# Billing: Billing account has not been enabled for this project. But you’ve done it indeed!
If you’ve got the error:
Error: Error updating Dataset "projects/<your-project-id>/datasets/demo_dataset": googleapi: Error 403: Billing has not been enabled for this project. Enable billing at console.cloud.google.com. The default table expiration time must be less than 60 days, billingNotEnabled
but you’ve set your billing account, try disabling billing for the project and enabling it again. This method has been successful for others.
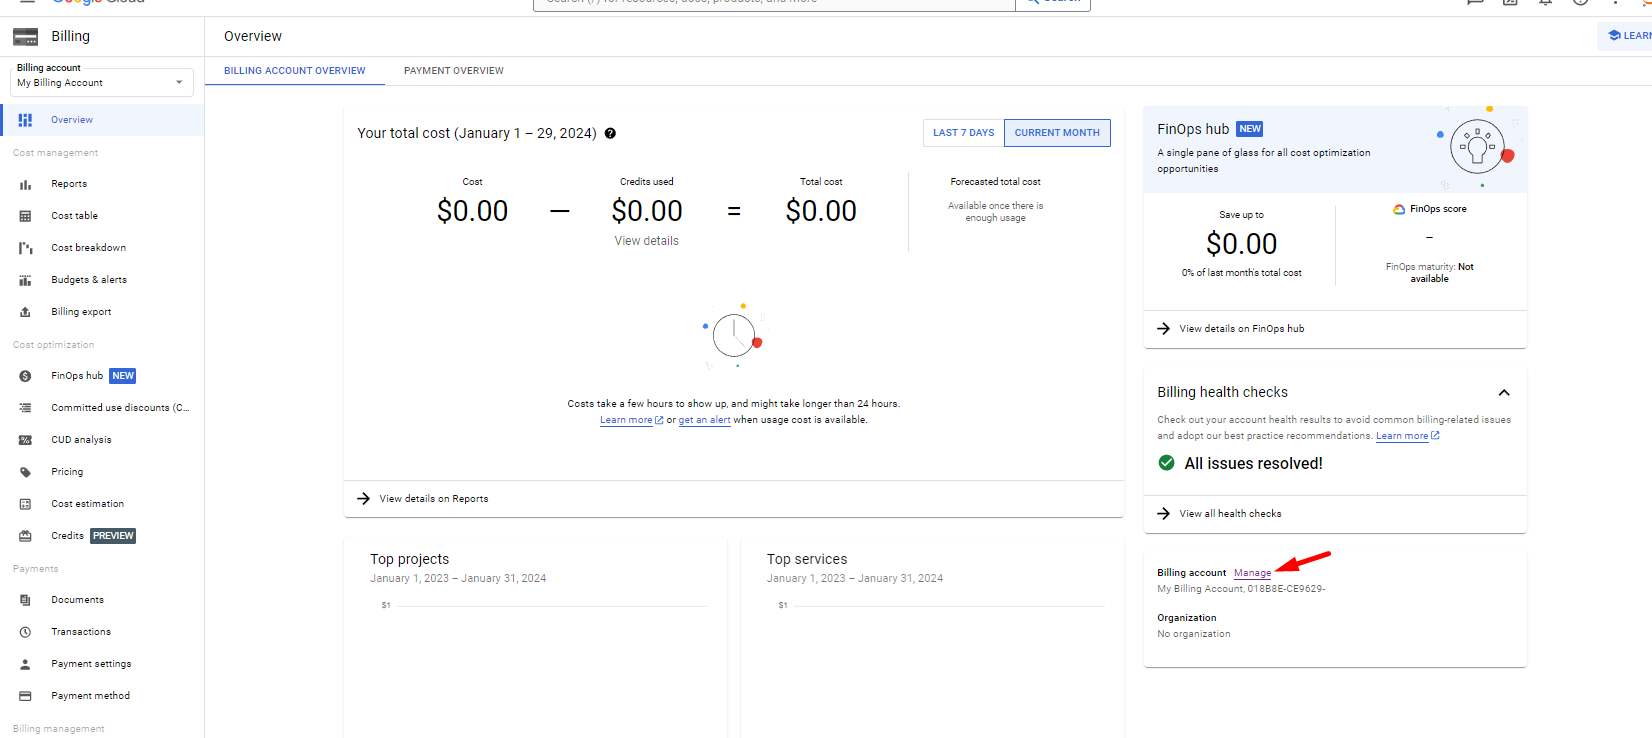
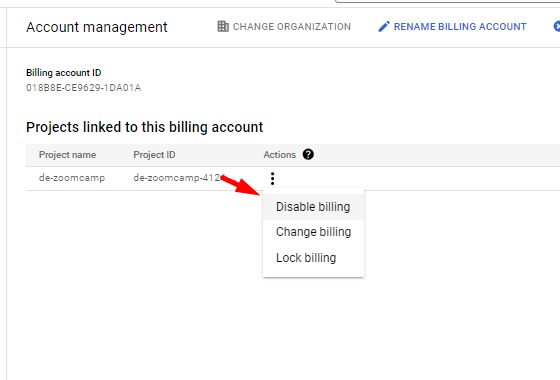
# GCP - Windows Google Cloud SDK install issue:
If you are encountering installation trouble with the Google Cloud SDK on Windows and receiving the following error:
These credentials will be used by any library that requests Application Default Credentials (ADC).

WARNING:

Cannot find a quota project to add to ADC. You might receive a "quota exceeded" or "API not enabled" error. Run $ gcloud auth application-default set-quota-project to add a quota project.
Try these steps:
- Reinstall the SDK using the unzip file "install.bat".
- Check the installation by running
gcloud version. - Run
gcloud initto set up your project. - Execute
gcloud auth application-default login.
For detailed instructions, refer to the following guide: Windows SDK Installation Guide
# GCP: I cannot get my Virtual Machine to start because GCP has no resources.
- Click on your VM.
- Create an image of your VM.
- On the page of the image, tell GCP to create a new VM instance via the image.
- On the settings page, change the location.
# GCP VM: Is it necessary to use a GCP VM? When is it useful?
The reason this video about the GCP VM exists is that many students had problems configuring their environment. You can use your own environment if it works for you.
Advantages of using your own environment include:
- Commit Changes: If you are working in a GitHub repository, you will be able to commit changes directly. In the VM, the repo is cloned via HTTPS, so it is not possible to commit directly, even if you are the owner of the repo.
# GCP VM - mkdir: cannot create directory ‘.ssh’: Permission denied
If you encounter an error while trying to create a directory:
User1@DESKTOP-PD6UM8A MINGW64 /

$ mkdir .ssh

mkdir: cannot create directory ‘.ssh’: Permission denied
This error occurs because you are attempting to create the directory in the root folder (/).
To resolve this, create the directory in your home directory instead. Use the following steps:
Navigate to your home directory using:
cd ~Create the
.sshdirectory:mkdir .ssh
For further guidance, watch this video.
# GCP VM: Error while saving the file in VM via VS Code
Failed to save '<file>': Unable to write file 'vscode-remote://ssh-remote+de-zoomcamp/home/<user>/data_engineering_course/week_2/airflow/dags/<file>' (NoPermissions (FileSystemError): Error: EACCES: permission denied, open '/home/<user>/data_engineering_course/week_2/airflow/dags/<file>')
To resolve this issue, you need to change the owner of the files you are trying to edit via VS Code. Follow these steps:
Connect to your VM using SSH.
Run the following command to change the ownership:
sudo chown -R <user> <path to your directory>
# GCP VM: VM connection request timeout
Question: I connected to my VM perfectly fine last week (SSH) but when I tried again this week, the connection request keeps timing out.
Answer:
Start Your VM: Make sure the VM is running in your GCP console.
Update External IP:
- Copy its External IP once the VM is running.
- Update your SSH configuration file with this IP.
Edit SSH Config:
cd ~/.ssh
code config
This command opens the config file in VSCode for editing.
# GCP VM: connect to host port 22 no route to host
Go to edit your VM.
Navigate to the Automation section.
Add the following Startup script:
#!/bin/bash
sudo ufw allow ssh
Stop and Start the VM.
# GCP VM: Port forwarding from GCP without using VS Code
You can easily forward the ports of pgAdmin, PostgreSQL, and Jupyter Notebook using the built-in tools in Ubuntu without any additional client:
On the VM machine:
- Launch Docker and Jupyter Notebook in the correct folder using:
docker-compose up -d
jupyter notebook
- Launch Docker and Jupyter Notebook in the correct folder using:
From the local machine:
- Execute:
ssh -i ~/.ssh/gcp -L 5432:localhost:5432 username@external_ip_of_vm - Execute the same command for ports 8080 and 8888.
- Execute:
Accessing Applications Locally:
- For pgAdmin, open a browser and go to
localhost:8080. - For Jupyter Notebook, open a browser and go to
localhost:8888.- If you encounter issues with credentials, you may need to copy the link with the access token from the terminal logs on the VM when you launched the Jupyter Notebook.
- For pgAdmin, open a browser and go to
Forwarding Both pgAdmin and PostgreSQL:
- Use:
ssh -i ~/.ssh/gcp -L 5432:localhost:5432 -L 8080:localhost:8080 modito@35.197.218.128
- Use:
# GCP gcloud + MS VS Code - gcloud auth hangs
If you are using MS VS Code and running gcloud in WSL2, when you first try to login to GCP via the gcloud CLI with gcloud auth application-default login, you may encounter an issue where the terminal prints a long OAuth URL and then shows a series of "not found" errors for browsers:
Your browser has been opened to visit:
    https://accounts.google.com/o/oauth2/auth?response_type=code&client_id=...

/usr/bin/xdg-open: 882: x-www-browser: not found
/usr/bin/xdg-open: 882: firefox: not found
/usr/bin/xdg-open: 882: chromium: not found
...
xdg-open: no method available for opening '...'
VS Code may show a notification: "Your application running on port 8085 is available" with an "Open in Browser" button. Clicking it may lead to an error page.
Solution:
- Hover over the long OAuth URL in the terminal output.
Ctrl + Clickthe link — VS Code will show a dialog: "Do you want Code to open the external website?" with buttons Open, Copy, Configure Trusted Domains, and Cancel.- Click Configure Trusted Domains.
- A dropdown will appear with options like:
- "Trust https://accounts.google.com"
- "Trust google.com and all its subdomains"
- "Trust all domains (disables link protection)"
- "Manage Trusted Domains"
- Pick the first or second entry (e.g., "Trust https://accounts.google.com").
Next time you run gcloud auth, the login page should pop up via the default browser without issues.
# GCP: How do I create a service account key when 'service account key creation is disabled'?
This error occurs when your organization has a policy that disables service account key creation. You can disable this policy using either the GCP Console or gcloud CLI.
Option 1: Using GCP Console
- Go to the IAM dashboard (IAM & Admin > IAM)
- Press Ctrl + O and make sure you select your organization
- Click the "Edit Principal" button (pencil icon) next to your account
- Search for "Organization Policy Administrator" role, add it and click save
- On the left sidebar, go to Organization Policies
- Look for the policy named "Disable service account key creation" that is active and select it
- Click on "Manage policy" then click on the drop down that says "Enforced", set it to "Off"
- Click "Done" and then the blue "Set policy" button
Option 2: Using gcloud CLI
# Get your organization ID
gcloud organizations list

# Get your account email
gcloud auth list

# Add policy admin role if needed
gcloud organizations add-iam-policy-binding <ORGANIZATION_ID> \
  --member="user:<YOUR_ACCOUNT_EMAIL>" \
  --role="roles/orgpolicy.policyAdmin"

# Delete the policy
gcloud org-policies delete iam.disableServiceAccountKeyCreation \
  --organization=<ORGANIZATION_ID>
Reference: GCP Organization Policies
# GCP VM: SSH suddenly stopped working after a restart
A common cause is the VM running out of disk space, often from accumulated logs, Docker images/volumes, or pipeline artifacts. When the disk fills up, sshd may fail to write its session files and refuse new connections.
To diagnose and recover:
- Open a serial console for the VM from the GCP console (Compute Engine → VM details → "Connect to serial console").
- Check disk usage:
df -h du -sh ~/* /var/log/* 2>/dev/null | sort -h - Free up space by clearing unused Docker resources and old logs:
docker system prune -af --volumes sudo journalctl --vacuum-time=7d - If your pipeline tool keeps a local storage/log folder (e.g. dlt's
~/.dlt, dbt'starget/, Kestra's mounted volumes), prune the oldest content there too.
Once disk space is freed, restart sshd or reboot the VM and SSH access should work again.
# GCP VM: If you have lost SSH access to your machine due to lack of space. Permission denied (publickey)
If your VM's boot disk is full you can lose SSH access. To recover, create a bigger boot disk from a snapshot of the old one and start a new instance from it:
- In the Google Cloud console, go to the VM instances page.
- Click the instance name to open the VM instance details page.
- Click Stop.
- In the Boot disk section, note the boot disk's size and name.
- In the Google Cloud console, go to the Create a snapshot page.
- Enter a snapshot Name.
- Select the boot disk from the Source disk drop-down list.
- Click Create.
- In the Google Cloud console, go to the Create an instance page.
- Enter the instance details.
- Create a new boot disk from the snapshot of the old boot disk:
- Under Boot disk, select Change.
- Select Snapshots.
- Select the snapshot of the old boot disk from the Snapshot drop-down list.
- Select the Boot disk type.
- Enter the new size for the disk (larger than before, so you don't run out of space again).
- Click Select to confirm your disk options.
- Click Create.
# SSH error in VS Code - “Could not establish connection to "de-zoomcamp": Permission denied (publickey).”
If you are using Windows, try the following steps to resolve the error:
Copy the
.sshfolder from the Linux file path to Windows.In the
configfile, use:IdentityFile C:\Users\<username>\.ssh\gcpInstead of:
IdentityFile ~/.ssh/gcpEnsure the private key file located at
C:\Users\<username>\.ssh\gcphas an extra line at the end:
Module 1: Terraform
# Terraform: Could not reach provider registry in restricted region (e.g., Iraq) – Invalid provider registry host / Could not query available provider packages
This error can occur when Terraform cannot access the online provider registry, which may happen in restricted regions where registry.terraform.io is blocked. The error messages may include things like "Invalid provider registry host" and "Could not query available versions for provider hashicorp/google".
Fix:
- Install and activate a system-wide VPN software (e.g., Proton VPN). Ensure that all traffic from your terminal (where
terraform initruns) is routed through the VPN. - Important: A VPN browser extension is usually not sufficient. Extensions proxy traffic only within the web browser and do not affect terminal/VS Code connections.
After the VPN is active, run terraform init again to retry fetching provider packages.
# Terraform: Error: Post "[storage.googleapis.com](https://storage.googleapis.com/storage/v1/b?alt=json&prettyPrint=false&project=coherent-ascent-379901): oauth2: cannot fetch token: Post "[oauth2.googleapis.com](https://oauth2.googleapis.com/token): dial tcp 172.217.163.42:443: i/o timeout
The issue was related to network restrictions, as Google is not accessible in my country. I used a VPN and discovered that the terminal program does not automatically follow the system proxy, requiring separate proxy configuration settings.
Solution:
- Open an Enhanced Mode in your VPN application, such as Clash.
- Run
terraform applyagain.
If you encounter this issue, consult your VPN provider for assistance with configuration.
# Terraform: Install for WSL
You can configure Terraform on Windows 10 using the Linux Subsystem (WSL) by following this guide: Configuring Terraform on Windows 10 Linux Subsystem.
# Terraform: Error acquiring the state lock
For more information, you can refer to the following issue on GitHub:
# Terraform: Error 400 Bad Request. Invalid JWT Token on WSL.
When running:
terraform apply
on WSL2, you might encounter the following error:
Error: Post "https://storage.googleapis.com/storage/v1/b?alt=json&prettyPrint=false&project=<your-project-id>": oauth2: cannot fetch token: 400 Bad Request

Response: {"error":"invalid_grant","error_description":"Invalid JWT: Token must be a short-lived token (60 minutes) and in a reasonable timeframe. Check your iat and exp values in the JWT claim."}
This issue occurs due to potential time desynchronization on your machine, affecting JWT computation.
To fix this, run the following command to synchronize your system time:
sudo hwclock -s
# Terraform - Error 403 : Access denied
│ Error: googleapi: Error 403: Access denied., forbidden
Your $GOOGLE_APPLICATION_CREDENTIALS might not be pointing to the correct file. Try the following steps:
Set the correct path for your credentials:
export GOOGLE_APPLICATION_CREDENTIALS=~/.gc/YOUR_JSON.jsonActivate the service account:
gcloud auth activate-service-account --key-file $GOOGLE_APPLICATION_CREDENTIALS
# Terraform: Do I need to make another service account for Terraform before I get the keys (.json file)?
One service account is enough for all the services/resources you'll use in this course. After you get the file with your credentials and set your environment variable, you should be good to go.
# Terraform: Where can I download the Terraform binary for Linux?
All Terraform releases are available at https://releases.hashicorp.com/terraform/.
Pick the version you need (the course README in the data-engineering-zoomcamp repo lists the recommended version) and the matching linux_amd64.zip (or linux_arm64.zip on ARM machines). Then unzip and place the terraform binary somewhere on your PATH, e.g. /usr/local/bin/.
# Terraform: Terraform initialized in an empty directory! The directory has no Terraform configuration files. You may begin working with Terraform immediately by creating Terraform configuration files.
This error occurs when terraform init is run outside the working directory.
To resolve this issue:
- Navigate to the working directory that contains your Terraform configuration files.
- Run the
terraform initcommand inside the correct directory.
Make sure your configuration files (e.g., .tf files) are present in the directory before running the command.
# Terraform - Error creating Dataset: googleapi: Error 403: Request had insufficient authentication scopes
The error:
Error: googleapi: Error 403: Access denied., forbidden

Error: Error creating Dataset: googleapi: Error 403: Request had insufficient authentication scopes.
Solution:
Verify your credentials by running:
echo $GOOGLE_APPLICATION_CREDENTIALS
echo $?
Ensure you have set the
GOOGLE_APPLICATION_CREDENTIALSenvironment variable correctly, as demonstrated in the environment setup video in week 1:export GOOGLE_APPLICATION_CREDENTIALS="<path/to/your/service-account-authkeys>.json"
# stoTerraform - Error creating Bucket: googleapi: Error 403: Permission denied to access ‘storage.buckets.create’
The error:
Error: googleapi: Error 403: terraform-trans-campus@trans-campus-410115.iam.gserviceaccount.com does not have storage.buckets.create access to the Google Cloud project. Permission 'storage.buckets.create' denied on resource (or it may not exist)., forbidden
The solution:
You have to declare the project name as your Project ID, not your Project name, available on the GCP console Dashboard.
# Terraform: google provider requires credentials.
To ensure the sensitivity of the credentials file, use the following configuration:
provider "google" {
  project     = var.projectId
  credentials = file("${var.gcpkey}")
  #region      = var.region
  zone = var.zone
}
# Terraform: Teardown of BigQuery Dataset
When running terraform destroy, the following error can occur:
Do you really want to destroy all resources?

Terraform will destroy all your managed infrastructure, as shown above.

There is no undo. Only 'yes' will be accepted to confirm.

Enter a value: yes

google_bigquery_dataset.homework_dataset: Destroying... [id=projects/terraform-demo-449214/datasets/homework_dataset]

╷

│ Error: Error when reading or editing Dataset: googleapi: Error 400: Dataset terraform-demo-449214:homework_dataset is still in use, resourceInUse
This is because the dataset is still in use by a table. To delete the dataset, set the delete_contents_on_destroy property to true in the main.tf file.
# Terraform Error 412: Request violates constraint 'constraints/storage.uniformBucketLevelAccess', conditionNotMet
Cause: The error occurs because the Google Cloud Storage bucket is under a constraint that requires Uniform Bucket-Level Access (UBLA) to be enabled. If UBLA is not enabled, Terraform apply can fail with 412.
Fix: Enable UBLA in the google_storage_bucket resource by setting uniform_bucket_level_access = true.
Example:
resource "google_storage_bucket" "demo-bucket" {
  name = "demo-bucket"

  uniform_bucket_level_access = true
}
Notes:
- Add this line to the google_storage_bucket resource for the affected bucket.
- After applying, re-run terraform apply to confirm the error is resolved.
Module 2: Workflow Orchestration
# What does concurrency mean in Kestra, and how does it work?
In Kestra, concurrency means controlling how many executions of the same flow can run at the same time. It is used to prevent problems such as duplicate processing, data corruption, or excessive resource usage when a flow is triggered multiple times.
Concurrency Limit
concurrency:
  limit: 1
This configuration means that only one execution of the flow can run at a time. If the flow is already running and another execution is triggered, Kestra applies the concurrency behavior defined below.
Concurrency Behavior Options
# Where are the FAQ questions from the previous cohorts for the orchestration module?
# How do I launch Kestra?
To launch Kestra, follow these instructions:
For Linux
Start Docker with the following command:
docker run \
  --pull=always \
  --rm \
  -it \
  -p 8080:8080 \
  --user=root \
  -v /var/run/docker.sock:/var/run/docker.sock \
  -v /tmp:/tmp \
  kestra/kestra:latest server local
Once it is running, you can log in to the dashboard at localhost:8080.
For Windows
Refer to the Kestra GitHub repository for detailed instructions: https://github.com/kestra-io/kestra
Sample docker-compose for Kestra:
kestra:
  build: .
  image: kestra/kestra:latest
  container_name: kestra
  user: "0:0"
  environment:
    DOCKER_HOST: tcp://host.docker.internal:2375  # for Windows
    KESTRA_CONFIGURATION: |
      kestra:
        repository:
          type: h2
        queue:
          type: memory
        storage:
          type: local
          local:
            basePath: /app/storage
        tasks:
          tmp-dir:
            path: /app/tmp
        plugins:
          repositories:
            - id: central
              type: maven
              url: [repo.maven.apache.org](https://repo.maven.apache.org/maven2)
          definitions:
            - io.kestra.plugin.core:core:latest
            - io.kestra.plugin.scripts:python:1.3.4
            - io.kestra.plugin.http:http:latest
    KESTRA_TASKS_TMP_DIR_PATH: /app/tmp
  ports:
    - "8080:8080"
  volumes:
    - //var/run/docker.sock:/var/run/docker.sock  # Windows path
    - /yourpath/.dbt:/app/.dbt
    - /yourpath/kestra/plugins:/app/plugins
    - /yourpath/kestra/workflows:/app/workflows
    - /yourpath/kestra/storage:/app/storage
    - /yourpath//kestra/tmp:/app/tmp
    - /yourpath//dbt_prj:/app/workflows/dbt_project
    - /yourpath//my-creds.json:/app/.dbt/my-creds.json
  command: server standalone
# docker: Error response from daemon: mkdir C:\Program Files\Git\var: Access is denied.
When running the following Docker command in Bash with Docker and WSL2 installed, you may encounter an error. Running Bash as admin will not resolve the issue:
docker run \
  --pull=always \
  --rm \
  -it \
  -p 8080:8080 \
  --user=root \
  -v /var/run/docker.sock:/var/run/docker.sock \
  -v /tmp:/tmp \
  kestra/kestra:latest server local
latest: Pulling from kestra/kestra
Digest: sha256:af02a309ccbb52c23ad1f1551a1a6db8cf0523cf7aac7c7eb878d7925bc85a62
Status: Image is up to date for kestra/kestra:latest
docker: Error response from daemon: mkdir C:\\Program Files\\Git\\var: Access is denied.
See 'docker run --help'.
To resolve this issue, run Command Prompt as an administrator and use the following command:
docker run \
  --pull=always \
  --rm \
  -it \
  -p 8080:8080 \
  --user=root \
  -v "/var/run/docker.sock:/var/run/docker.sock" \
  -v "C:/Temp:/tmp" \
  kestra/kestra:latest server local
After executing the command as described, the localhost should display the Kestra UI as expected.
# Adding a pgadmin service with volume mounting to the docker-compose:
I encountered an error where the localhost URL for pgAdmin would just hang (I chose localhost:8080 for my pgAdmin, and made kestra localhost:8090, personal preference).
The associated issue involved permissions. The resolution was to change the ownership of my local directory to the user "5050," which is pgAdmin. Unlike Postgres, pgAdmin requires explicit permission. Apparently, the Postgres user inside the Docker container creates the Postgres volume/dir, so it has permissions already.
This is a useful resource:
Stack Overflow: Permission denied /var/lib/pgadmin/sessions in Docker
# Running out of storage when using Kestra with Postgres on a GCP VM
Backfilling can blow through a small VM's disk surprisingly fast. The default 30 GB GCP VM disk fills quickly. To find and reclaim space:
Find what's using disk
sudo du -h --max-depth=1 / 2>/dev/null | sort -h | tail -20
Common culprits:
- Docker images and unused volumes (often several GB) — clean up with
docker system prune -af --volumes. - Old backfill artifacts in
/tmpor your project working dir. - Postgres data that's grown over many runs (table bloat from repeated backfills).
Clean up Kestra's stored executions
Kestra keeps execution metadata and logs that grow over time. Use a Purge flow to delete old executions. To purge immediately rather than wait for the scheduled trigger, set endDate to "{{ now() }}" and run it manually. You can choose whether to also remove FAILED-state executions.
Clean up PostgreSQL tables
If you backfilled the same dataset multiple times into different tables, drop the ones you don't need (manually in pgAdmin, or via a Kestra flow). For tables you want to keep but compact, run VACUUM FULL on them.
If after all this you still don't have enough room, increase the boot disk size from the GCP console (Compute Engine → VM details → Edit → Boot disk → Resize).
# Kestra: how do I authenticate to Google Cloud with a service account?
Never paste the service account JSON directly into a Kestra flow — it ends up in version control if you push the flow to GitHub. Use Kestra secrets or the KV store instead.
Option 1: KV store (simplest, recommended for the course)
- Open the Namespaces tab in Kestra and select your namespace (e.g.
zoomcamp). - Go to KV Store → New value.
- Set the key to
GCP_CREDS(or whatever name your flow expects), set the type to JSON, and paste the contents of your service account key file. - Reference it in your flow's
pluginDefaults:
pluginDefaults:
  - type: io.kestra.plugin.gcp
    values:
      serviceAccount: "{{ kv('GCP_CREDS') }}"
      projectId: "{{ kv('GCP_PROJECT_ID') }}"
All GCP plugin tasks (BigQuery, GCS, Dataproc, etc.) will pick up the credentials automatically.
Option 2: Encoded secret (when you can't use KV store)
- Base64-encode the service account JSON and store it in
.env_encoded(which must be.gitignored):
base64 service-account.json > .env_encoded
Pass the encoded value to Kestra via Docker Compose
environmentand decode it as a Kestra secret. See Kestra's Google credentials guide.Reference in flows with
{{ secret('GCP_SERVICE_ACCOUNT') }}.
- Always add
.env_encoded(and any local copy of the JSON key) to.gitignore. Base64 is encoding, not encryption — anyone who sees the file can decode it. - To rotate the credential: generate a new key in GCP, re-run the encoding/upload step, and restart Kestra.
- Both methods cover all GCP plugins — once configured in
pluginDefaults, individual tasks (BigQuery, GCS, etc.) inherit the credentials.
# Why can a Kestra workflow show successful upstream tasks even when downstream tasks fail?
Kestra executes tasks independently according to defined dependencies. A task is marked successful if its own execution completes without error, regardless of downstream failures. This makes it possible to inspect intermediate outputs and logs (such as file size computation) even if later database or merge steps fail.
# Storage: Bucket Permission Denied Error when running the gcp_setup flow
When following the YouTube lesson and then running the gcp_setup flow, you might encounter a permission denied error.
To resolve this:
- Verify if the bucket already exists using the GCP console.
- If it exists, choose a different name for the bucket.
Note: The GCP bucket name must be unique globally across all buckets, as the bucket will be accessible by URL.
# Invalid dataset ID Error when running the gcp_setup flow
When following the YouTube lesson and then running the gcp_setup flow, the error occurs during the create_bq_dataset task.
The error is less clear, but it stems from using a dash in the dataset name. To resolve this, change the dataset name to something like "de_zoomcamp" to avoid using a dash. This should resolve the error.
# Getting SIGILL in JRE when running latest kestra image on Mac M4 MacOS 15.2/3
SIGILL in Java Runtime Environment on MacOS M4
Add the following environment variable to your Kestra container: -e JAVA_OPTS="-XX:UseSVE=0":
docker run --rm -it \
  --pull=always \
  -p 8080:8080 \
  --user=root \
  -e JAVA_OPTS="-XX:UseSVE=0" \
  -v /var/run/docker.sock:/var/run/docker.sock \
  -v /tmp:/tmp \
  kestra/kestra:latest server local
The same in a Docker Compose file:
services:
  kestra:
    image: kestra/kestra:latest
    environment:
      JAVA_OPTS: "-XX:UseSVE=0"
# Kestra: "host.docker.internal" connection failures on Linux
host.docker.internal is a Docker Desktop convenience that resolves to the host machine. On native Linux Docker (and many Linux server setups) it doesn't resolve by default, so Kestra tasks that try to reach Postgres or other services via host.docker.internal fail with errors like:
The connection attempt failed.
could not translate host name "host.docker.internal" to address: Name or service not known
You have two options.
Option 1 (recommended): use the container service name
If Kestra and Postgres are in the same docker-compose.yml, just refer to Postgres by its service name. Replace host.docker.internal with the service name (e.g. postgres_zoomcamp) in pluginDefaults:
pluginDefaults:
  - type: io.kestra.plugin.jdbc.postgresql
    values:
      url: jdbc:postgresql://postgres_zoomcamp:5432/postgres-zoomcamp
      username: kestra
      password: k3str4
Apply this in flows like 02_postgres_taxi.yaml and 2_postgres_taxi_scheduled.yaml.
Option 2: add extra_hosts so host.docker.internal resolves on Linux
Add an extra_hosts entry to the Kestra service in docker-compose.yml:
services:
  kestra:
    image: kestra/kestra:latest
    extra_hosts:
      - "host.docker.internal:host-gateway"
    # ...
For the dbt-build task (or any other task using taskRunner with Docker), add extraHosts there too:
taskRunner:
  type: io.kestra.plugin.scripts.runner.docker.Docker
  extraHosts:
    - "host.docker.internal:host-gateway"
Option 1 is cleaner for inter-container communication; Option 2 is needed only when Kestra genuinely needs to reach a service running on the host (not in a sibling container).
# How to configure and run a Python script in Kestra Docker on Windows 11 without the 'Could not find or install 'Python 3.13' path' error?
type: io.kestra.plugin.scripts.python.Commands
commands:
  - pip install requests kestra
  - python your_script.py
InputFiles:
  your_script.py: |
    # Python script content from before
To use, replace your_script.py with your actual script filename and paste the Python code under InputFiles.
# Why are dataset row counts computed in PostgreSQL instead of within the Kestra workflow?
Kestra is designed to orchestrate tasks rather than perform analytical computations. Row counts represent dataset-level analytics that are best computed in the database layer after ingestion, ensuring correctness and separation of responsibilities.
# Why does Kestra support conditional branching within a single workflow instead of separate flows?
Kestra supports conditional branching within a single workflow to reuse shared orchestration logic while allowing dataset-specific behavior. This approach reduces duplication, keeps related steps together, and makes execution paths explicit within a single workflow definition.
When to use a single-workflow branch:
- Reuse common steps (e.g., data validation, enrichment) across datasets.
- Implement dataset-specific paths (e.g., Yellow vs Green taxi) within the same flow.
How to implement:
- Use a branching mechanism in Kestra (e.g., a condition or switch node) to evaluate a runtime variable (such as the dataset type) and route to the appropriate sub-path.
- Place shared steps before the branch; place dataset-specific steps inside each branch.
- Decide how branches converge: continue with a common tail after the branch or treat branches as separate end states.
Best practices:
- Keep branches modular and minimal; extract shared logic into subflows where possible.
- Centralize error handling and logging to ensure consistency across branches.
- Test each branch with representative inputs and monitor branch-specific failures separately.
Example (illustrative pseudo YAML):
- id: route_by_dataset
  type: branch
  when:
    - condition: ${workflow.variables.dataset_type == 'yellow'}
      then:
        - - id: yellow_tasks
            tasks: [ yellow_validate, yellow_transform ]
    - else:
        - - id: green_tasks
            tasks: [ green_validate, green_transform ]
- id: end
  type: terminate
Note: Adapt the exact branch/task names to your Kestra workflow definitions. The key idea is to place shared logic before the branch, branch on dataset/type, and then execute dataset-specific steps within each branch.
# Why can't row count questions in Homework 2 be answered directly from Kestra execution logs?
- Kestra orchestrates workflows but does not automatically aggregate dataset-level metrics such as total row counts across multiple executions.
- Questions involving total rows for a full year or specific months require querying the target database after ingestion.
- In Homework 2, accurate row counts were obtained using SQL queries against PostgreSQL tables populated by the Kestra flows.
# Why does Kestra use IANA timezone identifiers instead of offsets?
IANA timezone identifiers account for daylight saving transitions and historical changes. Fixed offsets or abbreviations can produce incorrect schedules during DST changes, which is why Kestra enforces IANA-based timezones.
# Why doesn’t Kestra automatically convert printed task outputs into variables?
Kestra distinguishes between execution logs and structured outputs. Values printed to stdout are treated as logs for observability, not as structured data. Explicit output definitions are required to persist or reuse values across tasks.
# Why must a file be declared again under outputFiles for it to be visible or downloadable in Kestra?
Kestra isolates task execution contexts. Files are only persisted and made available to subsequent tasks or the UI when explicitly declared under outputFiles. Without this declaration, files may exist temporarily during execution but are not surfaced or retained for inspection.
# Why does Kestra need access to the Docker socket?
Kestra runs many tasks inside Docker containers, and Kestra itself is responsible for starting those containers when needed. To do this, Kestra needs access to the host Docker daemon, which is exposed via the Docker socket at /var/run/docker.sock. In the official Docker Compose setup for Kestra, the container runs as root and mounts /var/run/docker.sock:/var/run/docker.sock, because the Docker Compose implementation requires root privileges to access the socket. This configuration is intended for development purposes.
# Why does the CSV file size shown in the Kestra Outputs tab differ from the value printed by a Python task?
Kestra displays file sizes in the Outputs tab using human-readable units (e.g., MiB), while a Python task using os.path.getsize() returns the raw file size in bytes. For Homework 2, the correct value is the uncompressed file size in bytes (as printed in task logs), not the rounded UI value. The UI size is a convenience display and should not be used for exact comparisons.
# Can I run my dbt project from Kestra?
Yes, you can integrate dbt with Kestra to combine dbt's transformation capabilities with Kestra's orchestration, monitoring, and Git integration. There are three main capabilities worth highlighting:
- Orchestrating
dbtruns as part of Kestra pipelines - Centralized monitoring and alerting for
dbtruns via Kestra - Git integration for triggering and tracking dbt projects within Kestra pipelines
# How can I edit Kestra flows locally with Docker Compose and keep them version-controlled?
How to edit Kestra flows locally with Docker Compose
By default, Kestra stores its flow definitions in a database. This means that every time you edit a flow through the web UI, the source of truth lives inside the container, not in your repository. That is fine for quick experiments, but for a real project you want flows version-controlled alongside the rest of the code and editable with your favourite IDE.
The solution is a bind-mount combined with Kestra's built-in file watcher. The idea goes like this: you mount a host directory into the container and tell Kestra to watch it. Any YAML file you create or modify in that folder is automatically synced into Kestra's catalog.
1. Bind-mount your flows directory
In docker-compose.yml, add a volume entry that maps a local folder (here ./flows) to a path inside the container (here /flows):
services:
  kestra:
    image: kestra/kestra:v1.3
    command: server standalone
    volumes:
      - kestra-data:/app/storage
      - /var/run/docker.sock:/var/run/docker.sock
      - /tmp/kestra-wd:/tmp/kestra-wd
      - ./flows:/flows
With this single line, anything you put in ./flows on the host appears at /flows inside the container.
2. Enable the file watcher
Kestra uses Micronaut under the hood. You can activate its file-system watcher through the KESTRA_CONFIGURATION environment variable:
services:
  kestra:
    environment:
      KESTRA_CONFIGURATION: |
        micronaut:
          io:
            watch:
              enabled: true
              paths:
                - /flows
The paths list must point to the container-side path — /flows in our case, not the host path.
3. Write your flows as local YAML files
Create any flow definition inside the ./flows directory on your host. For example, ./flows/dev.hello.yml:
id: hello
namespace: dev
tasks:
- id: say_hi
  type: io.kestra.plugin.core.log.Log
  message: "Hello from a local file!"
As soon as you save the file, the watcher picks up the change and Kestra imports (or updates) the flow. You can verify it in the web UI at http://localhost:8080.
How the sync works
- From Host to Kestra is automatic thanks to the watcher. Every time a YAML file is created or modified in the watched directory, Kestra upserts the corresponding flow.
- From Kestra to Host does not happen. If you edit a flow through the web UI, the change is written to the database only; the YAML file on the host is not updated. To keep things consistent, treat the local files as the single source of truth and avoid editing flows in the UI.
Putting it all together
A minimal docker-compose.yml that includes everything discussed above:
services:
  postgres:
    image: postgres:18
    environment:
      POSTGRES_DB: kestra
      POSTGRES_USER: kestra
      POSTGRES_PASSWORD: k3str4
    healthcheck:
      test: ["CMD-SHELL", "pg_isready -d kestra -U kestra"]
      interval: 30s
      timeout: 10s
      retries: 10

  kestra:
    image: kestra/kestra:v1.3
    command: server standalone
    user: "root"
    volumes:
      - kestra-data:/app/storage
      - /var/run/docker.sock:/var/run/docker.sock
      - /tmp/kestra-wd:/tmp/kestra-wd
      - ./flows:/flows
    environment:
      KESTRA_CONFIGURATION: |
        micronaut:
          io:
            watch:
              enabled: true
              paths:
                - /flows
        datasources:
          postgres:
            url: jdbc:postgresql://postgres:5432/kestra
            driverClassName: org.postgresql.Driver
            username: kestra
            password: k3str4
        kestra:
          repository:
            type: postgres
          queue:
            type: postgres
        tasks:
          tmp-dir:
            path: /tmp/kestra-wd/tmp
    ports:
      - "8080:8080"
    depends_on:
      postgres:
        condition: service_healthy

volumes:
  kestra-data:
Run docker compose up -d, drop a YAML flow into ./flows, and it will appear in Kestra within seconds, fully version-controlled and editable from your host machine.
For more information, check Kestra's official guide to sync local flows.
# GitHub Codespaces: ERR_EMPTY_RESPONSE when accessing Kestra in Docker (this page isn’t working / 127.0.0.1 didn’t send any data)
In Codespaces, localhost in your browser does not point to the Docker container. Kestra may be running correctly inside Docker, but you must access it through the forwarded port URL, not http://localhost:8080.
What to do:
- Open the Codespaces UI and go to the Ports (forwarded ports) section.
- Ensure port 8080 (or the port Kestra is listening on) is forwarded.
- Copy the forwarded URL for port 8080. It will look like a Codespaces-provided URL (not http://localhost:8080).
- In your browser, navigate to that forwarded URL instead of http://localhost:8080.
If you still see ERR_EMPTY_RESPONSE:
- Check that the Kestra container is actually running and that Kestra is listening on the configured port.
- Check the container logs for errors.
- If necessary, restart the Kestra container.
Notes:
- The forwarded URL is provided by Codespaces in the Ports panel.
- Once you access via the forwarded URL, you should be able to reach Kestra as normal.
# Kestra: Backfill showing getting executed but not getting results or showing up in executions
It seems to be a bug. The current fix is to remove the timezone from triggers in the script. More on this bug is here.
# How to fix Python logs shown as Kestra error messages?
The issue comes down to how Unix processes produce output and how Kestra interprets it:
Python's
loggingmodule writes tostderrby default. If you, for instance, calllogging.basicConfig()without specifying astreamargument, the root handler sends basically everything tostderr.Kestra maps the two standard streams to its own log levels. Anything the container writes to
stdoutbecomes a Kestra DEBUG entry and anything written onstderrbecomes ERROR. There is no middle ground.
The fix
Good news is that the fix is simple: redirect Python logging to stdout:
import sys
import logging

logging.basicConfig(
    level=logging.INFO,
    format="%(asctime)s %(levelname)s %(message)s",
    stream=sys.stdout,
)
That single stream=sys.stdout argument is enough. After the change, your informational messages will show up as DEBUG in Kestra.
Module 3: Data Warehousing
# GCS Bucket - error when writing data from web to GCS:
Make sure to use Nullable data types, such as Int64 when applicable.
# GCS Bucket - te table: Error while reading data, error message: Parquet column 'XYZ' has type INT which does not match the target cpp_type DOUBLE. File: gs://path/to/some/blob.parquet
Ultimately, when trying to ingest data into a BigQuery table, all files within a given directory must have the same schema.
When dealing with datasets, such as the FHV Datasets from 2019, you may encounter schema inconsistencies. For example, the files for '2019-05' and '2019-06' have the columns "PUlocationID" and "DOlocationID" as integers, while for the period of '2019-01' through '2019-04', the same columns are defined as floats.
When importing these files as Parquet to BigQuery, the first file will define the table schema. All subsequent files must have the same schema to append data correctly.
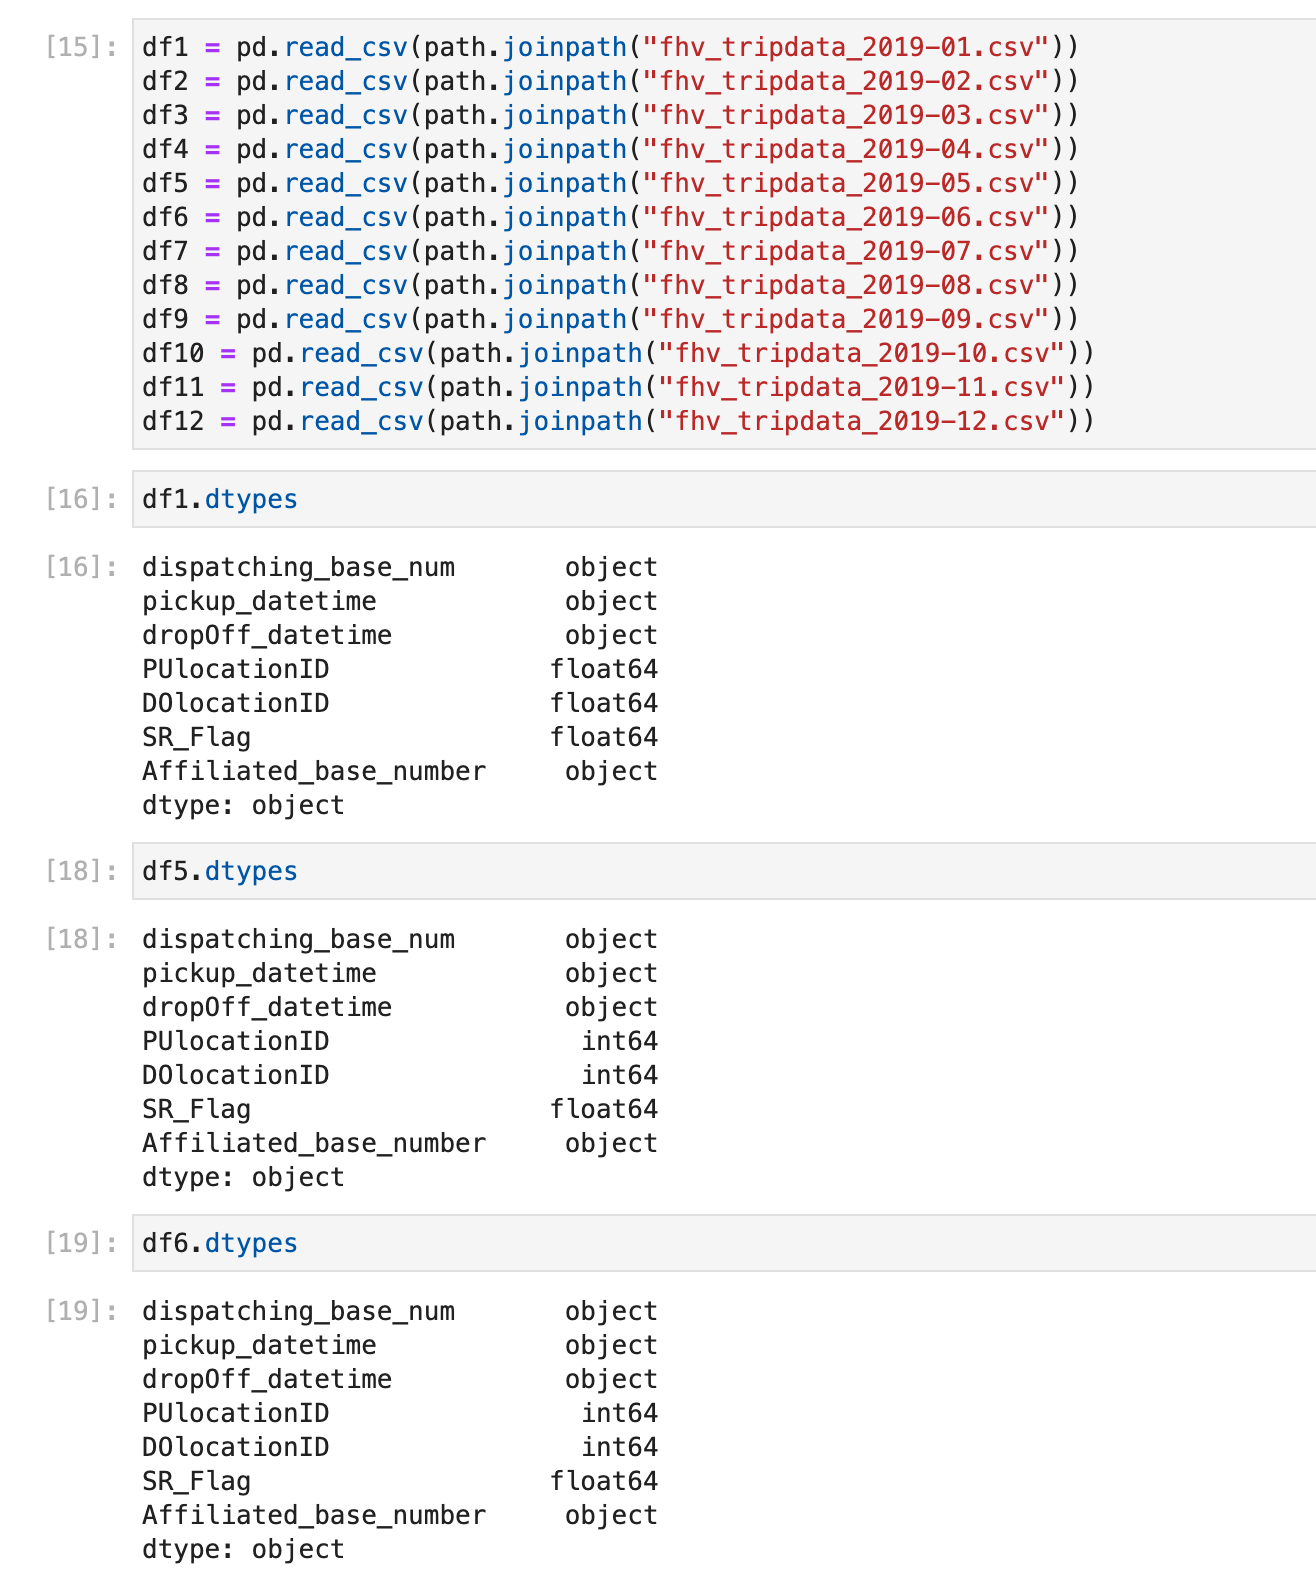
To prevent errors like this, enforce the data types for the columns on the DataFrame before serializing/uploading them to BigQuery:
pd.read_csv("path_or_url").astype({"col1_name": "datatype", "col2_name": "datatype", ..., "colN_name": "datatype"})
# GCS Bucket: Fix Error when importing FHV data to GCS
If you receive the error
gzip.BadGzipFile: Not a gzipped file (b'\n\n')
this is because you have specified the wrong URL to the FHV dataset. Make sure to use:
https://github.com/DataTalksClub/nyc-tlc-data/releases/download/fhv/{dataset_file}.csv.gz
Emphasize the /releases/download part of the URL.
# GCS Bucket - Load Data From URL list in to GCP Bucket
You can use a TSV file with a list of URLs to load data into a GCS bucket. Create a file (e.g., urls.tsv) with the following format:
TsvHttpData-1.0
https://d37ci6vzurychx.cloudfront.net/trip-data/green_tripdata_2022-01.parquet
https://d37ci6vzurychx.cloudfront.net/trip-data/green_tripdata_2022-02.parquet
https://d37ci6vzurychx.cloudfront.net/trip-data/green_tripdata_2022-03.parquet
https://d37ci6vzurychx.cloudfront.net/trip-data/green_tripdata_2022-04.parquet
https://d37ci6vzurychx.cloudfront.net/trip-data/green_tripdata_2022-05.parquet
https://d37ci6vzurychx.cloudfront.net/trip-data/green_tripdata_2022-06.parquet
https://d37ci6vzurychx.cloudfront.net/trip-data/green_tripdata_2022-07.parquet
https://d37ci6vzurychx.cloudfront.net/trip-data/green_tripdata_2022-08.parquet
https://d37ci6vzurychx.cloudfront.net/trip-data/green_tripdata_2022-09.parquet
https://d37ci6vzurychx.cloudfront.net/trip-data/green_tripdata_2022-10.parquet
https://d37ci6vzurychx.cloudfront.net/trip-data/green_tripdata_2022-11.parquet
https://d37ci6vzurychx.cloudfront.net/trip-data/green_tripdata_2022-12.parquet
Then use gsutil or the GCS Transfer Service to load these URLs into your bucket.
# GCS Bucket - I query my dataset and get a Bad character (ASCII 0) error?
Check the Schema: Ensure that the schema of your dataset is correctly defined.
Formatting Issues: You might have incorrect formatting in your files.
Upload Method: Try uploading the CSV.GZ files without formatting or processing them through pandas. Use
wgetto download if necessary.
# GCP BQ: "bq: command not found"
Run the following command to check if "BigQuery Command Line Tool" is installed or not:
gcloud components list
You can also use bq.cmd instead of bq to make it work.
# GCP: Caution in using BigQuery - bigquery:no
Use BigQuery carefully:
- I created my BigQuery dataset on an account where my free trial was exhausted and received a bill of $80.
- Use BigQuery under free credits and destroy all the datasets after creation.
- Check your billing daily, especially if you've spun up a VM.
# BigQuery: "Cannot read and write in different locations" when loading from GCS
BigQuery cannot load data from a GCS bucket into a dataset in a different region — they must match. If your bucket is in EU and your BigQuery dataset is in US (or us-central1 vs asia-south2, etc.), you'll see:
Cannot read and write in different locations: source: <region-A>, destination: <region-B>
- Check the bucket's region in the GCS console (the "Location" field on the bucket details page).
- Create a BigQuery dataset in the same region. Click the three-dot menu next to your project → "Create dataset" → set "Data location" to match the bucket exactly (e.g.
us-central1, not justUS). - Load the data into this newly-created dataset.
If you only ever need one region, set up your project resources (bucket and dataset) in the same region from the start.
For dbt-specific region issues (datasets created automatically by dbt build, prod vs dev mismatches, CI), see the corresponding dbt + BigQuery region FAQ in module 4.
# GCP BQ: Remember to save your queries
It's important to save your progress in the BigQuery SQL Editor frequently.
Here are some tips:
Save Regularly: Use the save button at the top bar in the BigQuery SQL Editor. Your saved queries will be available on the left panel.
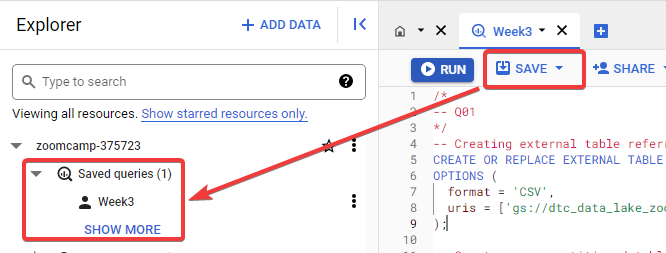
Alternative Method: Copy and paste your queries into a file using a text editor like Notepad++ or VS Code. Save it with a
.sqlextension to benefit from syntax highlighting.
By following these methods, you can avoid losing your work in case of unexpected browser issues.
# GCP BQ: Can I use BigQuery for real-time analytics in this project?
While real-time analytics might not be explicitly mentioned, BigQuery has real-time data streaming capabilities, allowing for potential integration in future project iterations.
# GCP BQ: Unable to load data from external tables into a materialized table in BigQuery due to an invalid timestamp error that are added while appending data to the file in Google Cloud Storage
could not parse 'pickup_datetime' as timestamp for field pickup_datetime (position 2)
This error is caused by invalid data in the timestamp column. To resolve this issue:
- Define the schema of the external table using the
STRINGdatatype for the timestamp column. This allows queries to execute without errors. - Filter out the invalid timestamp rows during data import.
- Insert the filtered rows into the materialized table, specifying the
TIMESTAMPdatatype for the timestamp fields.
# GCP BQ: Error Message in BigQuery: annotated as a valid Timestamp, please annotate it as TimestampType(MICROS) or TimestampType(MILLIS)
When you encounter this BigQuery error, it typically relates to how timestamps are stored in Parquet files.
To resolve this issue, you can modify the Parquet writing configuration by adding use_deprecated_int96_timestamps=True to the pq.write_to_dataset function. This setting writes timestamps in the INT96 format, which can be more compatible with BigQuery.
Here’s how you can adjust the function:
pq.write_to_dataset(
    table,
    root_path=root_path,
    filesystem=gcs,
    use_deprecated_int96_timestamps=True  # Write timestamps to INT96 Parquet format
)
- Stack Overflow - Parquet compatibility with PyArrow vs PySpark
- Stack Overflow - Editing Parquet files and datetime format errors
- Reddit - Parquet Timestamp to BQ issues
Use the above configuration to ensure compatibility with Google BigQuery when dealing with timestamps in Parquet files.
# BigQuery: Datetime columns in Parquet files created from Pandas show up as integer columns in BigQuery
When writing Parquet files from a Pandas DataFrame, Pandas may emit timestamp columns as integers (epoch milliseconds) by default. When BigQuery loads those files it sees raw INT64 values and won't auto-promote them to TIMESTAMP.
Solution 1: Coerce timestamps when writing the Parquet file
Use PyArrow with coerce_timestamps='us' so the file carries proper TIMESTAMP(MICROS) logical types:
import pyarrow as pa
import pyarrow.parquet as pq

table = pa.Table.from_pandas(df, preserve_index=False)

pq.write_table(
    table,
    'gs://<bucket>/<path>.parquet',
    # Force TIMESTAMP(MICROS) so BigQuery loads the column as TIMESTAMP
    coerce_timestamps='us',
    filesystem=pa.fs.GcsFileSystem(),
)
Solution 2: Provide an explicit schema
If you want full control over column types, pass an explicit PyArrow schema instead of relying on inference:
schema = pa.schema([
    ('vendor_id', pa.int64()),
    ('lpep_pickup_datetime', pa.timestamp('us')),
    ('lpep_dropoff_datetime', pa.timestamp('us')),
    # ...
])

table = pa.Table.from_pandas(df, schema=schema)
Either approach also works inside an orchestrator's data-export task — adapt the pq.write_table call to fit your task's signature.
# GCP: BQ - Create External Table using Python
Reference:
https://cloud.google.com/bigquery/docs/external-data-cloud-storage
Solution:
from google.cloud import bigquery

# Set table_id to the ID of the table to create
table_id = f"{project_id}.{dataset_name}.{table_name}"

# Construct a BigQuery client object
client = bigquery.Client()

# Set the external source format of your table
external_source_format = "PARQUET"

# Set the source_uris to point to your data in Google Cloud
source_uris = [f'gs://{bucket_name}/{object_key}/*']

# Create ExternalConfig object with external source format
external_config = bigquery.ExternalConfig(external_source_format)

# Set source_uris that point to your data in Google Cloud
external_config.source_uris = source_uris
external_config.autodetect = True

table = bigquery.Table(table_id)

# Set the external data configuration of the table
table.external_data_configuration = external_config
table = client.create_table(table)  # Make an API request.

print(f'Created table with external source: {table_id}')
print(f'Format: {table.external_data_configuration.source_format}')
# GCP BQ: Check BigQuery Table Exist And Delete
Stack Overflow - BigQuery Overwrite Table
To check if a BigQuery table exists and possibly delete it, utilize the following Python function before using client.create_table:
from google.cloud import bigquery

# Initialize client
client = bigquery.Client()

def table_exists(table_id, client):
    """
    Check if a table already exists using the tableID.

    :param table_id: str, the ID of the table
    :param client: bigquery.Client instance
    :return: Boolean
    """
    try:
        client.get_table(table_id)
        return True
    except Exception as e:  # NotFound:
        return False
Use this function to check table existence before creating a new table or taking further actions.
# GCP BQ - Error: Missing close double quote (") character
To avoid this error, you can upload data from Google Cloud Storage to BigQuery through BigQuery Cloud Shell using the command:
bq load --autodetect --allow_quoted_newlines --source_format=CSV dataset_name.table_name "gs://dtc-data-lake-bucketname/fhv/fhv_tripdata_2019-*.csv.gz"
# GCP BQ - Tip: Using Cloud Function to read csv.gz files from github directly to BigQuery in Google Cloud:
There are multiple benefits of using Cloud Functions to automate tasks in Google Cloud.
Use the following Cloud Function Python script to load files directly into BigQuery. Set your project ID, dataset ID, and table ID accordingly.
import tempfile
import requests
import logging
from google.cloud import bigquery

def hello_world(request):
    # table_id = <project_id.dataset_id.table_id>
    table_id = 'de-zoomcap-project.dezoomcamp.fhv-2019'

    # Create a new BigQuery client
    client = bigquery.Client()

    for month in range(4, 13):
        # Define the schema for the data in the CSV.gz files
        url = 'https://github.com/DataTalksClub/nyc-tlc-data/releases/download/fhv/fhv_tripdata_2019-{:02d}.csv.gz'.format(month)

        # Download the CSV.gz file from Github
        response = requests.get(url)

        # Create new table if loading first month data else append
        write_disposition_string = "WRITE_APPEND" if month > 1 else "WRITE_TRUNCATE"

        # Defining LoadJobConfig with schema of table to prevent it from changing with every table
        job_config = bigquery.LoadJobConfig(
            schema=[
                bigquery.SchemaField("dispatching_base_num", "STRING"),
                bigquery.SchemaField("pickup_datetime", "TIMESTAMP"),
                bigquery.SchemaField("dropOff_datetime", "TIMESTAMP"),
                bigquery.SchemaField("PUlocationID", "STRING"),
                bigquery.SchemaField("DOlocationID", "STRING"),
                bigquery.SchemaField("SR_Flag", "STRING"),
                bigquery.SchemaField("Affiliated_base_number", "STRING"),
            ],
            skip_leading_rows=1,
            write_disposition=write_disposition_string,
            autodetect=True,
            source_format="CSV",
        )

        # Load the data into BigQuery
        # Create a temporary file to prevent the exception: AttributeError: 'bytes' object has no attribute 'tell'
        with tempfile.NamedTemporaryFile() as f:
            f.write(response.content)
            f.seek(0)

            job = client.load_table_from_file(
                f,
                table_id,
                location="US",
                job_config=job_config,
            )

            job.result()

        logging.info("Data for month %d successfully loaded into table %s.", month, table_id)

    return 'Data loaded into table {}.'.format(table_id)
# GCP BQ: When querying two different tables, external and materialized, why do you get the same result with count(distinct(*))?
You need to uncheck cache preferences in query settings
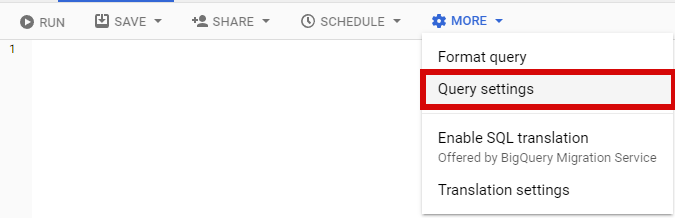
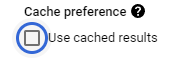
# GCP BQ: How to handle type error from BigQuery and Parquet data?
When injecting data into GCS using Pandas, some datasets might have missing values in the DOlocationID and PUlocationID columns. By default, Pandas will cast these columns as float, leading to inconsistent data types between the Parquet files in GCS and the schema defined in BigQuery. You might encounter the following error:
error: Error while reading table: trips_data_all.external_fhv_tripdata, error message: Parquet column 'DOlocationID' has type INT64 which does not match the target cpp_type DOUBLE.
Fix the data type issue in the data pipeline:
Before injecting data into GCS, use
astypeandInt64(which is different fromint64and accepts both missing values and integers) to cast the columns.Example:
df["PUlocationID"] = df.PUlocationID.astype("Int64")
df["DOlocationID"] = df.DOlocationID.astype("Int64")
It is best to define the data type of all the columns in the Transformation section of the ETL pipeline before loading to BigQuery.
# GCP BQ: Invalid project ID. Project IDs must contain 6-63 lowercase letters, digits, or dashes.
The problem occurs when there is a misplacement of content after the FROM clause in BigQuery SQLs. Check to remove any extra spaces or symbols; ensure project IDs are in lowercase, digits, and dashes only.
# BigQuery limits: partitioning columns, clustering columns, partition counts
The most commonly hit BigQuery limits in the course:
- Partition columns per table: 1. You cannot partition by multiple columns. (docs)
- Cluster columns per table: up to 4. You can cluster on a tuple of columns up to that limit. (docs)
- Partitions per table: 10,000 (older docs and the course playlist may say 4,000 — that limit was raised). (docs)
- Partitions modified by a single job: 4,000. A single load/query/copy/DML job can't touch more than 4,000 partitions at once.
Implications for time-based partitioning under the 10,000 partition limit:
- Daily partitions cover ~27 years.
- Hourly partitions cover ~416 days (just over a year).
- Monthly partitions cover over 800 years.
So daily partitioning is fine for almost any workload; hourly partitioning needs a retention strategy if your data goes back more than ~1 year.
# How to obtain the DDL of a table in BigQuery?
To reproduce a BigQuery table's schema and data layout, you can query the INFORMATION_SCHEMA.TABLES to retrieve the DDL needed to recreate the table.
For a normal (native) table in a dataset
SELECT table_name, ddl
FROM zoomcamp.INFORMATION_SCHEMA.TABLES
WHERE table_name = 'yellow_tripdata_parquet';
The result is the CREATE TABLE statement needed to recreate the table, e.g.:
CREATE TABLE `zoomcamp-ingenieria-datos.zoomcamp.yellow_tripdata_parquet`
(
    VendorID INT64,
    tpep_pickup_datetime TIMESTAMP,
    tpep_dropoff_datetime TIMESTAMP,
    passenger_count INT64,
    trip_distance FLOAT64,
    RatecodeID INT64,
    store_and_fwd_flag STRING,
    PULocationID INT64,
    DOLocationID INT64,
    payment_type INT64,
    fare_amount FLOAT64,
    extra FLOAT64,
    mta_tax FLOAT64,
    tip_amount FLOAT64,
    tolls_amount FLOAT64,
    improvement_surcharge FLOAT64,
    total_amount FLOAT64,
    congestion_surcharge FLOAT64,
    Airport_fee FLOAT64
);
For an external table
SELECT table_name, ddl
FROM zoomcamp.INFORMATION_SCHEMA.TABLES
WHERE table_name = 'yellow_tripdata_parquet_ext';
The result would contain the DDL including the path of the external files, e.g.:
CREATE EXTERNAL TABLE `zoomcamp-ingenieria-datos.zoomcamp.yellow_tripdata_parquet_ext`
OPTIONS(
    format="PARQUET",
    uris=["gs://newyork-taxi/yellow_tripdata_*.parquet"]
);
Notes
- This method works for both native and external tables. The exact path and URIs will depend on your dataset.
- For more details, see the BigQuery information_schema-tables documentation.
# GCP BQ: DATE() Error in BigQuery
Error Message:
PARTITION BY expression must be DATE(<timestamp_column>), DATE(<datetime_column>), DATETIME_TRUNC(<datetime_column>, DAY/HOUR/MONTH/YEAR), a DATE column, TIMESTAMP_TRUNC(<timestamp_column>, DAY/HOUR/MONTH/YEAR), DATE_TRUNC(<date_column>, MONTH/YEAR), or RANGE_BUCKET(<int64_column>, GENERATE_ARRAY(<int64_value>, <int64_value>[, <int64_value>]))
Solution:
Convert the column to datetime first:
# Convert pickup_datetime to datetime
df["pickup_datetime"] = pd.to_datetime(df["pickup_datetime"])

# Convert dropOff_datetime to datetime
df["dropOff_datetime"] = pd.to_datetime(df["dropOff_datetime"])
# GCP BQ: When trying to cluster by DATE(tpep_pickup_datetime) it gives an error: Entries in the CLUSTER BY clause must be column names
No need to convert as you can cluster by a TIMESTAMP column directly in BigQuery. BigQuery supports clustering on TIMESTAMP, DATE, DATETIME, STRING, INT64, and BOOL types.
Clustering sorts data based on the timestamp to optimize queries with filters like WHERE tpep_pickup_datetime BETWEEN ..., rather than creating discrete partitions.
If your goal is to improve performance for time-based queries, combining partitioning by DATE(event_time) and clustering by tpep_pickup_datetime is a good approach.
# BigQuery: native tables vs external tables — what's the difference and how do I create them?
A native (regular) table stores data inside BigQuery's managed storage. An external table only stores metadata in BigQuery — the actual data lives in GCS (or S3, Drive). When you query an external table, BigQuery reads the underlying files at query time.
Trade-offs:
- Native: faster queries, partition/cluster support, predictable cost. Uses BigQuery storage.
- External: no data duplication, easy to add files via globs. Slower than native, fewer optimizations, query cost depends on bytes scanned in GCS.
Create an external table from Parquet files in GCS
CREATE OR REPLACE EXTERNAL TABLE `your_project.your_dataset.yellow_taxi_external`
OPTIONS (
  format = 'PARQUET',
  uris = ['gs://your-bucket/yellow_tripdata_2024-*.parquet']
);
The * wildcard lets you point at every monthly file at once. Make sure all files have a compatible schema.
Create a native table from an existing external table
CREATE OR REPLACE TABLE `your_project.your_dataset.yellow_taxi`
AS
SELECT * FROM `your_project.your_dataset.yellow_taxi_external`;
This materializes the data into BigQuery storage so subsequent queries are faster and cheaper.
Can I create an external table directly from a public URL (e.g. nyc.gov)?
No — BigQuery's external table sources are limited to Cloud Storage, BigTable, and Google Drive. To use data from a public URL, download it to a GCS bucket first (manually, with gsutil cp, or via your ingestion pipeline), then point the external table at the bucket.
References:
# Why does my partitioned table in BigQuery show as non-partitioned even though BigQuery says it's partitioned?
If your partitioned table in BigQuery shows as non-partitioned, it may be due to a delay in updating the table's details in the UI. The table is likely partitioned, but it may not show the updated information immediately.
Here’s what you can do:
Refresh your BigQuery UI: If you're already inspecting the table in the BigQuery UI, try refreshing the page after a few minutes to ensure the table details are updated correctly.
Open a new tab: Alternatively, try opening a new tab in BigQuery and inspect the table details again. This can sometimes help to load the most up-to-date information.
Be patient: In some cases, there might be a slight delay in reflecting changes, but the table is very likely partitioned.
# GCP BQ ML: Unable to run command (shown in video) to export ML model from BQ to GCS
Issue:
Tried running command to export ML model from BQ to GCS from Week 3:
bq --project_id taxi-rides-ny extract -m nytaxi.tip_model gs://taxi_ml_model/tip_model
It is failing with the following error:
BigQuery error in extract operation: Error processing job Not found: Dataset was not found in location US
I verified the BQ dataset and GCS bucket are in the same region, us-west1. Not sure why it gets location US. I couldn’t find the solution yet.
Solution:
Please ensure the following:
Enter the correct
project_idandgcs_bucketfolder address.Example of a correct GCS bucket folder address:
gs://dtc_data_lake_optimum-airfoil-376815/tip_model
# GCP BQ ML - Export ML model to make predictions does not work for MacBook with Apple M1 chip (arm architecture).
Solution:
Proceed with setting up serving_dir on your computer as described in the extract_model.md file. Then, instead of using:
docker pull tensorflow/serving
use:
docker pull emacski/tensorflow-serving
Then run:
docker run -p 8500:8500 -p 8501:8501 --mount type=bind,source=`pwd`/serving_dir/tip_model,target=/models/tip_model -e MODEL_NAME=tip_model -t emacski/tensorflow-serving
After that, run the curl command as instructed, and you should get a prediction.
Or new since Oct 2024:
Beta release of Docker VMM - the more performant alternative to Apple Virtualization Framework on macOS (requires Apple Silicon and macOS 12.5 or later). https://docs.docker.com/desktop/features/vmm/
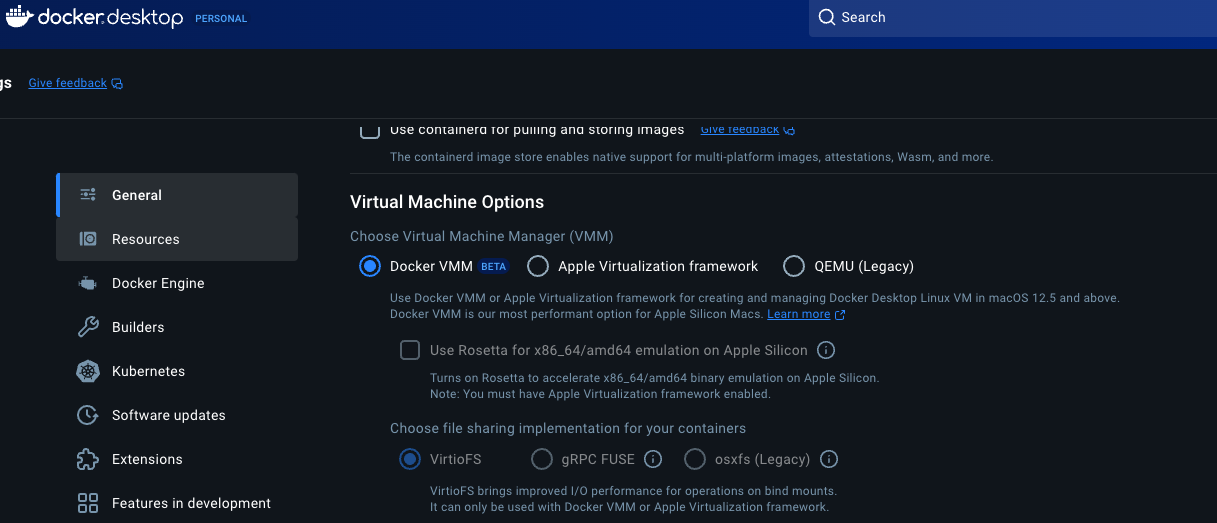
# Homework: What does it mean “Stop with loading the files into a bucket.”?
What they mean is that they don't want you to do anything more than that. You should load the files into the bucket and create an external table based on those files, but nothing like cleaning the data and putting it in parquet format.
# Homework: Reading parquets from nyc.gov directly into pandas returns Out of bounds error
If you try to read parquets directly from nyc.gov’s cloudfront into pandas, you might encounter this error:
pyarrow.lib.ArrowInvalid: Casting from timestamp[us] to timestamp[ns] would result in out of bounds
There is a data record where dropOff_datetime is set to the year 3019 instead of 2019.
Pandas uses "timestamp[ns]" and int64 only allows a ~580-year range, centered on 2000. See pd.Timestamp.max and pd.Timestamp.min.
This becomes out of bounds when pandas tries to read it because 3019 > 2300 (approx value of pd.Timestamp.max).
Use pyarrow to read the data:
import pyarrow.parquet as pq
df = pq.read_table('fhv_tripdata_2019-02.parquet').to_pandas(safe=False)
This will result in unusual timestamps for the offending record.
Read datetime columns separately:
table = pq.read_table('taxi.parquet')
datetimes = ['list of datetime column names']
df_dts = pd.DataFrame()

for col in datetimes:
    df_dts[col] = pd.to_datetime(table.column(col), errors='coerce')
The
errors='coerce'parameter will convert out-of-bounds timestamps into either the max or min.Remove the offending rows using filter:
import pyarrow.compute as pc

table = pq.read_table('taxi.parquet')

df = table.filter(
    pc.less_equal(table["dropOff_datetime"], pa.scalar(pd.Timestamp.max))
).to_pandas()
# Homework: Uploading files to GCS via GUI
This can help avoid schema issues in the homework. Download files locally and use the 'upload files' button in GCS at the desired path. You can upload many files at once. You can also choose to upload a folder.
# Homework - Qn 5: The partitioned/clustered table isn’t giving me the prediction I expected
Take a careful look at the format of the dates in the question.
# Homework: Qn 6: Did anyone get an exact match for one of the options given in Module 3 homework Q6?
Many people aren’t getting an exact match, but are very close to one of the options. It is suggested to choose the closest option.
# Why does selecting fewer columns reduce the number of bytes scanned?
BigQuery uses columnar storage, so only the columns referenced in a query are read during execution. Selecting fewer columns directly reduces the amount of data scanned and therefore lowers query cost.
# How do you connect BigQuery with BI tools like Looker Studio or Tableau?
BigQuery can be directly connected to popular BI tools such as Looker Studio (Google Data Studio) and Tableau to build dashboards and reports. Here is a high-level workflow for the two tools:
Looker Studio:
- In Looker Studio, click Create > Data Source.
- Choose BigQuery as the data source and authorize access to your Google Cloud project.
- Select the project, dataset, and table (or view) you want to report on, then click Connect.
- Add the data source to a report and start building your visuals.
Tableau (Tableau Desktop):
- Open Tableau Desktop and choose Google BigQuery as the data connector.
- Sign in with your Google account and authorize access to your project.
- Browse to your project, dataset, and table, then click Connect and start building visuals.
Notes:
- You may want to create views in BigQuery to simplify the data schema for BI tools.
- For Tableau, consider using extracts if you are working with large datasets or need offline access.
- Ensure proper IAM permissions (BigQuery Data Viewer or Editor) for the service account or user used by the BI tool.
# Python: invalid start byte Error Message
UnicodeDecodeError: 'utf-8' codec can't decode byte 0xa0 in position 41721: invalid start byte
Solution:
When reading the data from the web into the pandas dataframe, specify the encoding:
pd.read_csv(dataset_url, low_memory=False, encoding='latin1')When writing the dataframe from the local system to GCS as a CSV, specify the encoding:
df.to_csv(path_on_gsc, compression="gzip", encoding='utf-8')
Alternative: Use pd.read_parquet(url).
# Python: Generators in Python
A generator is a function in Python that returns an iterator using the yield keyword.
A generator is a special type of iterable, similar to a list or a tuple, but with a crucial difference. Instead of creating and storing all the values in memory at once, a generator generates values on-the-fly as you iterate over it. This makes generators memory-efficient, particularly when dealing with large datasets.
# Python: Easiest way to read multiple files at the same time?
The read_parquet function supports a list of files as an argument. The list of files will be merged into a single result table.
# Python: These won't work. You need to make sure you use Int64.
Incorrect:
df['DOlocationID'] = pd.to_numeric(df['DOlocationID'], downcast=integer)
or
df['DOlocationID'] = df['DOlocationID'].astype(int)
Correct:
df['DOlocationID'] = df['DOlocationID'].astype('Int64')
# How can I estimate BigQuery query costs over a time window and identify the users and times of executions?
Use the INFORMATION_SCHEMA.JOBS_BY_PROJECT view to estimate the cost of executed queries within a chosen time range and to see which users ran them and when. The query sums total_bytes_billed, converts to USD using a per-TB rate, and aggregates by date, user, and job type.
SELECT
  DATE(creation_time) as date,
  job_type,
  statement_type,
  user_email,
  SUM(total_bytes_billed) / 1099511627776 * 6.25 as estimated_cost_usd, -- on-demand model costs are defined US$ 6.25 per TB
  COUNT(*) as query_count
FROM <your_project_id>.<your_region>.INFORMATION_SCHEMA.JOBS_BY_PROJECT
WHERE creation_time >= DATE_ADD(CURRENT_TIMESTAMP(), INTERVAL -60 DAY) --Interval can be modified
GROUP BY date, user_email, job_type, statement_type
ORDER BY estimated_cost_usd DESC;
Notes:
- The query sums total_bytes_billed to estimate cost (6.25 USD per TB) for on-demand pricing.
- Replace
<your_project_id>.<your_region>with your actual project and region in the FROM clause. - Adjust the time window by changing the interval (e.g., -60 DAY).
- The results show: date, user_email, job_type, statement_type, estimated_cost_usd, and query_count. You can identify dates and users with the highest costs to target optimizations.
# How do you partition and cluster a table in BigQuery for better performance?
Overview:
- Partitioning reduces scanned data by dividing a table into smaller parts based on a column used in WHERE clauses.
- Clustering organizes data within partitions by one or more columns, improving the performance of ORDER BY and range queries. Note: BigQuery supports partitioning by only one column, but you can cluster on multiple columns.
Best practices:
- Partition based on the column you filter on most frequently in WHERE clauses.
- Cluster within partitions by columns used in ORDER BY to optimize data retrieval inside each partition.
Examples:
-- Partitioned by DATE(tpep_dropoff_datetime) and clustered by VendorID
CREATE OR REPLACE TABLE `nyc_taxi_data.yellow_tripdata_id_clustered`
PARTITION BY DATE(tpep_dropoff_datetime)
CLUSTER BY VendorID AS
SELECT * FROM `nyc_taxi_data.yellow_tripdata_ext`;
-- Partitioned on VendorID and clustered by tpep_dropoff_datetime
CREATE OR REPLACE TABLE `nyc_taxi_data.yellow_tripdata_date_clustered`
PARTITION BY RANGE_BUCKET(VendorID, GENERATE_ARRAY(0, 100, 1))
CLUSTER BY tpep_dropoff_datetime
AS
SELECT * FROM `nyc_taxi_data.yellow_tripdata_ext`;
-- Clustering on two columns (VendorID and tpep_dropoff_datetime)
CREATE OR REPLACE TABLE `nyc_taxi_data.yellow_tripdata_date_id_clustered`
CLUSTER BY VendorID, tpep_dropoff_datetime
AS
SELECT * FROM `nyc_taxi_data.yellow_tripdata_ext`;
Filtering behavior (conceptual):
- When a query filters on the partitioned column (e.g., VendorID in a table partitioned by VendorID), the engine can prune partitions and process only the relevant data (often much smaller scans).
- When a query filters on the partitioned column but the table is partitioned differently (e.g., by date), the engine may scan more data, potentially the entire table, depending on the partitioning scheme and data distribution.
For example, in the provided scenarios:
- A table partitioned by VendorID and clustered by tpep_dropoff_datetime may process a very small portion of data when filtering on a single VendorID value.
- A table partitioned by tpep_dropoff_datetime and clustered by VendorID may scan a larger portion of the data if the VendorID value exists across many partitions.
Notes:
- BigQuery supports only one partitioning column per table.
- You can combine partitioning with clustering (on one or more columns) to optimize specific query patterns.
If you have a dataset you want to optimize, start by identifying the most selective filter column for partitioning, then choose clustering keys that support your common ORDER BY or range queries.
# How do I manage security and access control in a BigQuery data warehouse?
BigQuery uses Identity and Access Management (IAM) to control who can view, query, or modify datasets and tables. You can assign roles at the project, dataset, or table level depending on how granular you want permissions to be.
Common roles:
BigQuery Data Viewer → Read-only access to datasets and tables.
BigQuery Data Editor → Can query and modify data.
BigQuery Admin → Full control, including managing datasets, tables, and jobs.
Best practices:
Apply the principle of least privilege (give users only the access they need).
Use authorized views to share query results without exposing the underlying raw data.
Enable column-level security if only certain fields should be visible to specific users.
Audit usage with INFORMATION_SCHEMA views to track who ran queries and how much data was processed.
This ensures that your BigQuery data warehouse remains secure while still enabling collaboration across teams.
# Why does the estimate of Bytes Processed for COUNT(*) stay at 0 bytes on a native BigQuery table, but become chargeable with a WHERE filter or when using an external table?
BigQuery's Bytes Processed metric behaves differently depending on the data source and query:
- Native tables (Standard): BigQuery keeps a Metadata Store that already contains the total row_count for the table. For a SELECT COUNT(*), the engine can read the row count from metadata without scanning any data blocks, so the operation is instantaneous and effectively incurs zero bytes processed.
- With a WHERE filter: If you add a predicate (e.g., WHERE fare_amount > 0), BigQuery must read the relevant column blocks to evaluate the condition. You then incur bytes processed proportional to the data scanned for that predicate.
- External tables (GCS): BigQuery has no metadata control over files stored in GCS. To count rows, it must open the Parquet files (or scan the data) to determine the result. The UI may show 0 B before execution, but the actual cost is determined after the query runs because data is read during execution.
Notes:
- If you primarily need the row count and you’re querying a native table, COUNT(*) can be effectively free due to metadata access.
- For filtered or non-native sources, expect bytes processed to reflect the portion of data read during execution.
Example (conceptual):
-- Counting rows in a native table may not require scanning the data
SELECT COUNT(*) FROM `project.dataset.native_table`;

-- With a filter, data scanned increases
SELECT COUNT(*) FROM `project.dataset.native_table` WHERE fare_amount > 0;

-- For an external table, the count requires reading external Parquet files
SELECT COUNT(*) FROM `project.dataset.external_table`;
# Why are there unexpected years in lpep_pickup_datetime after loading taxi data into BigQuery?
Unexpected years in lpep_pickup_datetime after loading taxi data into BigQuery usually indicate a corrupted or incorrect load. Common causes include:
- CSV schema autodetect misinterpreting timestamp format
- Mixing Parquet and CSV loads into the same table
- Appending instead of replacing during reload
- Partial failed loads
How to verify:
- Run a range check:
SELECT
  MIN(lpep_pickup_datetime),
  MAX(lpep_pickup_datetime)
FROM `project.dataset.table`;
If the values fall outside the expected years (for example 2019–2020), reload the table from a clean source using a replacement load, preferably Parquet:
bq load \
  --source_format=PARQUET \
  --replace \
  dataset.table \
  gs://bucket/path/*.parquet
Note: Using Parquet instead of CSV often helps prevent schema interpretation issues and ensures a cleaner, replace-based reload.
# How can I sync data from PostgreSQL to BigQuery for analytical workloads?
Overview: You can sync data from PostgreSQL to BigQuery by extracting tables and loading them into BigQuery datasets.
Steps:
- Connect to PostgreSQL using a Python script
- Read tables into pandas DataFrames
- Use the Google Cloud BigQuery client to load data
from google.cloud import bigquery

client = bigquery.Client()
table_id = 'project.dataset.table'

# Assuming df is a pandas DataFrame containing your data
job = client.load_table_from_dataframe(df, table_id)
job.result()
Prerequisites:
- your service account credentials are set
- the dataset exists in BigQuery
- location (US or EU) matches during queries
This approach lets you keep ingestion local while using BigQuery for scalable analytics.
# How do I structure a layered data warehouse (raw, clean, analytics) for a batch pipeline?
- Raw layer: store ingested data exactly as received
- Clean layer: filter invalid records and enforce basic constraints
- Data quality (dq) layer: validate completeness and consistency (e.g. missing timestamps)
- Analytics layer: build aggregated views
- Mart layer: expose final business metrics
Flow: raw → clean → dq → analytics → mart
Each layer is implemented as SQL transformations in PostgreSQL and BigQuery.
This separation helps with debugging, testing, and ensuring that analytical outputs are built on validated data.
# When should partitioning be used instead of clustering, and vice versa?
- Partitioning is most effective when queries consistently filter by a time-based column such as a date or timestamp.
- Clustering is most useful when queries frequently filter or sort on low-cardinality columns like IDs.
- They are complementary techniques and are often used together when access patterns justify it.
# Warning when run load_yellow_data python script
Warning Details:
RuntimeWarning: As the c extension couldn't be imported, google-crc32c is using a pure python implementation that is significantly slower. If possible, please configure a c build environment and compile extension warnings.warn(_SLOW_CRC32C_WARNING, RuntimeWarning)

Failed to upload ./yellow_tripdata_2024-01.parquet to GCS: Timeout of 120.0s exceeded, last exception: ('Connection aborted.', timeout('The write operation timed out'))

Failed to upload ./yellow_tripdata_2024-03.parquet to GCS: Timeout of 120.0s exceeded, last exception: ('Connection aborted.', timeout('The write operation timed out'))
google-crc32c Warning: The Google Cloud Storage library is using a slow Python implementation instead of the optimized C version.
Upload Timeout Error: Your file uploads are timing out after 120 seconds.
Install the C-optimized google-crc32c
pip install --upgrade google-crc32cFix Google Cloud Storage Upload Timeout
Solution 1: Increase Timeout
blob.upload_from_filename(file_path, timeout=300) # Set timeout to 5 minutes
Module 4: Analytics Engineering with dbt
# What is the difference between ref() and source() in dbt?
In dbt, source() and ref() are both used to reference tables, but they serve different purposes in the data pipeline.
source() – Referencing External Source Tables source() is used to reference raw or external tables that are not created by dbt. These tables usually live in a data warehouse such as BigQuery or Snowflake and are defined in a sources.yml file.
Key points:
- Used for raw / upstream data
- Defined in sources.yml
- dbt does not control how the table is created
- Enables freshness checks, documentation, and testing
Example:
SELECT *
FROM {{ source('raw', 'trips') }}
ref() – Referencing dbt Models ref() is used to reference other dbt models (SQL files inside the dbt project). dbt uses ref() to automatically manage model dependencies and execution order.
Key points:
- Used for dbt-generated models
- Automatically resolves schema and table names
- Controls run order and lineage
- Enables DAG, documentation, and refactoring safety
Example:
SELECT *
FROM {{ ref('stg_trips') }}
# dbt cloud Developer
Please be aware that the demos are done using dbt cloud Developer licensing. Although Team license is available to you upon creation of dbt cloud account for 14 days, the interface won't fully match the demo-ed experience.
# DBT-Config ERROR on CLOUD IDE: No dbt_project.yml found at expected path
No dbt_project.yml found at expected path /usr/src/develop/user-70471823426120/environment-70471823422561/repository-70471823410839/dbt_project.yml
Verify Packages:
- Confirm that every entry in
packages.yml(and their transitive dependencies) includes adbt_project.ymlfile.
- Confirm that every entry in
Initialize Project:
- Use the UI to initialize a new project.
Import Git Repo:
For importing a Git repository of an existing dbt project, follow the instructions available at:
# dbt + BigQuery: "Dataset was not found in location" / region mismatch errors
This is the single most common dbt+BigQuery problem in the course. The various "404 Not found: Dataset was not found in location X" errors all come down to the same root cause: a region mismatch between
- the source dataset (e.g.
trips_data_all), - the dbt-managed dev/prod dataset (e.g.
dbt_<initial><lastname>orprod), and - the connection's configured location in dbt Cloud or
profiles.yml.
BigQuery cannot read and write across regions in a single query, and dbt creates new datasets in whatever location its connection is configured to use. If those don't match your source data's region, you'll see one of:
404 Not found: Dataset <project>:<schema> was not found in location <region>
Access Denied: ... or perhaps it does not exist in location <region>
Find the location of your source dataset in the BigQuery console (open the dataset → "Details" → "Data location"). Note the exact region string, e.g.
EU,US,europe-west6,us-central1.Set dbt's connection location to the same value:
- dbt Cloud: Account settings → Projects → your project → Connection (BigQuery) → Optional Settings → Location.
- dbt Core: in
profiles.yml, under your target, setlocation: <region>.
If dbt already created datasets in the wrong region, delete those datasets in BigQuery and re-run
dbt buildso they are recreated in the correct region.For dbt Cloud Production / CI jobs specifically:
- Deploy → Environments → your environment → Settings → Deployment credentials. Confirm "Dataset" matches a dataset that exists in the right region.
- When CI is creating a new schema for each PR, the location is inherited from the connection's location setting (step 2). Make sure that's set to your source region, not the default
US.
If you genuinely need cross-region data (e.g. source is in
EUbut you want results inUS), copy or replicate the source dataset into the target region first using BigQuery's dataset-copy feature. Don't try to query across regions.
In a dbt model
You can also pin a specific model's location via config():
{{ config(
    materialized='table',
    location='EU'
) }}
But it's cleaner to fix this once at the connection level than to repeat it in every model.
Common variants
- "prod was not found in location EU" → step 2: set connection location to EU, then step 3.
- "Access Denied: ... or perhaps it does not exist in location US" → same, plus check the service account has access.
- "BigQuery adapter: 404 ... in location europe-west6" → set connection location to
europe-west6exactly (notEU). - A new dataset appears in
USafter a CI run while everything else is inEU→ step 2 (the connection's location is wrong) and step 4 (CI inherits it).
# Setup: No development environment
Error:
This project does not have a development environment configured. Please create a development environment and configure your development credentials to use the dbt IDE.
The error message provides guidance on resolving this issue. Follow the guide in the dbt cloud setup documentation. Additional instructions can be found in the video @1:42.
# Setup: Connecting dbt Cloud with BigQuery Error
Runtime Error
dbt was unable to connect to the specified database.
The database returned the following error:
Database Error

Access Denied: Project <project_name>: User does not have bigquery.jobs.create permission in project <project_name>.
Check your database credentials and try again. For more information, visit:
Steps to resolve error in Google Cloud:
- Navigate to IAM & Admin and select IAM.
- Click Grant Access if your newly created dbt service account isn't listed.
- In the New principals field, add your service account.
- Select a Role and search for BigQuery Job User to add.
- Go back to dbt Cloud project setup and test your connection.
- Note: Also add BigQuery Data Owner, Storage Object Admin, & Storage Admin to prevent permission issues later in the course.
<{IMAGE:image_id}>
# Setup: Failed to clone repository.
Error: Failed to clone repository.
$ git clone git@github.com:DataTalksClub/data-engineering-zoomcamp.git /usr/src/develop/...

Cloning into '/usr/src/develop/...

Warning: Permanently added '[github.com](http://github.com/),140.82.114.4' (ECDSA) to the list of known hosts.

git@github.com: Permission denied (publickey).

fatal: Could not read from remote repository.
Issue: You don’t have permissions to write to DataTalksClub/data-engineering-zoomcamp.git
Solutions:
Clone the Forked Repository
Clone the repository using your forked repo, which contains your GitHub username. Then, specify the path as:
[your github username]/data-engineering-zoomcamp.gitCreate a Fresh Repo for dbt-lessons
Create a new repository for dbt-lessons. This approach is beneficial as it allows for branching and pull requests without affecting your other repositories. There's no need to create a subfolder for the dbt project files.
Use HTTPS Link
Switch to using an HTTPS link for cloning the repository if SSH access is not configured.
# Errors when I start the server in dbt cloud: Failed to start server. Permission denied (publickey)
Failed to start server. Permission denied (publickey). fatal: Could not read from remote repository. Please make sure you have the correct access rights and the repository exists.
Use the deploy keys in dbt repo details to create a public key in your repo, the issue will be solved.
Steps in detail:
Find dbt Cloud’s SSH Key
- In dbt Cloud, go to Settings > Account Settings > SSH Keys
- Copy the public SSH key displayed there.
Add It to GitHub
- Go to GitHub > Settings > SSH and GPG Keys
- Click "New SSH Key", name it "dbt Cloud", and paste the key.
- Click "Add SSH Key".
Try Restarting dbt Cloud
# dbt: Command 'dbt' not found after installing dbt—how can I fix it?
These steps fix the 'dbt' command not found error when dbt is installed inside a virtual environment:
- Activate your virtual environment:
source ~/venvs/zoomcamp/bin/activate
- Verify dbt is installed inside it:
which dbt
It should return something like:
~/venvs/zoomcamp/bin/dbt
- If dbt is not installed, install it inside the activated environment:
pip install dbt-bigquery
- Confirm installation:
dbt --version
If you want dbt available globally (not recommended), ensure the installation path is added to your PATH variable.
# Setup: Your IDE session was unable to start. Please contact support.
Issue: If the DBT cloud IDE is loading indefinitely and then giving you this error.
Solution:
- Check the
dbt_cloud_setup.mdfile. - Create an SSH Key.
- Use
git cloneto import the repo into the dbt project. - Copy and paste the deploy key back in your repo settings.
# DBT: I am having problems with columns datatype while running DBT/BigQuery
Issue: If you don’t define the column format while converting from CSV to Parquet, Python will "choose" based on the first rows.
Solution: Define the schema while running the web_to_gcp.py pipeline.
Sebastian adapted the script:
To make the file work with gz files, add the following lines:
- Ensure deletion of the file at the end of each iteration to avoid disk space issues:
file_name_gz = f"{service}_tripdata_{year}-{month}.csv.gz"
open(file_name_gz, 'wb').write(r.content)
os.system(f"gzip -d {file_name_gz}")
os.system(f"rm {file_name_init}.*")
# Ingestion: When attempting to use the provided quick script to load trip data into GCS, you receive error Access Denied from the S3 bucket
If the provided URL isn’t working for you (nyc-tlc.s3.amazonaws.com/):
We can use the GitHub CLI to easily download the needed trip data from GitHub and manually upload to a GCS bucket.
Instructions on how to download the CLI here: GitHub
Commands to use:
gh auth login

gh release list -R DataTalksClub/nyc-tlc-data

gh release download yellow -R DataTalksClub/nyc-tlc-data

gh release download green -R DataTalksClub/nyc-tlc-data
Now you can upload the files to a GCS bucket using the GUI.
# Hack to load yellow and green trip data for 2019 and 2020
I initially followed this script but it was taking too long for the yellow trip data. When I downloaded and uploaded the Parquet files directly to GCS, it worked, but there was a schema inconsistency issue when creating the BigQuery table.
I found another solution shared on YouTube, which was suggested by Victoria. You can watch it here:
[Optional] Hack for loading data to BigQuery for Week 4 - YouTube
Make sure to watch until the end, as there are some required schema changes.
# dbt: dbt_utils.surrogate_key has been renamed to dbt_utils.generate_surrogate_key
In dbt-utils 1.0+, dbt_utils.surrogate_key was renamed to dbt_utils.generate_surrogate_key. If you copy the macro call from older course materials you'll see a deprecation warning or an error.
Fix: replace every surrogate_key call with generate_surrogate_key. The arguments are the same.
{{ dbt_utils.generate_surrogate_key(['field_a', 'field_b', 'field_c']) }}
Common places in the course where this comes up: stg_green_tripdata.sql, stg_yellow_tripdata.sql, and similar staging models.
# dbt + BigQuery: Access Denied / permission denied for the service account
When dbt runs against BigQuery and reads from external tables backed by GCS, the service account needs permissions on both BigQuery and Cloud Storage. Common errors:
Access Denied: BigQuery: Permission denied while globbing file pattern
Database Error: Access Denied: User does not have bigquery.jobs.create permission ...
Required roles
Grant these to the service account dbt is using (IAM & Admin → IAM in GCP console):
- BigQuery Data Editor (or BigQuery Admin) — for reading and writing dataset content.
- BigQuery Job User — for running queries.
- Storage Object Viewer (or Storage Object Admin) — for reading external table files in GCS.
- Storage Admin — for creating buckets/objects if your pipeline needs it.
The course's full setup typically uses BigQuery Admin + Storage Object Admin + Storage Admin to avoid hitting permission walls partway through.
After updating IAM
Roles take effect almost immediately, but if dbt was already running, restart the dbt session / job. If you regenerated the service account key, re-upload the JSON in dbt Cloud (Profile → Credentials → Analytics → BigQuery → Edit) so dbt uses the latest credentials.
# When you are getting error dbt_utils not found
To resolve the "dbt_utils not found" error, follow these steps:
Create a
packages.ymlfile in the main project directory and add the package metadata:packages: - package: dbt-labs/dbt_utils version: 0.8.0Run the following command:
dbt depsPress Enter.
# Lineage is currently unavailable. Check that your project does not contain compilation errors or contact support if this error persists.
Ensure you properly format your YAML file. Check the build logs if the run was completed successfully. You can expand the command history console (where you type the --vars '{"is_test_run": "false"}') and click on any stage’s logs to expand and read error messages or warnings.
# Build: Why do my Fact_trips only contain a few days of data?
Make sure you use:
dbt run --var 'is_test_run: false'
or
dbt build --var 'is_test_run: false'
Watch out for formatted text from this document: re-type the single quotes. If that does not work, use:
--vars '{"is_test_run": "false"}'
with each phrase separately quoted.
# Build: Why do my fact_trips only contain one month of data?
Check if you specified the if_exists argument correctly when writing data from GCS to BigQuery.
When I wrote my automated flow for each month of the years 2019 and 2020 for green and yellow data, I had specified if_exists="replace" while experimenting with the flow setup. Once you want to run the flow for all months in 2019 and 2020, make sure to set if_exists="append".
if_exists="replace"will replace the whole table with only the month data that you are writing into BigQuery in that one iteration -> you end up with only one month in BigQuery (the last one you inserted).if_exists="append"will append the new monthly data -> you end up with data from all months.
# BigQuery returns an error when I try to run the dm_monthly_zone_revenue.sql model.
After the second SELECT, change this line:
date_trunc('month', pickup_datetime) as revenue_month,
To this line:
date_trunc(pickup_datetime, month) as revenue_month,
Make sure that "month" isn’t surrounded by quotes!
# DBT: I ran dbt run without specifying variable which gave me a table of 100 rows. I ran again with the variable value specified but my table still has 100 rows in BQ.
Remove the dataset from BigQuery created by dbt and run again (with test disabled) to ensure the dataset created has all the rows.
DBT: Why am I getting a new dataset after running my CI/CD Job? / What is this new dbt dataset in BigQuery?
When you create the CI/CD job, under 'Compare Changes against an environment (Deferral)' make sure that you select 'No; do not defer to another environment'. Otherwise, dbt won’t merge your dev models into production models; it will create a new environment called ‘dbt_cloud_pr_number of pull request’
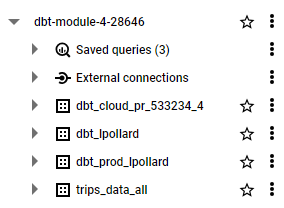
# Why do we need the Staging dataset?
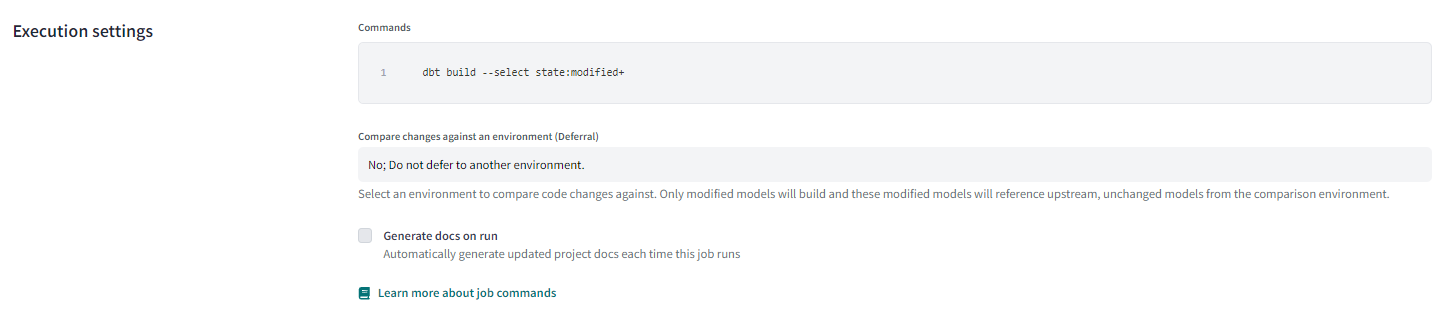
Staging, as the name suggests, acts as an intermediary between raw datasets and the final fact and dimension tables. It helps in transforming raw data into a more usable format. In staging, datasets are typically materialized as views rather than tables.
In the project, you focus on creating production and dbt_name + trips_data_all; the staging dataset serves its role behind the scenes.
# DBT: Docs Served but Not Accessible via Browser
Try removing the network: host line in docker-compose.
# dbt + git: the main branch is "read-only" — how do I make changes?
dbt Cloud (and the dbt VS Code extension) protect the main/default branch by making it read-only. To make changes, create and switch to a feature branch:
In the dbt Cloud IDE, click "create new branch" in the top-left and give it a name.
From the command line:
git checkout -b your-feature-branch
Make your edits, commit, push, then open a pull request to merge back to main:
git add .
git commit -m "your change description"
git push origin your-feature-branch
After the PR is merged on GitHub, the change appears on main.
See the dbt docs on version control basics for more.
# dbt CI: setting up Continuous Integration with GitHub
To enable CI jobs (running dbt on pull requests), dbt Cloud needs a native integration with GitHub, GitLab, or Azure DevOps — the generic "Git Clone" / SSH connection method does not unlock the "Run on Pull Requests" trigger and you'll see:
Triggered by pull requests
This feature is only available for dbt repositories connected through dbt Cloud's native integration with Github, Gitlab, or Azure DevOps
The dbt Cloud Developer plan also doesn't support CI jobs — you need Team or Enterprise. (See the dbt Cloud CI prerequisites.)
Switch from Git Clone to native GitHub integration
Connect your GitHub account in dbt Cloud: Profile Settings → Linked Accounts → connect GitHub and grant the requested permissions. (dbt docs)
Disconnect the existing Git Clone connection: Account Settings → Projects → your project → Repository → Disconnect.
Reconfigure with the GitHub option, selecting the repository.
(If your dbt project lives in a subfolder of the repo) set Project Subdirectory in the project settings to point to that folder.
In Deploy → Job → Configuration → Triggers, you should now see "Run on Pull Requests" as an available toggle.
CI job runs but says "valid dbt project was not found"
Usually one of:
- Project is in a subfolder, but Project Subdirectory isn't set.
- The CI environment is configured to run on a custom branch that doesn't exist.
- Uncommitted/unpushed changes.
In Deploy → Environments → your environment → Settings, set "Custom branch" if you're not on the default branch, and confirm it matches a real branch in GitHub.
# Compilation Error: Model 'model.my_new_project.stg_green_tripdata' (models/staging/stg_green_tripdata.sql) depends on a source named 'staging.green_trip_external' which was not found
If you're following video DE Zoomcamp 4.3.1 - Building the First DBT Models, you may encounter an issue at 14:25 where the Lineage graph isn't displayed and a Compilation Error occurs, as shown in the attached image.
Don't worry—a quick fix for this is to simply save your schema.yml file. Once you've done this, you should be able to view your Lineage graph without any further issues.
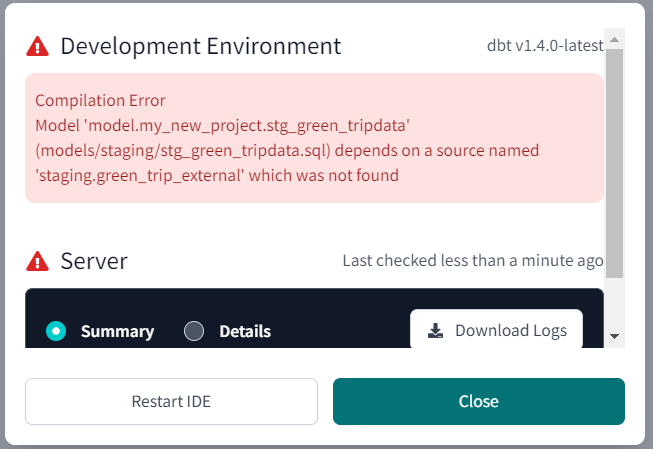
# Compilation Error in test accepted_values_stg_green_tripdata_Payment_type__False___var_payment_type_values_ (models/staging/schema.yml) 'NoneType' object is not iterable
In the macro test_accepted_values (found in tests/generic/builtin.sql), an error was triggered by the test accepted_values_stg_green_tripdata_Payment_type__False___var_payment_type_values_ located in models/staging/schema.yml.
To resolve this issue, ensure the following variable is added to your dbt_project.yml file:
vars:
  payment_type_values: [1, 2, 3, 4, 5, 6]
# dbt: macro errors with get_payment_type_description(payment_type)
You will face this issue if you copied and pasted the exact macro directly from the data-engineering-zoomcamp repo.
BigQuery adapter: Retry attempt 1 of 1 after error: BadRequest('No matching signature for operator CASE for argument types: STRING, INT64, STRING, INT64, STRING, INT64, STRING, INT64, STRING, INT64, STRING, INT64, STRING, NULL at [35:5]; reason: invalidQuery, location: query, message: No matching signature for operator CASE for argument types: STRING, INT64, STRING, INT64, STRING, INT64, STRING, INT64, STRING, INT64, STRING, INT64, STRING, NULL at [35:5]')
To resolve this issue, change the data type of the numbers (1, 2, 3, etc.) to text by enclosing them in quotes. The payment_type data type should be a string.
Updated Macro
{#
This macro returns the description of the payment_type
#}

{% macro get_payment_type_description(payment_type) -%}
    case {{ payment_type }}
        when '1' then 'Credit card'
        when '2' then 'Cash'
        when '3' then 'No charge'
        when '4' then 'Dispute'
        when '5' then 'Unknown'
        when '6' then 'Voided trip'
    end
{%- endmacro %}
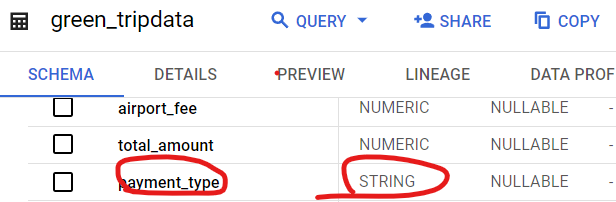
# Troubleshooting in dbt:
The dbt error log contains a link to BigQuery. When you follow it, you will see your query, and the problematic line will be highlighted.
# DBT: Why changing the target schema to “marts” actually creates a schema named “dbt_marts” instead?
It is a default behavior of dbt to append custom schema to the initial schema. To override this behavior, create a macro named generate_schema_name.sql:
{% macro generate_schema_name(custom_schema_name, node) -%}

{%- set default_schema = target.schema -%}

{%- if custom_schema_name is none -%}

{{ default_schema }}

{%- else -%}

{{ custom_schema_name | trim }}

{%- endif -%}

{%- endmacro %}
Now you can override the default custom schema in dbt_project.yml.
# How to set subdirectory of the github repository as the dbt project root
There is a project setting which allows you to set Project subdirectory in dbt cloud:
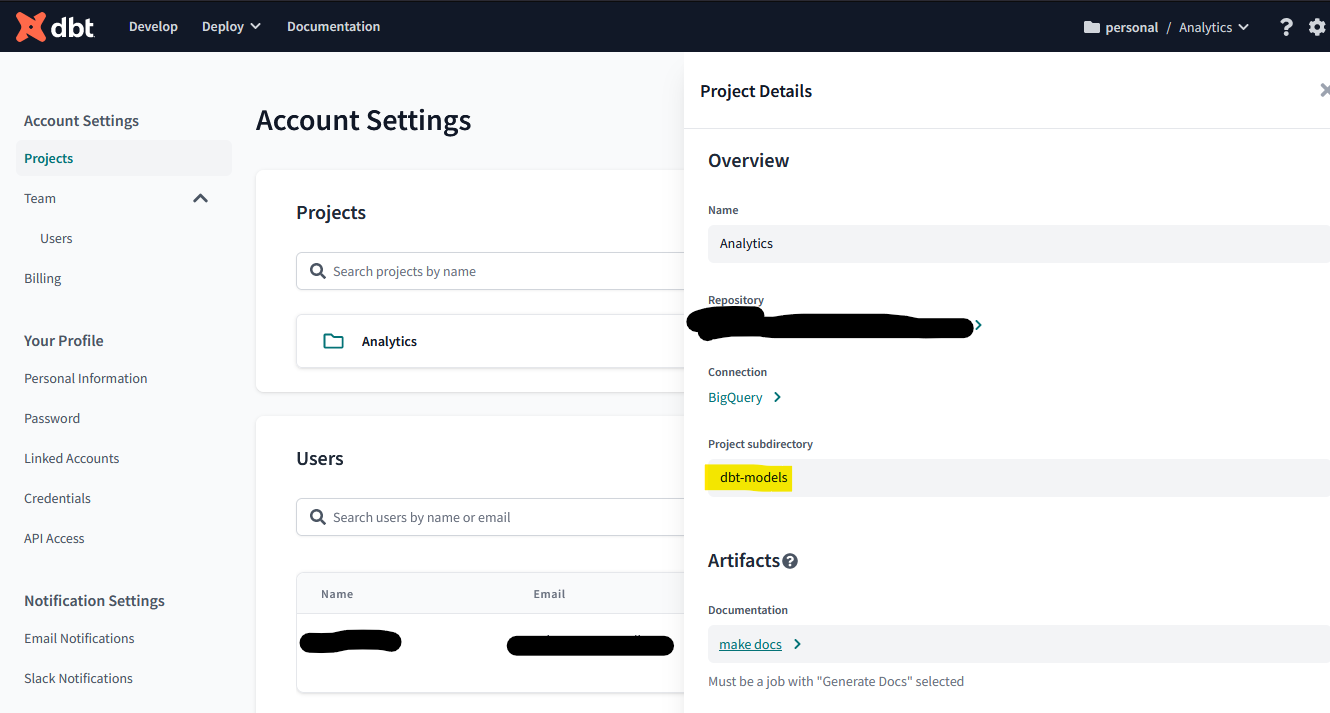
# Compilation Error: Model 'model.XXX' (models/<model_path>/XXX.sql) depends on a source named '<a table name>' which was not found
Remember to modify your .sql models to read from existing table names in BigQuery/Postgres DB.
Example:
select * from {{ source('staging', '<your table name in the database>') }}
# Compilation Error: Model '<model_name>' (<model_path>) depends on a node named '<seed_name>' which was not found (Production Environment)
Make sure that you create a pull request from your Development branch to the Production branch (main by default). After that, check in your seeds folder to ensure the seed file is inside it. Another thing to check is your .gitignore file. Make sure that the .csv extension is not included.
# When loading GitHub repo raise exception that 'taxi_zone_lookup' not found
Seed files are loaded from a directory named 'seed'. Therefore, you should rename the directory currently named 'data' to 'seed'.
# Inconsistent number of rows when re-running fact_trips model
This issue arises from the way deduplication is handled in two staging files.
Solution:
- Add an
ORDER BYclause in thePARTITION BYsection of both staging files. - Continue adding columns to the
ORDER BYclause until the row count in thefact_tripstable is consistent upon re-running the model.
Explanation:
We partition by vendor_id and pickup_datetime, selecting the first row (rn=1) from these partitions. These partitions lack an order, so every execution might yield a different first row. The inconsistency leads to different rows being processed, possibly with or without an unknown borough. Consequently, the fact_trips model discards a varying number of rows based on the presence of unknown boroughs.
# CREATE TABLE has columns with duplicate name locationid.
This error could result if you are using a SELECT * query without specifying the table names.
Example:
WITH dim_zones AS (
  SELECT * FROM `engaged-cosine-374921`.`dbt_victoria_mola`.`dim_zones`
  WHERE borough != 'Unknown'
),
fhv AS (
  SELECT * FROM `engaged-cosine-374921`.`dbt_victoria_mola`.`stg_fhv_tripdata`
)
SELECT * FROM fhv
INNER JOIN dim_zones AS pickup_zone
ON fhv.PUlocationID = pickup_zone.locationid
INNER JOIN dim_zones AS dropoff_zone
ON fhv.DOlocationID = dropoff_zone.locationid;
To resolve, replace with:
SELECT fhv.* FROM fhv
# "Bad int64 value" / Parquet column has type DOUBLE which does not match INT64 — casting failures on green tripdata
Several columns in the green taxi data — ehail_fee, ratecodeid, trip_type, payment_type — can fail to cast to INT64 for two related reasons:
- The Parquet file stores the column as
DOUBLE(BigQuery sees the schema mismatch directly). - The values look like
1.0,2.0, etc. — they're whole numbers but stored as floats, which BigQuery'sINT64cast rejects.
You'll see errors like:
Parquet column 'ehail_fee' has type DOUBLE which does not match the target cpp_type INT64
Bad int64 value: 0.0
Bad int64 value: 1.0
Option 1: Use safe_cast in your dbt model
safe_cast returns NULL instead of erroring on a failed cast:
{{ dbt.safe_cast('ehail_fee', api.Column.translate_type("numeric")) }} as ehail_fee,
Or without dbt_utils:
safe_cast(ehail_fee as numeric) as ehail_fee
For ehail_fee specifically, prefer numeric over integer — fees aren't always whole numbers.
Option 2: Drop the column
If the column isn't used downstream, just drop it:
SELECT * EXCEPT (ehail_fee) FROM ...
Option 3: Strip the trailing .0 before casting
Useful for fields like ratecodeid and trip_type where the values really are integers but stored as floats:
CAST(REGEXP_REPLACE(CAST(rate_code AS STRING), r'\.0$', '') AS INT64) AS ratecodeid,

CAST(
    CASE
        WHEN REGEXP_CONTAINS(CAST(trip_type AS STRING), r'\.\d+') THEN NULL
        ELSE CAST(trip_type AS INT64)
    END AS INT64
) AS trip_type
Option 4: Fix the upstream Parquet schema
If you control the ingestion, cast to Int64 (pandas nullable int) before writing:
df['ehail_fee'] = df['ehail_fee'].astype('Int64')
This produces a Parquet file with the right schema and avoids the issue entirely.
# The - vars argument must be a YAML dictionary, but was of type str
Remember to add a space between the variable and the value. Otherwise, it won't be interpreted as a dictionary.
Correct usage:
dbt run --var 'is_test_run: false'
Not able to change Environment Type as it is greyed out and inaccessible. You don't need to change the environment type. If you are following the videos, you are creating a Production Deployment, so the only available option is the correct one.
# Could not parse the dbt project. Please check that the repository contains a valid dbt project.
Running the Environment on the master branch causes this error. You must activate the “Only run on a custom branch” checkbox and specify the branch you are working on when the Environment is set up.
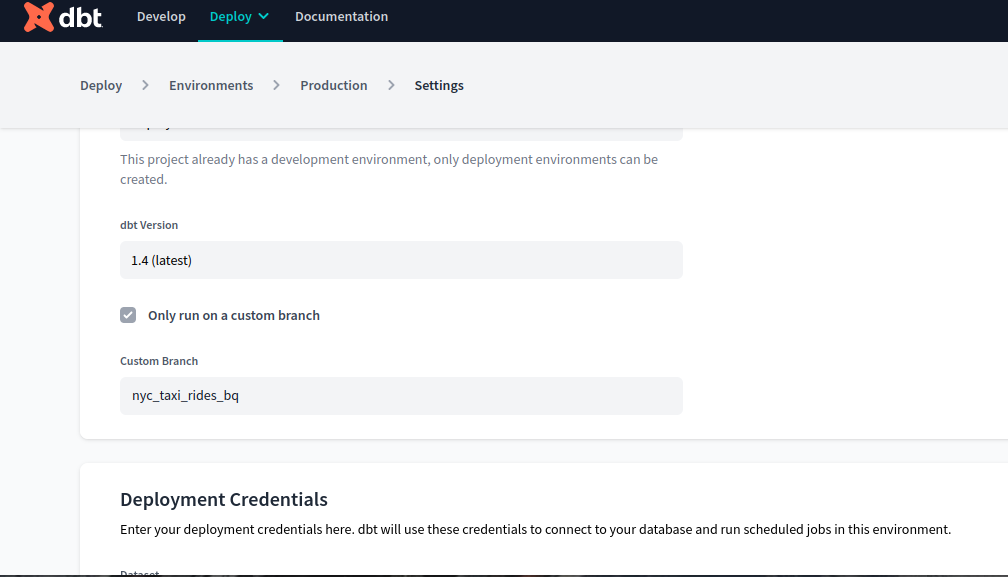
# How do I migrate from a dbt Cloud managed repository to a GitHub repository?
- Save and commit your progress in your dbt projects. This ensures your files are up-to-date before you download them.
- Go to your profile settings in dbt.
- Under 'Settings' on the left-hand side, click 'Projects'.
- Click your project name (e.g., 'taxi_rides_ny').
- Under 'Repository', click the link (e.g., 'git@github.com:dbt-cloud-managed...').
- Download the zip file of your repository. Unzip the file, then upload the files/folders for your dbt project to your GitHub repo.
- After your files are saved in your GitHub repo, go back to the 'Repository details' dbt page. Click 'Disconnect' and 'Confirm Disconnect'. This will remove dbt's managed repo from your project.
- Follow the instructions on the dbt page to link your GitHub account. You only need to give it access to the repo you are using for this project.
- The dbt page should prompt you to set up a repo for your project. Connect it to your GitHub repo.
- After your project is connected to your GitHub repo, go to 'Studio' to view your project. You should see the folders of your GitHub repo.
- Click 'Initiate project'. This will re-create dbt folders/files in the root (main area) of your repo.
If you want the dbt project to live in a subfolder of your repo (e.g. Week_4/), see the dbt subfolder FAQ.
# Made change to your modeling files and commit to your development branch, but Job still runs on old file?
Switch to the main branch and make a pull request from the development branch. This will take you to GitHub. Approve the merge and rerun your job; it should work as planned now.
# Setup: I’ve set Github and Bigquery to dbt successfully. Why nothing showed in my Develop tab?
Before you can develop some data model on dbt, you should:
Create a Development Environment: Ensure that your development environment is properly configured.
Set Parameters: Specify necessary parameters within the environment.
Once the model has been developed, also create a deployment environment to create and run jobs.
# DBT: Running `dbt run --models stg_green_tripdata --var 'is_test_run: false'` is not returning anything:
Use the syntax below instead if the code in the tutorial is not working.
dbt run --select stg_green_tripdata --vars '{"is_test_run": false}'
# DBT: Error: No module named 'pytz' while setting up dbt with docker
Following dbt with BigQuery on Docker readme.md, after running docker-compose build and docker-compose run dbt-bq-dtc init, you might encounter the error:
ModuleNotFoundError: No module named 'pytz'
Solution:
Add the following line in the Dockerfile under FROM --platform=$build_for python:3.9.9-slim-bullseye as base:
RUN python -m pip install --no-cache pytz
# VS Code: NoPermissions (FileSystemError): Error: EACCES: permission denied (linux)
If you encounter problems editing dbt_project.yml when using Docker after running docker-compose run dbt-bq-dtc init, to change the profile ‘taxi_rides_ny’ to 'bq-dbt-workshop’, execute the following command:
sudo chown -R username path
If you see the error "DBT - Internal Error: Profile should not be None if loading is completed" when running dbt debug, change the directory to the newly created subdirectory, such as the taxi_rides_ny directory, which contains the dbt project.
# DBT Deploy: Error When trying to run the dbt project on Prod
When running the dbt project on production, ensure the following steps:
Pull Request and Merge
- Make the pull request and merge the branch into the main.
Version Check
- Ensure you have the latest version if changes were made to the repository elsewhere.
Project File Accessibility
- Verify that the
dbt_project.ymlfile is accessible to the project. If not, refer to the solution for the error: "Dbt: This dbt Cloud run was cancelled because a valid dbt project was not found."
- Verify that the
Dataset Consistency
- Confirm that the name assigned to the dataset on BigQuery matches the name specified in the production environment configuration on dbt Cloud.
# Homework: Ingesting FHV data from the course's GitHub mirror
If you're loading FHV trip data from the course's GitHub mirror into GCS / BigQuery and the input file isn't recognised as parquet, two things to check:
Append
?raw=trueto the URL so GitHub serves the raw file rather than its HTML preview page. For a templated URL, append?raw=trueafter the.parquet:.../fhv_tripdata_<YYYY>-<MM>.parquet?raw=trueUse the
blobURL, nottree— the prefix should look like:https://github.com/alexeygrigorev/datasets/blob/master/nyc-tlc/fhvIf your URL has
treeinstead ofblob, replace it.
The curl -sSLf (or wget) call you use to download the file doesn't need to change.
# Ingesting FHV: alternative with kestra
Add this task based on the previous ones:
- id: if_fhv_taxi
  type: io.kestra.plugin.core.flow.If
  condition: "{{inputs.taxi == 'fhv'}}"
  then:
  - id: bq_fhv_tripdata
    type: io.kestra.plugin.gcp.bigquery.Query
    sql: |
      CREATE TABLE IF NOT EXISTS `{{kv('GCP_PROJECT_ID')}}.{{kv('GCP_DATASET')}}.fhv_tripdata`
      (
        unique_row_id BYTES OPTIONS (description = 'A unique identifier for the trip, generated by hashing key trip attributes.'),
        filename STRING OPTIONS (description = 'The source filename from which the trip data was loaded.'),
        dispatching_base_num STRING,
        pickup_datetime TIMESTAMP,
        dropoff_datetime TIMESTAMP,
        PUlocationID NUMERIC,
        DOlocationID NUMERIC,
        SR_Flag STRING,
        Affiliated_base_number STRING
      )
      PARTITION BY DATE(pickup_datetime);
- id: bq_fhv_table_ext
  type: io.kestra.plugin.gcp.bigquery.Query
  sql: |
    CREATE OR REPLACE EXTERNAL TABLE `{{kv('GCP_PROJECT_ID')}}.{{render(vars.table)}}_ext`
    (
      dispatching_base_num STRING,
      pickup_datetime TIMESTAMP,
      dropoff_datetime TIMESTAMP,
      PUlocationID NUMERIC,
      DOlocationID NUMERIC,
      SR_Flag STRING,
      Affiliated_base_number STRING
    )
    OPTIONS (
      format = 'CSV',
      uris = ['{{render(vars.gcs_file)}}'],
      skip_leading_rows = 1,
      ignore_unknown_values = TRUE
    );
- id: bq_fhv_table_tmp
  type: io.kestra.plugin.gcp.bigquery.Query
  sql: |
    CREATE OR REPLACE TABLE `{{kv('GCP_PROJECT_ID')}}.{{render(vars.table)}}`
    AS
    SELECT
      MD5(CONCAT(
        COALESCE(CAST(pickup_datetime AS STRING), ""),
        COALESCE(CAST(dropoff_datetime AS STRING), ""),
        COALESCE(CAST(PUlocationID AS STRING), ""),
        COALESCE(CAST(DOLocationID AS STRING), "")
      )) AS unique_row_id,
      "{{render(vars.file)}}" AS filename,
      *
    FROM `{{kv('GCP_PROJECT_ID')}}.{{render(vars.table)}}_ext`;
- id: bq_fhv_merge
  type: io.kestra.plugin.gcp.bigquery.Query
  sql: |
    MERGE INTO `{{kv('GCP_PROJECT_ID')}}.{{kv('GCP_DATASET')}}.fhv_tripdata` T
    USING `{{kv('GCP_PROJECT_ID')}}.{{render(vars.table)}}` S
    ON T.unique_row_id = S.unique_row_id
    WHEN NOT MATCHED THEN
      INSERT (unique_row_id, filename, dispatching_base_num, pickup_datetime, dropoff_datetime, PUlocationID, DOlocationID, SR_Flag, Affiliated_base_number)
      VALUES (S.unique_row_id, S.filename, S.dispatching_base_num, S.pickup_datetime, S.dropoff_datetime, S.PUlocationID, S.DOlocationID, S.SR_Flag, S.Affiliated_base_number);
Add a trigger too:
- id: fhv_schedule
  type: io.kestra.plugin.core.trigger.Schedule
  cron: "0 11 1 * *"
  inputs:
    taxi: fhv
And modify inputs:
inputs:
- id: taxi
  type: SELECT
  displayName: Select taxi type
  values: [yellow, green, fhv]
  defaults: green
# Homework: Ingesting NYC TLC Data
The easiest way to upload datasets from GitHub for the homework is by utilizing this script: git_csv_to_gcs.py. It is similar to a script provided in 03-data-warehouse/extras/web_to_gcs.py. <{IMAGE:image_id}>
# How to set environment variable easily for any credentials
If you need to securely set up credentials for a project and intend to push it to a git repository, using an environment variable is a recommended option.
For example, for scripts like web_to_gcs.py or git_csv_to_gcs.py, you may need to set these variables:
GOOGLE_APPLICATION_CREDENTIALSGCP_GCS_BUCKET
The easiest option to manage this is to use a .env file with dotenv.
To install and utilize this package, follow these steps:
Install
python-dotenv:pip install python-dotenvAdd the following code to inject these variables into your project:
from dotenv import load_dotenv
import os

# Load environment variables from .env file
load_dotenv()

# Now you can access environment variables like GCP_GCS_BUCKET and GOOGLE_APPLICATION_CREDENTIALS
credentials_path = os.getenv("GOOGLE_APPLICATION_CREDENTIALS")
BUCKET = os.environ.get("GCP_GCS_BUCKET")
# Schema and type errors when ingesting FHV data (timestamps fail to parse, Parquet column type mismatches, NULL handling)
The FHV 2019 dataset has multiple schema gotchas. The fix depends on which file format you ingested.
CSV: timestamps fail to parse
Could not parse 'pickup_datetime' as a timestamp
Define the timestamp columns as STRING in the external table, then cast them in the staging model. This avoids BigQuery rejecting rows with malformed timestamps at load time:
CREATE OR REPLACE EXTERNAL TABLE `gcp_project.trips_data_all.fhv_tripdata` (
  dispatching_base_num STRING,
  pickup_datetime STRING,
  dropoff_datetime STRING,
  PUlocationID STRING,
  DOlocationID STRING,
  SR_Flag STRING,
  Affiliated_base_number STRING
)
OPTIONS (
  format = 'csv',
  uris = ['gs://bucket/*.csv']
);
In your staging model, cast through TIMESTAMP(CAST(... AS STRING)):
SELECT
  TIMESTAMP(CAST(pickup_datetime AS STRING)) AS pickup_datetime,
  TIMESTAMP(CAST(dropoff_datetime AS STRING)) AS dropoff_datetime,
  ...
FROM {{ ref('stg_fhv_tripdata') }}
To skip type-detection issues entirely, you can also load with bq load --autodetect --allow_quoted_newlines --source_format=CSV from a .csv.gz file in GCS — see the BigQuery CLI external-table FAQ.
Parquet: column type mismatch (FLOAT vs INT) or NULL location IDs
Parquet column 'PULocationID' has type INT64 which does not match the target cpp_type DOUBLE
Could not parse SR_Flag as Float64
Pandas reads integer columns with NULL values as floats by default, which produces a Parquet file with DOUBLE columns. BigQuery's external table then conflicts with your declared schema.
Two options:
a) Define the external table schema with FLOAT64 for the offending location ID columns (matches what Parquet actually has):
CREATE OR REPLACE EXTERNAL TABLE `dw-bigquery-week-3.trips_data_all.external_tlc_fhv_trips_2019` (
  dispatching_base_num STRING,
  pickup_datetime TIMESTAMP,
  dropoff_datetime TIMESTAMP,
  PUlocationID FLOAT64,
  DOlocationID FLOAT64,
  SR_Flag FLOAT64,
  Affiliated_base_number STRING
)
OPTIONS (
  format = 'PARQUET',
  uris = ['gs://project/fhv_2019_*.parquet']
);
b) Fix the Parquet at write time by using pandas' nullable Int64:
df['PUlocationID'] = df['PUlocationID'].astype('Int64')
df['DOlocationID'] = df['DOlocationID'].astype('Int64')
Or coerce the whole DataFrame:
df.fillna(-999999, inplace=True)
df = df.convert_dtypes()
df = df.replace(-999999, None)
This produces a Parquet file with the right INT64 schema and avoids the issue downstream.
When the column types differ between months
Some FHV month files have PUlocationID as INT, others as FLOAT, leading to:
error: Error while reading data: Parquet column 'PUlocationID' has type INT which does not match the target cpp_type DOUBLE
The first file BigQuery loads defines the table schema, and subsequent files with a different schema fail. Force consistent types when generating the Parquet (option b above) or load the months that have the same schema in groups.
"Bad int64 value" on cast in the dbt model
For ehail_fee, ratecodeid, trip_type, etc. — see the dedicated bad-int64 / parquet-schema FAQ.
# Join Error on LocationID: "Unable to find common supertype for templated argument"
No matching signature for operator = for argument types: STRING, INT64
Signature: T1 = T1
Error: Unable to find common supertype for templated argument.
Solution:
Make sure the LocationID field is of the same type in both tables. If it is in string format in one table, use the following dbt code to convert it to an integer:
{{ dbt.safe_cast("PULocationID", api.Column.translate_type("integer")) }} as pickup_locationid
# Google Looker Studio: you have used up your 30-day trial
When accessing Looker Studio through the Google Cloud Project console, you may be prompted to subscribe to the Pro version and receive the following errors:
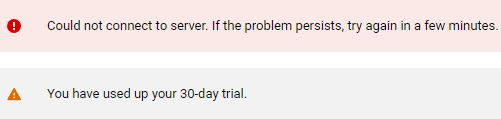
Instead, navigate to https://lookerstudio.google.com/navigation/reporting which will take you to the free version.
# How does dbt handle dependencies between models?
Dbt provides a mechanism called ref to manage dependencies between models. By referencing other models using the ref keyword in SQL, dbt automatically understands the dependencies and ensures the correct execution order.
# What is the fastest way to upload taxi data to dbt-postgres?
Use the PostgreSQL COPY FROM feature, which is compatible with CSV files.
Steps:
Create the Table
First, create your table (example):
CREATE TABLE taxis (

…

);
Use COPY Functionality
Use the
COPYcommand (example):COPY taxis FROM PROGRAM 'url' WITH ( FORMAT csv, HEADER true, ENCODING utf8 );- Syntax for
COPY:
COPY table_name [ ( column_name [, ...] ) ] FROM { 'filename' | PROGRAM 'command' | STDIN } [ [ WITH ] ( option [, ...] ) ] [ WHERE condition ]- Syntax for
# dbt: Where should we create `profiles.yml`?
For local environments using dbt-core, the profile configuration is valid for all projects. Note: dbt Cloud doesn’t require it.
The ~/.dbt/profiles.yml file should be located in your user's home directory. On Windows, this would typically be:
C:\Users\<YourUsername>\.dbt\profiles.yml
Replace <YourUsername> with your actual Windows username. This file is used by dbt to store connection profiles for different projects.
Here's how you can create the profiles.yml file in the appropriate directory:
- Open File Explorer and navigate to
C:\Users\<YourUsername>\. - Create a new folder named
.dbtif it doesn't already exist. - Inside the
.dbtfolder, create a new file namedprofiles.yml.
Usage example can be found here.
# dbt: Are there UI options for dbt Core like dbt Cloud?
While dbt Core does not have an official UI like dbt Cloud, there are several tools available that provide UI functionality:
Altimate's VS Code Extension:
- Use the VS Code dbt Power User extension.
- Sign up for the community plan for free usage at Altimate and add the API into your VS Code extension.
VSCode Snippets for dbt and Jinja:
- Access the snippets package for SQL, YAML, and Markdown here.
Monitoring with Elementary:
- Monitor dbt projects using Elementary.
- Learn more about its setup and features in this Medium article.
# When configuring the profiles.yml file for dbt-postgres with jinja templates with environment variables, I'm getting "Credentials in profile \"PROFILE_NAME\", target: 'dev', invalid: '5432' is not of type 'integer'"
Make sure that the port number is set as an integer in your profiles.yml file. Environment variables are usually strings, so you need to explicitly convert them to integers in Jinja. Update the line that sets the port with something like:
port: {{ env_var('DB_PORT') | int }}
This will ensure that the value is treated as an integer.
# DBT: The database is correct but I get Error with Incorrect Schema in Models
What to do if your dbt model fails with an error similar to:
DBT-CORE
Check profiles.yml:
- Ensure your
profiles.ymlfile is correctly configured with the correct schema and database under your target. This file is typically located in~/.dbt/.
Example configuration:
DBT-CLOUD-IDE
Check Credentials in dbt Cloud UI:
- Navigate to the Credentials section in the dbt Cloud project settings.
- Ensure the correct database and schema are set (e.g., ‘my_dataset’).
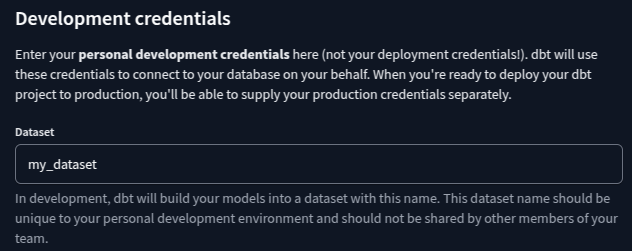
Verify Environment Settings:
- Double-check that you are working in the correct environment (dev, prod, etc.), as dbt Cloud allows different settings for different environments.
No Need for profiles.yml:
- In dbt Cloud, you don’t need to configure
profiles.ymlmanually. All connection settings are handled via the UI.
# DBT: DBT allows only 1 project in free developer version.
Yes, DBT allows only 1 project under one account. But you can create multiple accounts as shown below:
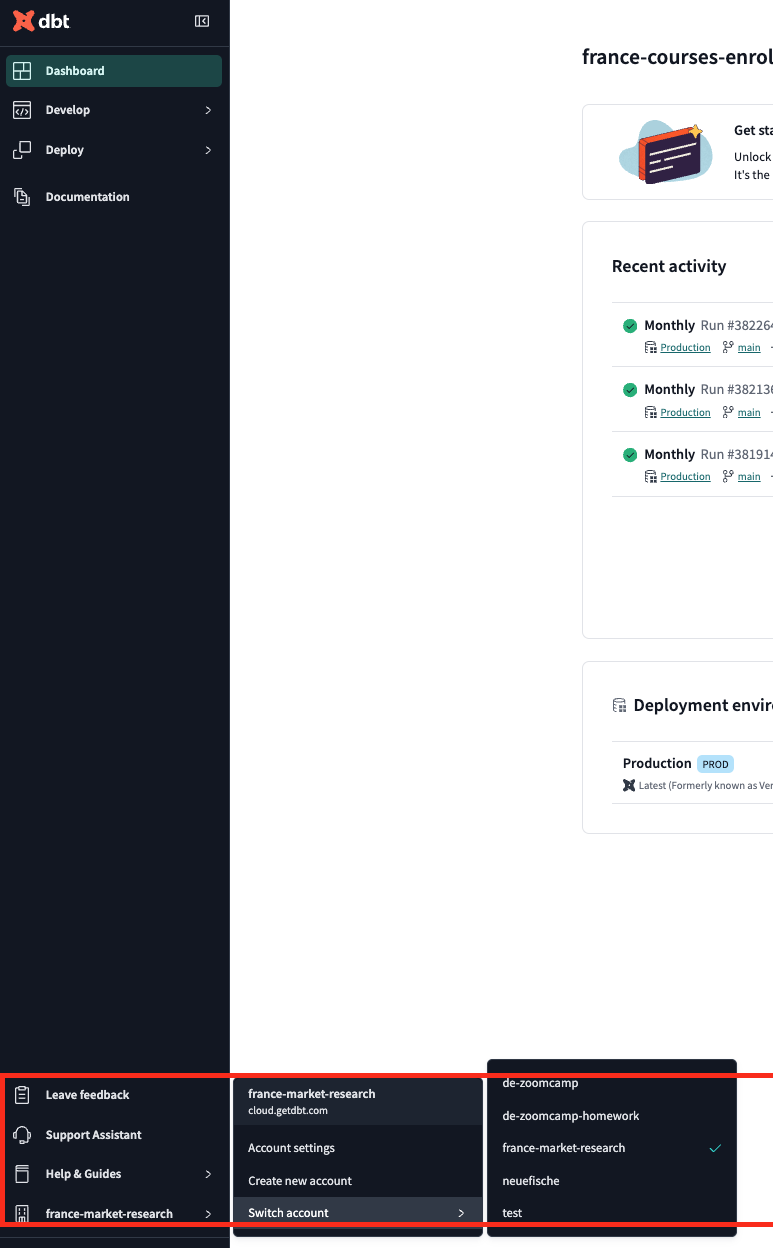
# Power user for dbt vscode extension keeps asking to install dbt core even though dbt is installed in a virtual environment
Power user for the dbt VS Code extension keeps prompting to install dbt core even though dbt is already installed in your virtual environment.
Steps to resolve
- Activate your virtual environment:
# Unix/macOS
source <path-to-venv>/bin/activate

# Windows
<path-to-venv>\Scripts\activate
- In your dbt project folder (the one containing
dbt_project.yml), run:
dbt debug
Copy the Python interpreter path shown by
dbt debug(the path to the Python executable inside your virtual environment).Configure VS Code to use that interpreter:
Ctrl/Cmd+Shift+P -> Python: Select Interpreter -> Enter interpreter path
- Paste the copied path and press Enter. Then check the bottom-left corner of VS Code to confirm that dbt core shows with a checkmark, indicating it is using the selected interpreter.
If the prompt persists, ensure there are no conflicting Python environments and consider restarting VS Code.
# dbt Cloud: Connecting to BigQuery via Workload Identity Federation won't work — how to fix it?
When setting up a dbt Cloud connection to BigQuery, you might try using Workload Identity Federation (WIF) instead of a JSON service account key — especially if your GCP organization has disabled service account key creation.
This route does not work reliably with dbt Cloud. The "Save" button keeps turning into "Retry" regardless of your WIF configuration (pool, principal, OAuth client, etc.).
The solution is to remove the organization policy that blocks service account key creation:
Grant yourself Service Account Key Admin and Organization Policy Administrator roles at the organization level.
Delete the policy that prevents key creation:
gcloud org-policies delete iam.disableServiceAccountKeyCreation --organization=[your-org-id]
Note: Manually disabling legacy and enforced policies via the GCP Console may not work — the CLI command above is what actually removes the restriction.
- Now you can create a JSON key for your BigQuery service account and proceed with the normal dbt Cloud setup.
# dbt: relationships test fails with "depends on a node named 'taxi_zone_lookup.csv' which was not found"
The warning indicates that dbt is trying to reference a model or seed named taxi_zone_lookup.csv, but the ref() function takes the model name, not the file name — so the .csv suffix should not be part of the reference.
Wrong:
- relationships:
    to: ref('taxi_zone_lookup.csv')
    field: locationid
Correct:
- relationships:
    to: ref('taxi_zone_lookup')
    field: locationid
# Documentation or book sign not shown even after doing `dbt docs generate`.
In the free version, it does not show the docs when models are run in the development environment. Create a production job and tick the 'generate docs' section. Execute it, and it will generate the documentation.
# Solving dbt-Athena library conflicts
When working on a dbt-Athena project, do not install dbt-athena-adapter. Instead, always use the dbt-athena-community package, ensuring it matches the version of dbt-core to avoid compatibility conflicts.
Best Practice
Always pin the versions of
dbt-coreanddbt-athena-communityto the same version.Example: dbt-core~=1.9.3 dbt-athena-community~=1.9.3
Why?
dbt-athena-adapteris outdated and no longer maintained.dbt-athena-communityis the actively maintained package and is compatible with the latest versions ofdbt-core.
Steps to Avoid Conflicts
- Check the compatibility matrix in the dbt-athena-community GitHub repository.
- Update
requirements.txtto use the latest compatible versions ofdbt-coreanddbt-athena-community. - Avoid mixing
dbt-athena-adapterwithdbt-athena-communityin the same environment.
By following this practice, you can avoid the conflicts we faced previously and ensure a smooth development experience.
# Can I keep my dbt project in a subfolder of my GitHub repo (instead of the root)?
Yes. The trick is to leave dbt_project.yml at the root of the repo and prefix every path inside it with your subfolder.
For example, to keep all the dbt files in a Week_4/ folder of the repo:
Keep
dbt_project.ymlin the root of your repo. Edit it so every path is prefixed with your subfolder:model-paths: ["Week_4/models"] analysis-paths: ["Week_4/analyses"] test-paths: ["Week_4/tests"] seed-paths: ["Week_4/seeds"] macro-paths: ["Week_4/macros"] snapshot-paths: ["Week_4/snapshots"] target-path: "Week_4/target" clean-targets: - "Week_4/target" - "Week_4/dbt_packages"Save
dbt_project.yml.Review your
.gitignorefor any dbt-related entries and update paths if needed.Delete the duplicate dbt files/folders that dbt initially created in the root of your repo — they aren't used now that paths are pointed at the subfolder. (The
target/folder may re-appear when you run dbt commands; that's fine.)If there's an older copy of
dbt_project.ymlinside the subfolder, delete it so you don't edit the wrong one by accident.Test-run dbt commands from the subfolder to confirm everything works.
# How do I authenticate dbt with BigQuery when service account key creation is disabled and switch to OAuth?
When running dbt debug with BigQuery, authentication issues can occur if your dbt profile uses method: service-account but Google Cloud enforces iam.disableServiceAccountKeyCreation. In that case, use Google Application Default Credentials / OAuth instead.
Update profiles.yml from:
method: service-account
keyfile: "{{ env_var('GOOGLE_APPLICATION_CREDENTIALS') }}"
to:
method: oauth
Example BigQuery profile:
default:
  target: dev
  outputs:
    dev:
      type: bigquery
      method: oauth
      project: "{{ env_var('GCP_PROJECT_ID') }}"
      dataset: "{{ env_var('BIGQUERY_DATASET_GOLD') }}"
      threads: 4
      location: "{{ env_var('GCP_REGION', 'europe-west2') }}"
      priority: interactive
Then authenticate locally:
gcloud auth login
gcloud auth application-default login

gcloud config set project <your-project-id>

gcloud auth application-default set-quota-project <your-project-id>
Finally test:
dbt debug
# Why use dbt if we already have Python?
You could do transformations in Python (with pandas, polars, or by sending SQL to the warehouse yourself), but dbt is built specifically for SQL transformations in a warehouse and gives you a few things for free that you would otherwise build yourself:
- Model dependencies via
ref()— dbt figures out the run order - Tests (not null, unique, accepted values, custom assertions)
- Documentation and lineage graphs
- Environment separation (dev/prod) through profiles
- Incremental models without writing the merge logic by hand
The other reason is where the work happens. When you transform in Python, data flows through your machine (or your worker). When you use dbt with BigQuery, the SQL runs inside BigQuery — no data movement, scales with the warehouse, not with your laptop.
A common split:
- Python for ingestion (APIs, files, anything not already in SQL)
- dbt for transformations once data is in the warehouse
- Python again for anything SQL can't express well (ML features, complex parsing)
So the answer isn't "dbt replaces Python" — it's that dbt is the right tool for the SQL transformation step, and Python stays useful for everything else.
Module 5: Data Platforms (Bruin)
# How do I add the Bruin MCP server to VS Code?
- Open the command palette in your IDE and search for "MCP: Add Server..."
- Choose "Command (stdio)"
- Enter the command:
bruin mcp - Name the server "bruin"
- Choose how to add it:
- Globally: If you are doing local development
- Remotely/Workspace: If you are doing development in GitHub Codespaces
- You should now see "bruin" listed when you use the "MCP: List Servers" command in VS Code.
# When should I use merge instead of append?
Use merge when existing data can be updated. If a record with the same primary key already exists, it will be updated. If it does not exist, it will be inserted.
Common use cases:
- Order status updates
- User profile changes
- CDC-based data processing
materialization:
type: merge
primary_key: order_id
If data never changes, use append.
If data can change, use merge.
# Can I have multiple Bruin projects inside the same Git repository?
Yes, you can have multiple Bruin projects inside the same Git repository. However, bruin init automatically places the .bruin.yml config in the Git root, so you need to manually relocate the config file and explicitly tell Bruin where it lives.
Why this happens: When you run:
bruin init
Bruin detects the nearest .git directory in the parent folders and creates the .bruin.yml there. So if your repository looks like this:
repo/
├── .git/
└── data-platforms/
the config file will be created in repo/, even if you run the command inside data-platforms/.
# Bruin Python asset fails with ArrowInvalid: Cannot locate timezone 'UTC': Timezone database not found
Cause: On Windows, PyArrow has no built-in timezone database. When dlt/ingestr receives a DataFrame with naive (tz-unaware) timestamp columns, it calls pyarrow.compute.assume_timezone("UTC") internally to annotate them — which requires a tzdata file on disk. If that file isn't where PyArrow expects it, the pipeline crashes even if tzdata is listed in your requirements.txt (that package only installs into the asset container, not the host ingestr environment).
Solution: Return timestamps that are already tz-aware UTC from your materialize() function. When columns arrive with timezone info already set, dlt skips the assume_timezone call entirely.
for col in df.columns:
    if pd.api.types.is_datetime64_any_dtype(df[col]):
        if hasattr(df[col].dt, "tz") and df[col].dt.tz is None:
            df[col] = df[col].dt.tz_localize("UTC")
        else:
            df[col] = df[col].dt.tz_convert("UTC")
        # microsecond precision avoids ns-overflow and is what pyarrow prefers
        df[col] = df[col].astype("datetime64[us, UTC]")

df["extracted_at"] = pd.Timestamp.now("UTC").floor("us")
Also bump pyarrow to 14+ in requirements.txt — datetime64[us, UTC] as a pandas dtype was stabilised there:
pyarrow==15.0.2
tzdata==2024.1
# Why do downstream Bruin assets fail with 'Table does not exist' error even though the upstream ingestion asset succeeded?
Bruin creates tables inside schemas (for example ingestion, staging, reports). If you reference a table without its schema, DuckDB will not find it and will raise a “Table does not exist” error, even if the upstream ingestion asset ran successfully. Always use schema-qualified names in downstream assets. You can verify existing tables with:
bruin query -c duckdb-default -q "SELECT table_schema, table_name FROM information_schema.tables;"
Example of the pitfall and the fix:
-- This will fail if the table was created as ingestion.trips_raw
SELECT * FROM trips_raw;

-- Correct:
SELECT * FROM ingestion.trips_raw;
Notes:
- Always reference the fully-qualified table name that the upstream asset created (e.g., ingestion.trips_raw, staging.orders, reports.sales_summary).
- If you’re unsure which schema a table lives in, list tables with the command above and inspect the schema column.
- Consider using explicit schema qualification in all downstream assets to prevent these errors.
# Why does my Bruin seed asset fail with a timeout error related to ingestr or duckdb installation?
Bruin seed assets can fail with a timeout when Bruin dynamically installs the ingestr package and the DuckDB wheel during execution. If the network is slow or unstable, the installer steps may time out, causing the pipeline to fail.
- Bruin uses uv to install required dependencies at run time.
- The ingestr package and the DuckDB wheel are downloaded during seed asset execution.
- Slow or unreliable network connectivity can cause installation to exceed the timeout.
- Increase the HTTP timeout for uv
export UV_HTTP_TIMEOUT=120
Ensure stable network connectivity during seed execution.
For small static lookup tables, replace the seed asset with a SQL asset using a VALUES clause to avoid dynamic dependency installation.
SELECT * FROM (VALUES ('A'), ('B'), ('C')) AS t(col);
- Using SQL VALUES can provide more deterministic local execution when the lookup table is small and static.
- If you frequently depend on large non-static datasets, consider pre-bundling or caching dependencies to reduce runtime installation time.
# Bruin time_interval: Why does the first run fail with a 'table does not exist' catalog error?
The time_interval materialization strategy deletes the target table before loading data for the requested time window. On the first run, the table does not exist yet, so the DELETE statement fails with a catalog error.
How to resolve:
- Run the asset once using create+replace to create the table.
- After the table exists, switch the materialization strategy back to time_interval.
Alternatively, run the pipeline with a full refresh to ensure the table exists before incremental logic runs:
bruin run pipeline --full-refresh
Notes:
- After the initial run creates the table, you can continue using time_interval as intended.
# How to monitor RAM usage when running data pipelines locally?
Monitoring RAM usage when running data pipelines locally is important to prevent out-of-memory failures. The following steps show how to monitor memory on Windows with WSL (Ubuntu by default):
- Install Windows Subsystem for Linux with Ubuntu as the default distribution:
wsl --install
- To see static memory usage (RAM) consumed up to the current time (within WSL):
free -h
- To see memory usage in real time while a process is running (refreshes at your chosen interval):
watch -n 1 free -h
- If you are using Windows, allocate resources to WSL by configuring the .wslconfig file in your Windows home directory (e.g., C:\Users\<your_user>\.wslconfig). A simple setup:
[wsl2]
memory=6GB           # Memory to be allocated
processors=4         # Processors to be allocated
swap=10GB            # Disk memory used to avoid crashes (slower but safer)
- Restart WSL to apply changes:
wsl --shutdown
# Why does DuckDB show “IO Error: Could not set lock on file” after pressing Ctrl+Z in Ubuntu, and how can it be fixed?
Pressing Ctrl+Z while running:
duckdb data.duckdb
does not exit DuckDB. It only suspends the process and returns to the shell. The DuckDB process continues running in the background and still holds a lock on the database file. When running:
duckdb data.duckdb
gain, the message appears:
IO Error: Could not set lock on file
because the original suspended process still owns the file lock. How to fix it:
- Option 1, resume and exit properly
- Bring the suspended process back to the foreground:
fg
- Exit DuckDB properly:
.exit
or press:
Ctrl+D
- Option 2, kill the DuckDB process
- Check the running DuckDB process:
ps -Af | grep duckdb
Example output:
demo 33251 3667 0 08:21 pts/0 00:00:00 duckdb taxi_rides_ny.duckdb
The process ID (PID) is 33251.
2. Kill the process:
kill -9 33251
This releases the file lock.
# libduckdb.so: cannot open shared object file error when running Bruin with DuckDB on Windows 10 / WSL Ubuntu 24.04
The error occurs because the system cannot locate the DuckDB shared library. Resolve by downloading and moving the library to the system's library path:
# 1. Download the Linux AMD64 shared library
wget https://github.com/duckdb/duckdb/releases/download/v1.1.3/libduckdb-linux-amd64.zip

# 2. Unzip the package
unzip libduckdb-linux-amd64.zip

# 3. Move the library to a standard system location
sudo mv libduckdb.so /usr/local/lib/

# 4. Refresh the library cache
sudo ldconfig
Module 6: Spark
# PySpark on Windows: "Python was not found; run without arguments to install from the Microsoft Store"
PySpark spawns Python workers via python.exe, and on Windows that often resolves to the Microsoft Store stub if a real Python isn't on PATH first. The error appears when running UDFs (or any operation that forks a worker).
PYSPARK_PYTHON tells Spark which interpreter to use; setting it explicitly fixes this.
In the same shell where you launch PySpark, set PYSPARK_PYTHON to your project's Python:
# inside an activated venv:
export PYSPARK_PYTHON="$(which python)"
export PYSPARK_DRIVER_PYTHON="$(which python)"
Or set it in the script before creating the SparkSession:
import os, sys
os.environ['PYSPARK_PYTHON'] = sys.executable
os.environ['PYSPARK_DRIVER_PYTHON'] = sys.executable
Running scripts via uv run python script.py also avoids the issue because uv invokes the venv's interpreter directly.
# Cannot find Spark jobs UI at localhost
This is because the current port is in use, so the Spark UI will run on a different port. You can check which port Spark is using by running this command:
spark.sparkContext.uiWebUrl
If it indicates a different port, you should access that specific port instead. Additionally, ensure that there are no other notebooks or processes that might be using the same port. Clean up unused resources to avoid port conflicts.
# Following 5.2.1, I am getting an error - Head:cannot open ‘taxi+_zone_lookup.csv’ for reading: No such file or directory
The latest filename is just taxi_zone_lookup.csv, so it should work after removing the + now.
# Error: java.io.FileNotFoundException
# Code executed:
df = spark.read.parquet(pq_path)

# … some operations on df …

df.write.parquet(pq_path, mode="overwrite")

# Error:
# java.io.FileNotFoundException: File file:/home/xxx/code/data/pq/fhvhv/2021/02/part-00021-523f9ad5-14af-4332-9434-bdcb0831f2b7-c000.snappy.parquet does not exist
The problem is that Spark performs lazy transformations, so the actual action that triggers the job is df.write, which deletes the parquet files it tries to read (mode="overwrite").
Solution:
Write to a different directory:
df.write.parquet(pq_path_temp, mode="overwrite")
# Which type of SQL is used in Spark? Postgres? MySQL? SQL Server?
Spark uses its own type of SQL, known as Spark SQL.
The SQL syntax across various providers is generally similar, as shown below:
SELECT [attributes]
FROM [table]
WHERE [filter]
GROUP BY [grouping attributes]
HAVING [filtering the groups]
ORDER BY [attribute to order]
(INNER/FULL/LEFT/RIGHT) JOIN [table2]
ON [attributes table joining table2] (...)
What differs most between SQL providers are the built-in functions.
For built-in Spark SQL functions, check this link: Spark SQL Functions
Extra information on Spark SQL:
# The spark viewer on localhost:4040 was not showing the current run
Solution:
Ensure you have identified all running Spark notebooks. If multiple notebooks are running, each will attempt to use available ports starting from 4040.
If a port is in use, Spark automatically assigns the next available port (e.g., 4041, 4042, etc.).
To find the exact port being used by your current Spark application, run the following command:
spark.sparkContext.uiWebUrlThe result will provide the URL, for example:
[172.19.10.61:4041](http://172.19.10.61:4041).If the expected port does not show your current run, verify that cleanup has been performed on closed or non-running containers.
# Spark: BigQuery connector Automatic configuration
To automatically configure the Spark BigQuery connector, you can create a SparkSession by specifying the spark.jars.packages configuration.
spark = SparkSession.builder
    .master('local')
    .appName('bq')
    .config("spark.jars.packages", "com.google.cloud.spark:spark-bigquery-with-dependencies_2.12:0.23.2")
    .getOrCreate()
This approach automatically downloads the required dependency jars and configures the connector, eliminating the need to manually manage this dependency. More details are available here.
# How can I read a small number of rows from the parquet file directly?
To read a small number of rows from a parquet file, you can use PyArrow or Apache Spark:
Using PyArrow
from pyarrow.parquet import ParquetFile

pf = ParquetFile('fhvhv_tripdata_2021-01.parquet')

# PyArrow builds tables, not dataframes

tbl_small = next(pf.iter_batches(batch_size=1000))

# Convert the table to a DataFrame

df = tbl_small.to_pandas()
Alternatively, without PyArrow
df = spark.read.parquet('fhvhv_tripdata_2021-01.parquet')

df1 = df.sort('DOLocationID').limit(1000)

pdf = df1.select("*").toPandas()
# DataType error when creating Spark DataFrame with a specified schema?
When defining the schema for a Spark DataFrame, you might encounter a data type error if you're using a Parquet file with the schema definition from the TLC example. The error occurs because the PULocationID and DOLocationID columns are defined as IntegerType, but the Parquet file uses INT64.
You'll get an error like:
Parquet column cannot be converted in file [...] Column [...] Expected: int, Found: INT64
To resolve this issue:
- Change the schema definition from
IntegerTypetoLongType. This adjustment should align the expected and actual data types, allowing the DataFrame to be created successfully.
# Remove white spaces from column names in Pyspark
df_finalx = df_finalw.select([col(x).alias(x.replace(" ", "")) for x in df_finalw.columns])
# Compression Error: zcat output is gibberish, seems like still compressed
In the code along from Video 5.3.3, Alexey downloads the CSV files from the NYT website and gzips them in their bash script. Currently (2023), if we download the data from the GH course repo, it is already zipped as csv.gz files. Following the video exactly would zip them again, leading to gibberish output when using zcat, as it only unzips the file once.
Solution: Do not gzip the files downloaded from the course repo. Simply use wget to download and save them as csv.gz files. Then the zcat command and the showSchema command will work correctly.
URL="${URL_PREFIX}/${TAXI_TYPE}/${TAXI_TYPE}_tripdata_${YEAR}-${FMONTH}.csv.gz"

LOCAL_PREFIX="data/raw/${TAXI_TYPE}/${YEAR}/${FMONTH}"

LOCAL_FILE="${TAXI_TYPE}_tripdata_${YEAR}_${FMONTH}.csv.gz"

LOCAL_PATH="${LOCAL_PREFIX}/${LOCAL_FILE}"

echo "downloading ${URL} to ${LOCAL_PATH}"

mkdir -p ${LOCAL_PREFIX}

wget ${URL} -O ${LOCAL_PATH}

echo "compressing ${LOCAL_PATH}"

# gzip ${LOCAL_PATH} <- uncomment this line
# Connecting from local Spark to GCS: Spark does not find my Google credentials as shown in the video?
Make sure you have your credentials for your GCP in your VM under the location defined in the script.
# How do you read data stored in GCS on pandas with your local computer?
To do this:
Install
gcsfs:pip install gcsfsCopy the URI path to the file and use the following command to read it:
df = pandas.read_csv('gs://path/to/your/file.csv')
# TypeError when using spark.createDataFrame function on a pandas df
Error:
spark.createDataFrame(df_pandas).schema

TypeError: field Affiliated_base_number: Can not merge type <class 'pyspark.sql.types.StringType'> and <class 'pyspark.sql.types.DoubleType'>
Solution:
Reason:
- The
Affiliated_base_numberfield is a mix of letters and numbers, so it cannot be set toDoubleType. The suitable type would beStringType. Spark'sinferSchemais more accurate than Pandas' infer type method in this case. SetinferSchematotruewhen reading the CSV to prevent data removal.
- The
Implementation:
df = spark.read \
  .options(
    header = "true", \
    inferSchema = "true"
  ) \
  .csv('path/to/your/csv/file/')
Alternative Solution:
- Problem: Some rows in
affiliated_base_numberare null, and therefore are assigned the datatypeString, which cannot be converted toDouble. - Solution: Only take rows from the pandas df that are not null in the 'Affiliated_base_number' column before converting it to a PySpark DataFrame.
# Only take rows that have no null values pandas_df = pandas_df[pandas_df.notnull().all(1)]- Problem: Some rows in
# MemoryManager: Total allocation exceeds 95.00% (1,020,054,720 bytes) of heap memory
Default executor memory is 1GB. This error appeared when working with the homework dataset.
Error:
MemoryManager: Total allocation exceeds 95.00% (1,020,054,720 bytes) of heap memoryScaling row group sizes to 95.00% for 8 writers
Solution:
Increase the memory of the executor when creating the Spark session like this:
spark = SparkSession.builder \
    .master("local[*]") \
    .appName('test') \
    .config("spark.executor.memory", "4g") \
    .config("spark.driver.memory", "4g") \
    .getOrCreate()
Remember to restart the Jupyter session (i.e., close the Spark session) or the config won’t take effect.
# hadoop “wc -l” is giving a different result than shown in the video
If you are using wc -l fhvhv_tripdata_2021-01.csv.gz with the gzip file as the file argument, you will get a different result, obviously, since the file is compressed.
Unzip the file and then use:
wc -l fhvhv_tripdata_2021-01.csv
to get the right results.
# Dataproc: ERROR: (gcloud.dataproc.jobs.submit.pyspark) The required property [project] is not currently set. It can be set on a per-command basis by re-running your command with the [--project] flag.
Fix is to set the flag like the error states. Get your project ID from your dashboard and set it like so:
gcloud dataproc jobs submit pyspark \
  --cluster=my_cluster \
  --region=us-central1 \
  --project=my-dtc-project-1010101 \
  gs://my-dtc-bucket-id/code/06_spark_sql.py \
  --
<{IMAGE:image_id}>
# lServiceException: 401 Anonymous caller does not have storage.objects.list access to the Google Cloud Storage bucket. Permission 'storage.objects.list' denied on resource (or it may not exist).
This occurs because you are not logged in with Google Cloud SDK, or the project ID is not set. Follow these steps:
Log in using Google Cloud SDK:
gcloud auth loginThis will open a tab in the browser. Accept the terms, then close the tab if needed.
Set the project ID:
gcloud config set project <YOUR_PROJECT_ID>Upload the
pqdirectory to a Google Cloud Storage (GCS) Bucket:gsutil -m cp -r pq/ <YOUR_URI_from_gsutil>/pq
# GCP: py4j.protocol.Py4JJavaError
When submitting a job, you might encounter a py4j.protocol.Py4JJavaError related to Java in the log panel within Dataproc.
To address this error, consider the following steps:
Cluster Versioning Control:
- If you've recently changed the versioning settings, ensure that the cluster configuration is compatible with your requirements. For example, switching from Debian-Hadoop-Spark to Ubuntu 20.02-Hadoop3.3-Spark3.3 might resolve issues if you have a similar setup on your local machine.
Consistency with Local Environment:
- Aligning the cluster's OS version and software stack with your local environment can help reduce configuration issues.
Although specific documentation may not be available, this approach has proven effective in some scenarios.
# Repartition the Dataframe to 6 partitions using df.repartition(6) - got 8 partitions instead
Use both repartition and coalesce, like so:
df = df.repartition(6)

df = df.coalesce(6)

df.write.parquet('fhv/2019/10', mode='overwrite')
# Jupyter Notebook or SparkUI not loading properly at localhost after port forwarding from VS code?
Possible Solution: Try to forward the port using SSH CLI instead of VS Code.
Run the following command:
ssh -L <local port>:<VM host/ip>:<VM port> <ssh hostname>
ssh hostnameis the name you specified in the~/.ssh/configfile.
For example, in case of Jupyter Notebook, run:
ssh -L 8888:localhost:8888 gcp-vm
from your local machine’s CLI.
Note: If you logout from the session, the connection would break. While creating the Spark session, check the block's log because sometimes it fails to run at 4040 and switches to 4041.
If you are having trouble accessing localhost ports from a GCP VM, consider adding the forwarding instructions to the .ssh/config file as follows:
Host <hostname>
  Hostname <external-gcp-ip>
  User xxxx
  IdentityFile yyyy
  LocalForward 8888 localhost:8888
  LocalForward 8080 localhost:8080
  LocalForward 5432 localhost:5432
  LocalForward 4040 localhost:4040
This should automatically forward all ports and will enable accessing localhost ports.
# Dataproc: "Insufficient SSD_TOTAL_GB quota" when creating a cluster
The default per-region quota for SSD persistent disk is limited (often 250 or 500 GB depending on region/account). If your cluster's combined boot disk size exceeds it, cluster creation fails:
Error: Insufficient 'SSD_TOTAL_GB' quota. Requested 500.0, available 250.0.
Options
- Wait and retry — the message can also indicate transient resource pressure in the region.
- Reduce the cluster's disk usage so it fits within your quota:
- Master node: 1 ×
n2-standard-2, primary disk 85 GB. - Workers: 2 ×
n2-standard-2, primary disk 80 GB each. - Total: 85 + 80 + 80 = 245 GB, fits under a 250 GB quota.
- Master node: 1 ×
- Switch boot disk type from
pd-balanced(SSD-backed) topd-standard(HDD-backed) — this disk type counts against a different quota. - Pick a region with more headroom or request a quota increase via the GCP console (IAM & Admin → Quotas).
# How can I calculate the duration between two Spark timestamp columns in hours (e.g., tpep_pickup_datetime and tpep_dropoff_datetime)?
You can compute the duration in hours between two Spark timestamp columns in several ways. Choose the approach that best fits your workflow:
- Using unix_timestamp (per-row hours as a floating-point value):
from pyspark.sql import functions as F

trip_duration_hours = (
    F.unix_timestamp("tpep_dropoff_datetime") -
    F.unix_timestamp("tpep_pickup_datetime")
) / 3600
This yields the duration in hours for each row as a numeric value.
- Using datediff (hours approximation via days):
from pyspark.sql import functions as F

# difference in days, then multiply by 24 to get hours
hours = F.datediff("tpep_dropoff_datetime", "tpep_pickup_datetime") * 24
Note that datediff returns whole days; if you need sub-day precision, prefer the unix_timestamp method above or compute seconds directly.
- Working with Python timedelta after collecting (Python-side calculation):
# after collecting to Python (e.g., with toPandas or collect):
# delta is a Python datetime.timedelta object between dropoff and pickup
hours = delta.total_seconds() / 3600
Each approach has trade-offs:
- unix_timestamp gives per-row exact hours including minutes and seconds.
- datediff provides a quick day-based delta (multiplying by 24 to get hours) but loses sub-day precision.
- Python-side timedelta is useful when you're operating outside Spark/after collecting, but it requires moving data to the driver.
# Dataproc Qn: Is it essential to have a VM on GCP for running Dataproc and submitting jobs?
No, you can submit a job to Dataproc from your local computer by installing and configuring gsutil. For installation instructions, visit https://cloud.google.com/storage/docs/gsutil_install.
You can execute the following command from your local computer:
gcloud dataproc jobs submit pyspark \
  --cluster=de-zoomcamp-cluster \
  --region=europe-west6 \
  gs://dtc_data_lake_de-zoomcamp-nytaxi/code/06_spark_sql.py \
  -- \
  --input_green=gs://dtc_data_lake_de-zoomcamp-nytaxi/pq/green/2020/*/ \
  --input_yellow=gs://dtc_data_lake_de-zoomcamp-nytaxi/pq/yellow/2020/*/ \
  --output=gs://dtc_data_lake_de-zoomcamp-nytaxi/report-2020
# Setting JAVA_HOME with Homebrew on Apple Silicon (M1/M2/M3 Macs)
Apple Silicon Macs install Homebrew under /opt/homebrew/ instead of /usr/local/. Generic instructions written for Intel Macs won't find the JDK. Set JAVA_HOME explicitly in ~/.zshrc (or ~/.bashrc):
brew install openjdk@17
export JAVA_HOME="/opt/homebrew/opt/openjdk@17"
export PATH="${JAVA_HOME}/bin:${PATH}"
Reload your shell (source ~/.zshrc or open a new terminal) and verify:
which java
java --version
which java should print a path under /opt/homebrew/... and java --version should show JDK 17.
Spark 4.x supports Java 17 and 21; pick whichever is available via Homebrew (brew install openjdk@21 works the same way).
# Subnetwork 'default' does not support Private Google Access which is required for Dataproc clusters when 'internal_ip_only' is set to 'true'. Enable Private Google Access on subnetwork 'default' or set 'internal_ip_only' to 'false'.
To resolve this issue, follow these steps:
- Search for VPC in Google Cloud Console.
- Navigate to the "SUBNETS IN CURRENT PROJECT" tab.
- Locate the region/location where your Dataproc will be located and click on it.
- Click the edit button and toggle on "Private Google Access."
- Save changes.
# How do you share a DataFrame across multiple Spark sessions?
Spark provides Global Temporary Views to share DataFrames across different Spark sessions within the same Spark application. Unlike regular temporary views, global temporary views are accessible from any session. Step 1: Create a Global Temporary View
# Create a global temporary view
df.createOrReplaceGlobalTempView('trips_global')
This registers the DataFrame as a global temporary view named trips_global.
Step 2: Query the Global View from Any Session
spark.sql("SELECT * FROM global_temp.trips_global").show()
Global temporary views are stored in the global_temp database and must be referenced using the global_temp. prefix.
# How do I use Spark with BigQuery as a data source and sink?
Add the connector package: com.google.cloud.spark:spark-bigquery-with-dependencies_2.12
Read from BigQuery:
df = spark.read.format("bigquery") \
.option("table", "project.dataset.table") \
.load()
Write to BigQuery:
df.write.format("bigquery") \
.option("table", "project.dataset.output_table") \
.mode("overwrite") \
.save()
Make sure:
- your GCP credentials are configured
- dataset location matches your query location
- the output dataset exists
This enables distributed processing on top of warehouse data.
# Why does casting TIMESTAMP_NTZ to BIGINT fail in Spark, and how can I convert it to a numeric value?
TIMESTAMP_NTZ cannot be cast directly to numeric types like BIGINT in Spark. To convert to a numeric representation (epoch seconds), use the to_unix_timestamp function.
SELECT to_unix_timestamp(tpep_pickup_datetime)
FROM yellow_2025_11
# Why does Spark write multiple parquet files after repartitioning a DataFrame?
Spark processes data in partitions. When you write a DataFrame to disk, Spark writes each partition as a separate output file. For example:
trips.repartition(4).write.parquet("output/")
This creates four parquet files because the DataFrame now has four partitions. This behavior enables Spark to write data in parallel and can improve performance on large datasets.
# How many records are stored in each partition/parquet file when writing a Spark DataFrame with repartition?
When you repartition a DataFrame and write it to Parquet, Spark writes one Parquet file per partition. The total number of rows in the dataset is distributed across those files, so each partition file contains roughly N / num_partitions rows (where N is the total row count and num_partitions is the number of partitions you repartitioned to). The exact counts per file depend on the data distribution and the chosen number of partitions.
Example:
df.repartition(4).write.parquet("output/")
To see how many rows are in each partition file, read the output and count rows per input file:
spark.read.parquet("output/").groupBy(input_file_name()).count().show()
Notes:
- The function
input_file_name()helps identify which file a row came from. You may need to import it in PySpark:
from pyspark.sql.functions import input_file_name
- The counts shown by the above command correspond to the quiz options, and will vary with dataset size and the number of partitions you write to. If you want more uniform file sizes, adjust the number of partitions or use
coalesce/repartitionas appropriate.
# Why does max(trip_distance) return extremely large values in Spark for yellow_tripdata_2023-11, and how can I obtain a realistic maximum?
This issue is caused by data quality problems in the NYC Taxi dataset. Some rows have unrealistic trip_distance values due to GPS errors, sensor faults, corrupted trip records, or incorrect meter readings. When Spark computes max(trip_distance) without filtering, these outliers inflate the result.
To obtain a more realistic maximum, apply a simple filter before computing the maximum. For example:
df.filter('trip_distance > 0 AND trip_distance < 200').selectExpr('max(trip_distance)').show()
- Notes:
- The threshold (200 in the example) is dataset-specific; adjust it to reflect plausible trip distances for your data.
- This approach helps you reflect typical taxi trips rather than including extreme outliers.
# What is the difference between a Spark application, job, stage, and task?
One of the first places where Spark concepts appear is in the graphical interface. There we see terms like application, job, stage, or task, but at first it's not always clear how they relate to each other. Understanding this hierarchy is very useful because it allows us to interpret what Spark is doing internally, debug problems, and better understand the performance of our processes.
Applications
A Spark application is the complete program we execute. It is the entire process that begins when we launch something like:
spark-submit script.py
or when we start a session in PySpark or a notebook.
import pyspark
import os
from pyspark.sql import SparkSession
spark = SparkSession.builder \
.master(os.environ.get('SPARK_MASTER')) \
.appName("csv-to-parquet") \
.getOrCreate()
A Spark application includes:
- The driver program, which coordinates execution.
- The executors, which perform the distributed work.
- All operations executed by the program until it finishes.
We can think of the application as the complete execution of our program.
For example, if we run a PySpark script that 1) reads a dataset, 2) performs several transformations, and 3) writes a result; all of that forms a single Spark application.
The graphical interface shows one entry for each executed application.
Job
Within an application, Spark divides the work into jobs. A job is created every time we execute an action on a DataFrame. As we saw in previous chapters, in Spark there are two types of operations:
- Transformations: describe a transformation but are not executed immediately.
- Actions: trigger the immediate execution of the transformations described up to that point.
Some examples of actions are show(), count(), collect(), write, or save. Every time we call an action, Spark creates a new job.
In the script:
df = spark.read.parquet("data.parquet")
df_filtered = df.filter("price > 10")
df_filtered.count()
df_filtered.show()
... two separate jobs will be executed, one for count() and one for show(), even though both use the same DataFrame.
This happens because Spark evaluates transformations lazily and only executes the plan when a result is requested.
Stages
Each job is divided into stages. Stages represent groups of operations that can be executed without needing to redistribute data between nodes.
The reason they are separated into stages is usually an operation called a shuffle. A shuffle occurs when data must be redistributed between partitions; for example in operations like: groupBy, join, distinct, and reduceByKey.
When Spark detects that a shuffle is needed, it divides the job into several stages.
df.groupBy("city").count()
This typically generates an execution plan roughly like this:
- Stage 1: data reading and initial transformation
- Shuffle
- Stage 2: final aggregation
Each stage can be executed in parallel across multiple nodes.
Task
A task is the smallest unit of work in Spark. Each stage is divided into multiple tasks, and each task processes one partition of data.
For example, for a dataset with 200 partitions in one stage, Spark will launch 200 tasks. And each task will be executed by an executor.
In other words:
Stage
├─ Task 1: processes partition 1
├─ Task 2: processes partition 2
├─ Task 3: processes partition 3
...
The more partitions there are, the more tasks Spark can execute in parallel.
Full Hierarchy in an Example
Imagine this code:
df = spark.read.parquet("rides.parquet")
result = (
df
.filter("passenger_count > 2")
.groupBy("PULocationID")
.count()
)
result.show()
The execution might look like this:
- Application: the complete script.
- Job: created by
show(). - Stages:
- Reading and filtering.
- Shuffle and aggregation.
- Tasks: one per partition.
Relevant Links
To get in-depth information about these concepts, check:
# Spark: Is working, however, nothing appears in the Spark UI (e.g., .show())?
Since we used multiple notebooks during the course, it's possible that there are more than one Spark session active. It’s highly likely that you are observing the incorrect one. Follow these steps to troubleshoot:
Spark uses port 4040 by default, but if more than one session is active, it will try to use the next available port (e.g., 4041).
Ensure you're viewing the correct Spark Web UI for the application where your jobs are running.
Verify the current application session address:
# Using the following command in your session spark.sparkContext.uiWebUrlExpected output might look like:
http://your.application.session.address.internal:4041Indicating port 4041.
If using a VM, make sure you forward the identified port to access the web UI on
localhost:<port>.
# How do I connect PySpark to BigQuery?
Add the BigQuery connector to your SparkSession via spark.jars.packages. PySpark will download the matching jar from Maven Central on first run.
from pyspark.sql import SparkSession
spark = (SparkSession.builder
.master("local[*]")
.appName("bq")
.config("spark.jars.packages",
"com.google.cloud.spark:spark-bigquery-with-dependencies_2.12:0.42.0")
.getOrCreate())
Pick a connector version that matches your Spark / Scala version (the _2.12 suffix is the Scala build target). Check the latest at the Spark BigQuery connector releases.
For credentials, set GOOGLE_APPLICATION_CREDENTIALS in your environment to the path of your service account JSON before launching Spark — the connector picks it up automatically.
For the read/write API once the connector is loaded, see the dedicated Spark + BigQuery FAQ.
Module 7: Streaming
# Docker: Could not start docker image "control-center" from the docker-compose.yaml file.
Check Docker Compose File:
Ensure that your docker-compose.yaml file is correctly configured with the necessary details for the "control-center" service. Check the service name, image name, ports, volumes, environment variables, and any other configurations required for the container to start.
On Mac OSX 12.2.1 (Monterey), if you encounter this issue, try the following:
- Open Docker Desktop and check for any images still running from previous sessions.
- If there are images still running and they do not appear with the
docker pscommand, they may need to be deleted directly from Docker Desktop. - Once those images are removed, try starting the Kafka environment again.
This approach resolved the issue on Mac OSX 12.2.1 for a similar setup.
# Module “kafka” not found when trying to run producer.py
To resolve the "Module 'kafka' not found" error when running producer.py, you can create a virtual environment and install the required packages. Follow these steps:
Create a Virtual Environment
Run the following command to create a virtual environment:
python -m venv envActivate the Virtual Environment
On macOS and Linux:
source env/bin/activateOn Windows:
env\Scripts\activate
Install Required Packages
Install the packages listed in
requirements.txt:pip install -r ../requirements.txtDeactivate the Virtual Environment
When you're done, deactivate the virtual environment:
deactivate
Note: Ensure that Docker images are running before executing the Python file. The virtual environment is meant for running the Python files locally.
# ModuleNotFoundError: No module named 'avro'
The confluent-kafka package doesn't bring in Avro support by default. Install the [avro] extra:
uv add "confluent-kafka[avro]"
# or, with pip:
pip install "confluent-kafka[avro]"
References:
# What is the use of Redpanda?
Redpanda is built on top of the Raft consensus algorithm and is designed as a high-performance, low-latency alternative to Kafka. It uses a log-centric architecture similar to Kafka but with different underlying principles.
# Negsignal:SIGKILL while converting data files to parquet format
Got this error because the Docker container memory was exhausted. The data file was up to 800MB but my Docker container does not have enough memory to handle that.
Solution:
- Load the file in chunks with Pandas.
- Create multiple parquet files for each data file being processed.
This approach worked smoothly and resolved the issue.
# resources/rides.csv is missing
Copy the file found in the Java example: data-engineering-zoomcamp/week_6_stream_processing/java/kafka_examples/src/main/resources/rides.csv
# Kafka: Python videos have low audio and are hard to follow up
To improve the audio quality:
- Download the videos and use VLC media player. You can set the audio to 200% of the original volume for better sound quality.
- Alternatively, use auto-generated captions directly on YouTube for better clarity.
# Kafka Python Videos: Rides.csv
There is no clear explanation of the rides.csv data that the producer.py Python programs use. You can find it here: Rides CSV File.
# kafka.errors.NoBrokersAvailable: NoBrokersAvailable
If you encounter this error, it is likely that your Kafka broker Docker container is not running.
Use the following command to check the running containers:
docker psNavigate to the folder containing your Docker Compose YAML file and execute the following command to start all instances:
docker-compose up -d
# Kafka homework Q3: There are options that support the scaling concept more than the others.
Focus on the horizontal scaling option.
Think of scaling in terms of scaling from the consumer end, or consuming messages via horizontal scaling.
# Docker: How to fix docker compose error: Error response from daemon: pull access denied for spark-3.3.1, repository does not exist or may require 'docker login': denied: requested access to the resource is denied
If you get this error, it means you have not built your Spark and Jupyter images. These images aren’t readily available on DockerHub.
To resolve this:
In the Spark folder, run the following command from a bash CLI to build all images before running docker compose:
./build.sh
# Python Kafka: ./build.sh: Permission denied Error
Run this command in the terminal in the same directory (/docker/spark):
chmod +x build.sh
# Python Kafka: ‘KafkaTimeoutError: Failed to update metadata after 60.0 secs.’ when running stream-example/producer.py
Restarting all services worked for me:
docker-compose down
docker-compose up
# Python Kafka: ./spark-submit.sh streaming.py - ERROR StandaloneSchedulerBackend: Application has been killed. Reason: All masters are unresponsive! Giving up.
While following tutorial 13.2, when running ./spark-submit.sh streaming.py, encountered the following error:
24/03/11 09:48:36 INFO StandaloneAppClient$ClientEndpoint: Connecting to master spark://localhost:7077...
24/03/11 09:48:36 INFO TransportClientFactory: Successfully created connection to localhost/127.0.0.1:7077 after 10 ms (0 ms spent in bootstraps)
24/03/11 09:48:54 WARN GarbageCollectionMetrics: To enable non-built-in garbage collector(s) List(G1 Concurrent GC), users should configure it(them) to spark.eventLog.gcMetrics.youngGenerationGarbageCollectors or spark.eventLog.gcMetrics.oldGenerationGarbageCollectors
24/03/11 09:48:56 INFO StandaloneAppClient$ClientEndpoint: Connecting to master spark://localhost:7077…
24/03/11 09:49:16 INFO StandaloneAppClient$ClientEndpoint: Connecting to master spark://localhost:7077...
24/03/11 09:49:36 WARN StandaloneSchedulerBackend: Application ID is not initialized yet.
24/03/11 09:49:36 ERROR StandaloneSchedulerBackend: Application has been killed. Reason: All masters are unresponsive! Giving up.
py4j.protocol.Py4JJavaError: An error occurred while calling None.org.apache.spark.sql.SparkSession.
: java.lang.IllegalStateException: Cannot call methods on a stopped SparkContext.
Solution:
Downgrade PySpark:
- Downgrade your local PySpark to 3.3.1 (ensure it matches the version used in Dockerfile).
- The mismatch of PySpark versions can be a cause of the failed connection.
- Check the logs of
spark-masterin the Docker container for confirmation.
Check Spark Version:
- Run
pyspark --versionandspark-submit --versionto check your local Spark version. - Adjust the
SPARK_VERSIONvariable inbuild.shto match your current Spark version.
- Run
# Python Kafka: ./spark-submit.sh streaming.py - How to check why Spark master connection fails
Start a new terminal.
Run the following command to list running containers:
docker psCopy the
CONTAINER IDof thespark-mastercontainer.Execute the following command to access the container's shell:
docker exec -it <spark_master_container_id> bashRun this command to view the Spark master logs:
cat logs/spark-master.outCheck the log for the timestamp when the error occurred.
Search the error message online for further troubleshooting.
# Python Kafka: ./spark-submit.sh streaming.py Error: py4j.protocol.Py4JJavaError: An error occurred while calling None.org.apache.spark.api.java.JavaSparkContext.
Make sure your Java version is 11 or 8.
Check your version by:
java --versionCheck all your installed Java versions by:
/usr/libexec/java_home -VIf you already have Java 11 but it's not set as the default, select the specific version by:
export JAVA_HOME=$(/usr/libexec/java_home -v 11.0.22)(or another version of 11)
# Java Kafka: <project_name>-1.0-SNAPSHOT.jar errors: package xxx does not exist even after gradle build
In my setup, all of the dependencies listed in build.gradle were not installed in <project_name>-1.0-SNAPSHOT.jar.
Solution:
In the
build.gradlefile, add the following at the end:shadowJar { archiveBaseName = "java-kafka-rides" archiveClassifier = '' }In the command line, run:
gradle shadowjarExecute the script from
java-kafka-rides-1.0-SNAPSHOT.jarcreated by the shadowjar.
# Streaming: installing dependencies for the Python avro example (producer.py)
For the 06-streaming/python/avro_example/producer.py script, install:
uv add confluent-kafka fastavro
# or, with pip:
pip install confluent-kafka fastavro
Then run with uv run python producer.py (or python producer.py from inside an activated venv).
# Can I use the Faust library for the streaming module?
The Faust library is no longer maintained — see https://github.com/robinhood/faust. We don't recommend using it for the course.
If you don't know Java, follow the Python streaming materials in the course repo (under 06-streaming/python/) instead, which use Kafka or Redpanda directly. Watching the Java videos to understand the streaming concepts is still useful even if you skip the coding parts.
# Java Kafka: How to run producer/consumer/kstreams/etc in terminal
In the project directory, run:
java -cp build/libs/<jar_name>-1.0-SNAPSHOT.jar:out src/main/java/org/example/JsonProducer.java
# Java Kafka: When running the producer/consumer/etc java scripts, no results retrieved or no message sent
For example, when running JsonConsumer.java, you might see:
Consuming form kafka started
RESULTS:::0
RESULTS:::0
RESULTS:::0
Or when running JsonProducer.java, you might encounter:
Exception in thread "main" java.util.concurrent.ExecutionException: org.apache.kafka.common.errors.SaslAuthenticationException: Authentication failed
Solution:
Ensure the
StreamsConfig.BOOTSTRAP_SERVERS_CONFIGin the scripts located atsrc/main/java/org/example/(e.g.,JsonConsumer.java,JsonProducer.java) is pointing to the correct server URL (e.g.,europe-west3vseurope-west2).Verify that the cluster key and secrets are updated in
src/main/java/org/example/Secrets.java(KAFKA_CLUSTER_KEYandKAFKA_CLUSTER_SECRET).
# Java Kafka: Tests are not picked up in VSCode
In VS Code, you might expect to see a triangle icon next to each test method in your Java files. If you don't see it, here are the steps to fix the issue:
Open Explorer (first icon on the left navigation bar).
Navigate to JAVA PROJECTS (bottom collapsable section).
Click the icon in the rightmost position next to JAVA PROJECTS to open the options.
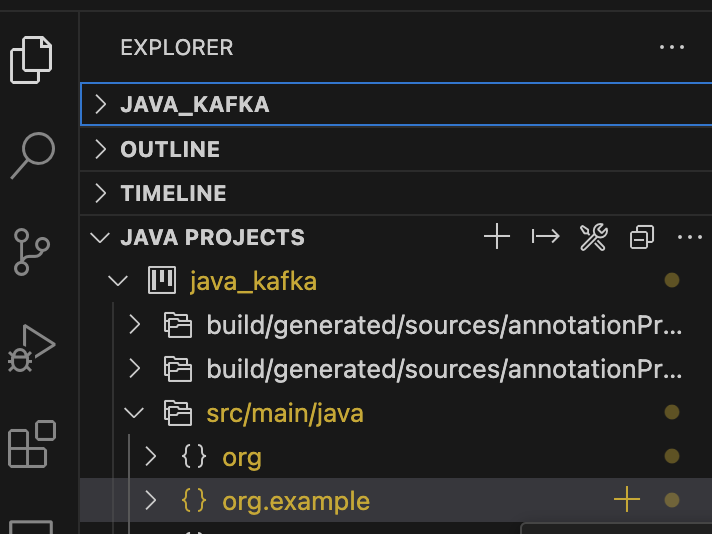

Select Clean Workspace.
Confirm by clicking Reload and Delete.
Following these steps should restore the triangle icons you expect to see next to each test, similar to those visible in Python tests.
Example:

Additionally, you can add classes and packages in this window instead of creating files directly in the project directory.
# Confluent Kafka: Where can I find schema registry URL?
In Confluent Cloud:
- Navigate to your Environment (e.g., default or a custom name).
- Use the right navigation bar to find "Stream Governance API."
- The URL can be found under "Endpoint."
- Create credentials from the Credentials section below it.
# How do I check compatibility of local and container Spark versions?
You can check the version of your local Spark using:
spark-submit --version
In the build.sh file of the Python folder, ensure that SPARK_VERSION matches your local version. Similarly, ensure the PySpark you installed via pip also matches this version.
# How to fix the error "ModuleNotFoundError: No module named 'kafka.vendor.six.moves'?"
# How do you manually manage offsets in a Kafka consumer?
Kafka allows you to manually control when message offsets are committed. This is useful when you want to commit offsets only after successful message processing, ensuring reliable processing.
Step 1: Disable Auto Commit
consumer = KafkaConsumer(
'taxi-trips',
bootstrap_servers=['localhost:9092'],
enable_auto_commit=False # Manual commit
)
Setting enable_auto_commit=False prevents Kafka from automatically committing offsets.
Step 2: Process Messages and Commit Manually
for message in consumer:
try:
# Process the message
process_trip(message.value)
# Commit offset after successful processing
consumer.commit()
except Exception as e:
print(f"Error: {e}")
# Do not commit on failure → message will be reprocessed
Offsets are committed only after the message is successfully processed. If an error occurs, the offset is not committed, so the message can be consumed again.
# PyFlink session window job fails with 'please declare primary key for sink table when query contains update/delete record' error
Session window aggregations produce updates while the session is still open. The JDBC sink needs a primary key so it knows which row should be updated in the table. Without a primary key, Flink cannot apply the updates and the job fails. Define a primary key in the sink table using the window boundaries and the grouping key (for example window_start, window_end, and PULocationID).
# Why does the tumbling window job run successfully but the PostgreSQL sink table returns no rows when queried?
Flink streaming jobs emit results only after the window closes. With event-time processing and watermarks, the window will not close until the watermark passes the window end. If you query the PostgreSQL table too early, it may still be empty even though the job is running correctly. Let the job run for a short time so the watermark advances and the window results are written to the sink table.
# Why does the PyFlink streaming job fail with a JSON deserialization error when consuming records from the Kafka/Redpanda topic?
Problem The PyFlink streaming job fails during deserialization with a JSON error when consuming records from Kafka/Redpanda. This happens if the produced JSON payload contains NaN values (e.g., NaN in numeric fields like passenger_count). Standard JSON does not allow NaN, so Flink's JSON parser rejects the payload and the source fails, causing the job to restart.
Root cause NaN is not valid JSON. When NaN is serialized into JSON, downstream JSON parsers (including Flink's) fail to parse the record.
Fix Clean the dataset before producing events by replacing NaN values with null or a valid number before serialization.
How to implement (example in Python)
import json
import math
def sanitize_and_serialize(record):
# Convert NaNs to JSON nulls
for key, value in record.items():
if isinstance(value, float) and math.isnan(value):
record[key] = None
return json.dumps(record, separators=(',', ':'), ensure_ascii=False)
# Example usage
# Suppose 'rows' is an iterable of dicts representing taxi trips
for row in rows:
json_str = sanitize_and_serialize(row)
# send json_str to Kafka/Redpanda
Alternative: simple NaN handling with a default numeric value
# If you prefer numeric defaults instead of nulls
df = df.fillna({'passenger_count': 0, 'trip_distance': 0, 'fare_amount': 0})
Validation
- After serialization, verify that the payload is valid JSON:
import json
json.loads(json_str) # should not raise
Notes
- This is the recommended approach; avoid sending NaN in JSON payloads.
- If you cannot modify the producer, you may consider additional validation at the ingestion layer, but the source-level sanitization is most reliable.
# How to Inspect Messages in a Kafka Topic Using Offsets?
An offset in Kafka is a per-partition sequence number that uniquely identifies messages within that partition. There is no global offset for the entire topic, and consumers use offsets to track what they have processed.
Why inspecting offsets helps: when errors occur in a real-time stream, inspecting messages near a known offset helps you see what data caused the error, understand surrounding context, and reproduce the issue locally.
Viewing offsets and consumer lag
Use the Kafka CLI to see how far a consumer group has progressed:
kafka-consumer-groups \
--bootstrap-server localhost:9092 \
--describe \
--group rides-to-postgres
You can also run this via Docker:
docker run --rm -it --network pyflink_default confluentinc/cp-kafka:7.6.0 kafka-consumer-groups \
--bootstrap-server redpanda:29092 \
--describe \
--group rides-to-postgres
Key fields to look at:
- CURRENT-OFFSET: last offset processed by the consumer
- LOG-END-OFFSET: last offset available in the topic
- LAG: messages pending to be processed
For more details, see the official docs: kafka-consumer-groups-sh
Consuming messages from the beginning of a topic
To inspect all messages in a topic, you can use kafka-console-consumer:
kafka-console-consumer \
--bootstrap-server localhost:9092 \
--topic rides \
--from-beginning
Or via Docker:
docker run --rm -it --network pyflink_default confluentinc/cp-kafka:7.6.0 kafka-console-consumer \
--bootstrap-server redpanda:29092 \
--topic rides \
--from-beginning
Notes:
- This is useful for basic exploration but does not allow jumping to a specific offset.
Inspecting messages from a specific offset with kcat (formerly kafkacat)
A very handy tool is kcat for reading messages starting from a given offset:
kcat -C \
-b localhost:9092 \
-t rides \
-p 0 \
-o 25 \
-c 5
Docker usage:
docker run --network pyflink_default edenhill/kcat:1.7.1 -C \
-b redpanda:29092 \
-t rides \
-p 0 \
-o 25 \
-c 5
Options explained:
- consumer mode
-C - broker
-b(host:port) - topic
-tthe topic to read from - partition
-pthe partition - start at offset
-oto begin reading - read up to
-cmessages
This lets you see exactly what happens starting from a particular offset.
Notes:
- kcat is the successor to kafkacat; you can install or run it from Docker.
- Replace broker address and topic/partition as per your environment.
Conclusion
Knowing how to inspect messages with specific offsets is a fundamental skill for Kafka debugging. Use these commands to locate the data around a known offset, monitor consumer lag, and reproduce issues locally when needed.
# How do I avoid backpressure in a Flink streaming job?
Backpressure occurs when Flink processes data slower than the upstream source produces it. This causes growing buffers, increased memory usage, and can eventually slow down or crash the job.
How to mitigate it:
- Increase consumer parallelism so more tasks process records in parallel.
- Increase the number of partitions on the source topic so the additional Flink consumers actually have separate partitions to read from.
- Watch Flink's metrics (the "Backpressure" tab in the Web UI, or the
inputRate/outputRatetask metrics) to confirm where the bottleneck is.
Setting parallelism in PyFlink:
env.set_parallelism(4)
Increase parallelism gradually and re-check metrics — making it too large just shifts the bottleneck somewhere else (network, sink, etc.).
# Spark Streaming: How do I read from multiple topics in the same Spark Session
To read from multiple topics in the same Spark session, follow these steps:
Initiate a Spark Session:
spark = (SparkSession .builder .appName(app_name) .master(master=master) .getOrCreate()) spark.streams.resetTerminated()Read Streams from Multiple Topics:
query1 = spark .readStream ... ... .load() query2 = spark .readStream ... ... .load() query3 = spark .readStream ... ... .load()Start the Queries:
query1.start() query2.start() query3.start()Await Termination:
spark.streams.awaitAnyTermination() # Waits for any one of the queries to receive a kill signal or error failure. This is asynchronous.Note:
query3.start().awaitTermination()is a blocking call. It works well when we are reading only from one topic.
Project
# How is my capstone project going to be evaluated?
Each submitted project will be evaluated by three randomly assigned students who have also submitted the project.
You will also be responsible for grading projects from three fellow students yourself. Please note that not complying with this rule will result in failing to achieve the Certificate at the end of the course.
The final grade you receive will be the median score of the grades from peer reviewers.
The peer review criteria for evaluating or being evaluated must follow the guidelines defined here.
# Can I collaborate with others on the capstone project?
Collaboration is not allowed for the capstone submission. However, you can discuss ideas and get feedback from peers in the forums or Slack channels.
# Project 1 & Project 2
There is only ONE project for this Zoomcamp. You do not need to submit or create two projects.
There are simply TWO chances to pass the course. You can use the Second Attempt if you:
- Fail the first attempt
- Do not have the time due to other engagements such as holidays or sickness to enter your project into the first attempt.
Project Evaluation - Reproducibility
Even with thorough documentation, ensuring that a peer reviewer can follow your steps can be challenging. Here’s how this criterion will be evaluated:
"Ideally yes, you should try to re-run everything. But I understand that not everyone has time to do it, so if you check the code by looking at it and try to spot errors, places with missing instructions, and so on - then it's already great."
Certificates: How do I get it?
See the certificate.mdx file.
# Does anyone know nice and relatively large datasets?
See a list of datasets here: GitHub Datasets
# Data Transformation from Databricks to Azure SQL DB
Transformed data can be moved into Azure Blob Storage and then it can be moved into Azure SQL DB, instead of moving directly from Databricks to Azure SQL DB.
# Orchestrating dbt with Airflow
The trial dbt account provides access to the dbt API. A job will still need to be added manually. Airflow can run the job using a Python operator that calls the API. You will need to provide an API key, job ID, etc., and be careful not to commit this information to GitHub.
- Detailed explanation: dbt and Airflow Spiritual Alignment
- Source code example: GitHub dbt Cloud Example
# Orchestrating DataProc with Airflow
For orchestrating DataProc with Airflow, you can refer to the following documentation:
Roles for Service Account
Ensure that you assign the following roles to your service account:
DataProc Administrator
Service Account User
For more details, see the explanation on Stack Overflow.
Operators to Use
DataprocSubmitPySparkJobOperatorDataprocDeleteClusterOperatorDataprocCreateClusterOperator
Important Note
When using DataprocSubmitPySparkJobOperator, make sure to add the BigQuery Connector, as DataProc does not include it by default:
dataproc_jars = ["gs://spark-lib/bigquery/spark-bigquery-with-dependencies_2.12-0.24.0.jar"]
# Key Vault in Azure cloud stack
The Key Vault in Azure Cloud is used to store credentials, passwords, or secrets for different technologies used within Azure. For example, if you do not want to expose the password of an SQL database, you can save the password under a given name and use it in other Azure services.
# How to run a dbt-core project as an Airflow Task Group on Google Cloud Composer using a service account JSON key
Install the astronomer-cosmos package as a dependency. Refer to the installation guide here and see a Terraform example.
Create a new folder,
dbt/, inside thedags/folder of your Composer GCP bucket and copy your dbt-core project there. See the example.Ensure your
profiles.ymlis configured to authenticate with a service account key. Refer to the BigQuery example.Create a new DAG using the
DbtTaskGroupclass. Use aProfileConfigspecifying aprofiles_yml_filepaththat points to the location of your JSON key file. See this example.
Your dbt lineage graph should now appear as tasks inside a task group like this:
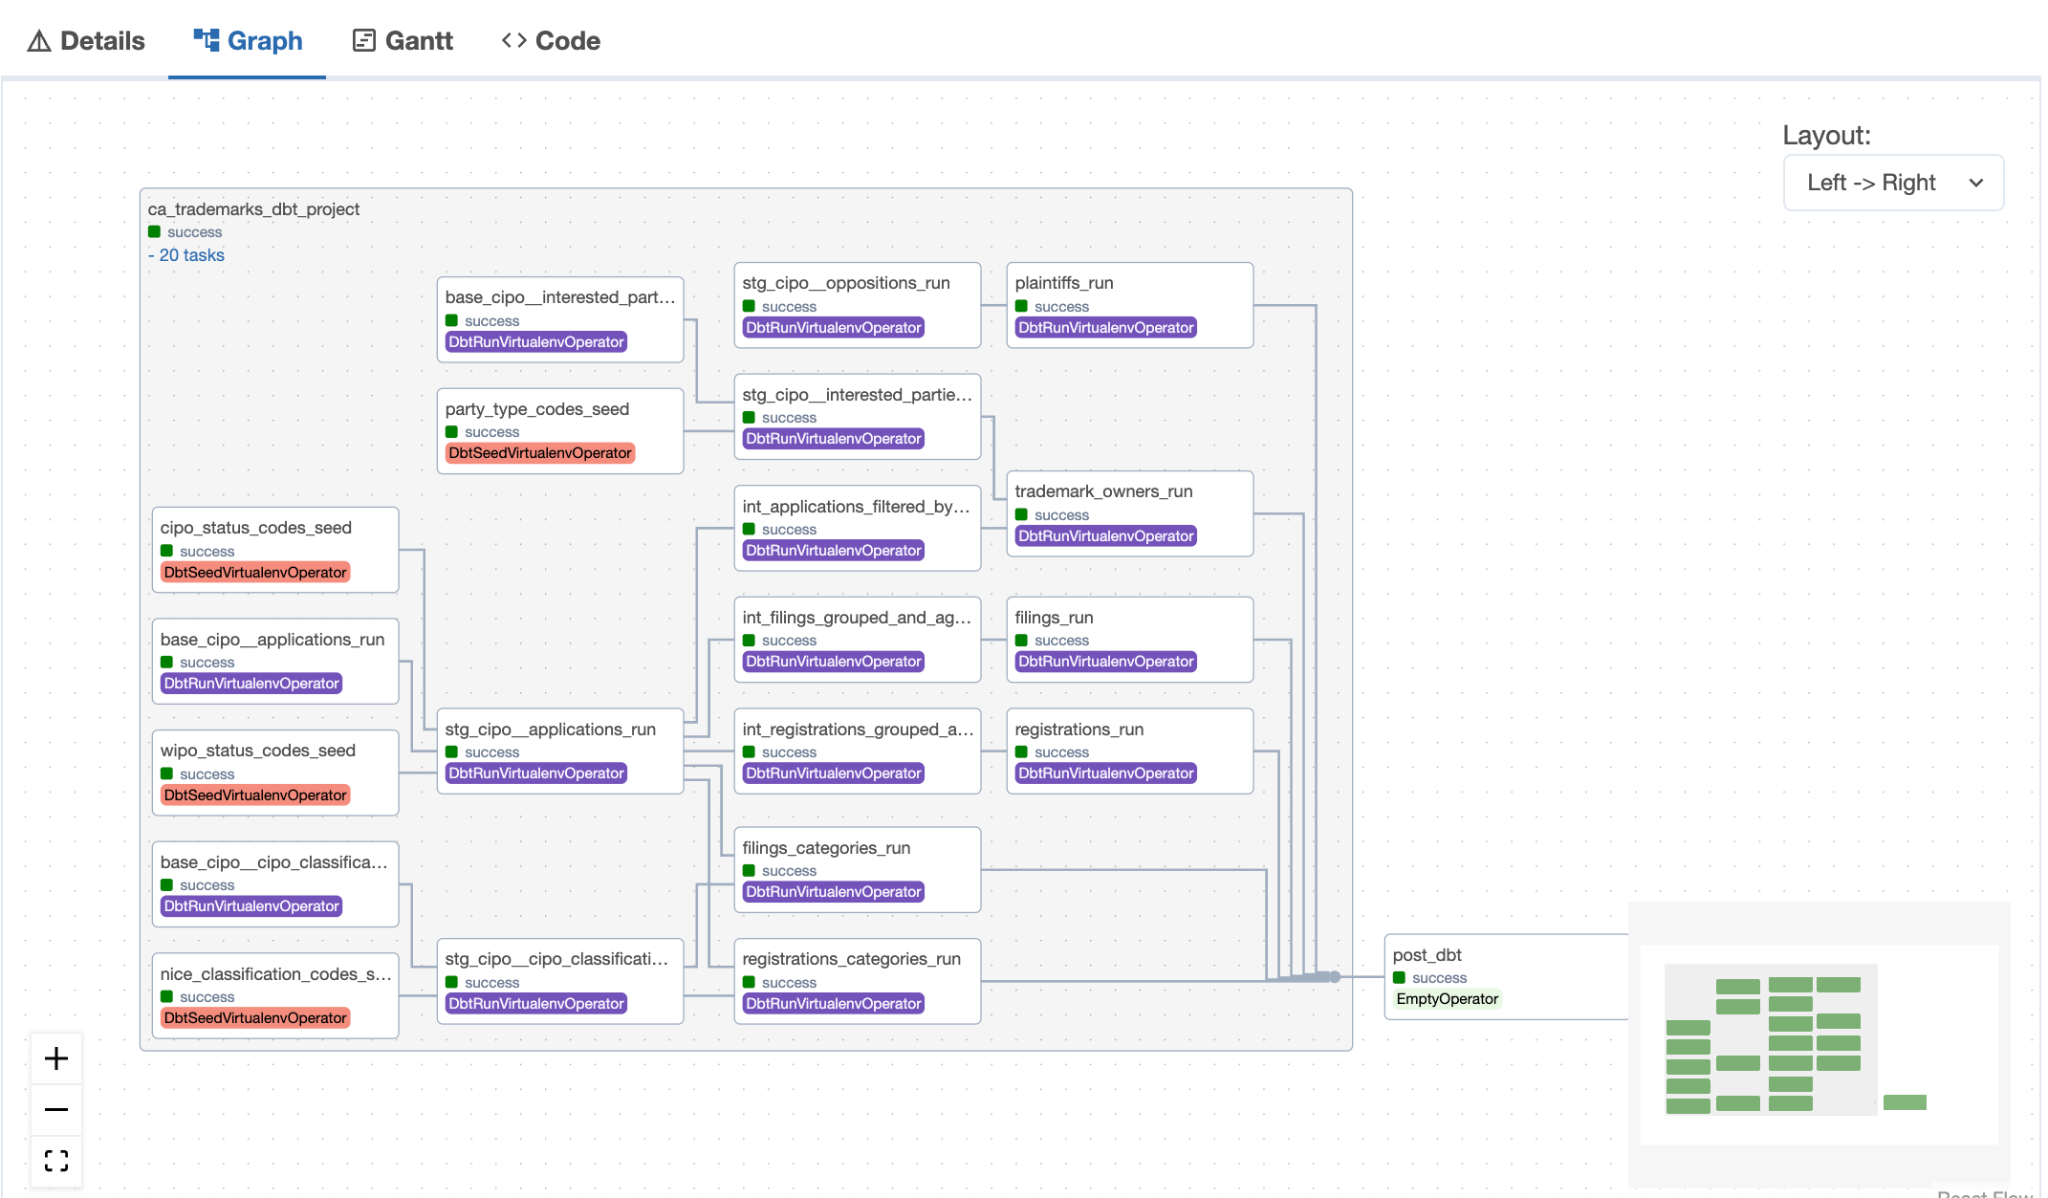
# How can I run UV in Kestra without installing it on every flow execution?
To avoid reinstalling uv on each flow run, you can create a custom Docker image based on the official Kestra image with uv pre-installed. Here's how:
Create a Dockerfile (e.g., Dockerfile) with the following content:
# Use the official Kestra image as a base FROM kestra/kestra # Install uv RUN pip install uvUpdate your
docker-compose.ymlto build this custom image instead of pulling the default one:services: kestra: build: context: . dockerfile: Dockerfile image: custom-kestra
This approach ensures that uv is available in the container at runtime without requiring installation during each flow execution.
# Is it ok to use NY_Taxi data for the project?
No.
# How to use dbt-core with Athena?
If you don’t have access to dbt Cloud, which is natively supported by AWS, you can use the community-built dbt-Athena Adapter for dbt-Core. Here are some references:
Key Features:
- Enables dbt to work with AWS Athena using dbt Core
- Allows data transformation using
CREATE TABLE ASorCREATE VIEWSQL queries
Not Yet Supported Features:
- Python models
- Persisting documentation for views
This adapter can be a valuable resource for those who need to work with Athena using dbt Core.
Workshop 1 - dlthub
# Which set-up should I use for my dlt homework?
Technically you can use any code editor or Jupyter Notebook, as long as you can run dbt and answer the homework questions. A lot of code is provided by the instructor on the homework page to give you a head start in the right direction: dlt Homework Instructions.
The most practical way is to use the provided Colabs Jupyter notebook called ‘dlt - Homework.ipynb’ which you can find here: Colab Notebook since all of the provided code is applicable in the Colabs set-up.
# How do I install the necessary dependencies to run the code?
To run the provided code, ensure that the dlt[duckdb] package is installed. You can do this by executing the following installation command in a Jupyter notebook:
!pip install dlt[duckdb]
If you’re installing it locally, make sure to also have duckdb installed before the duckdb package is loaded:
pip install "dlt[duckdb]"
# Other packages needed but not listed
If you are running Jupyter Notebook on a fresh new Codespace or in a local machine with a new virtual environment, you will need these packages to run the starter Jupyter Notebook offered by the teacher. Execute this command to install all the necessary dependencies:
pip install duckdb pandas numpy pyarrow
Or save it into a requirements.txt file:
dlt[duckdb]
duckdb
pandas
numpy
pyarrow # Optional, needed for Parquet support
Then run:
pip install -r requirements.txt
# Homework: dlt Exercise 3 - Merge a generator concerns
After loading, you should have a total of 8 records, and ID 3 should have age 33.
Question: Calculate the sum of ages of all the people loaded as described above.
- The sum of all eight records' respective ages is too big to be in the choices.
- You need to first filter out the people whose occupation is equal to
Nonein order to get an answer that is close to or present in the given choices.
I'm having an issue with the DLT workshop notebook, specifically in the 'Load to Parquet file' section. No matter what I change the file path to, it's still saving the DLT files directly to my C drive.
Use a raw string and keep the file:/// at the start of your file path.
# Set the bucket_url. We can also use a local folder
os.environ['DESTINATION__FILESYSTEM__BUCKET_URL'] = r'file:///content/.dlt/my_folder'
url = "https://storage.googleapis.com/dtc_zoomcamp_api/yellow_tripdata_2009-06.jsonl"
# Define your pipeline
pipeline = dlt.pipeline(
pipeline_name='my_pipeline',
destination='filesystem',
dataset_name='mydata'
)
# Run the pipeline with the generator we created earlier.
load_info = pipeline.run(stream_download_jsonl(url), table_name="users", loader_file_format="parquet")
print(load_info)
# Get a list of all Parquet files in the specified folder
parquet_files = glob.glob('/content/.dlt/my_folder/mydata/users/*.parquet')
# Show Parquet files
for file in parquet_files:
print(file)


# Problem with importing the dlt or dlt.sources module
Make sure you don’t have a dlt.py file saved in the same directory as your working file.
# How to set credentials in Google Colab notebook to connect to BigQuery
In the secrets sidebar, create a secret BIGQUERY_CREDENTIALS with the value being your Google Cloud service account key. Then load it with:
import os
from google.colab import userdata
os.environ["DESTINATION__BIGQUERY__CREDENTIALS"] = userdata.get('BIGQUERY_CREDENTIALS')
# How do I set up credentials to run dlt in my environment (not Google Colab)?
You can set up credentials for dlt in several ways. Here are the two most common methods:
Environment Variables (Easiest)
Set credentials via environment variables. For example, to configure Google Cloud credentials. This method avoids hardcoding secrets in your code and works seamlessly with most environments.
Configuration Files (Recommended for Local Use)
- Use
.dlt/secrets.tomlfor sensitive credentials and.dlt/config.tomlfor non-sensitive configurations. - Example for Google Cloud in
secrets.toml:
[google_cloud]
service_account_key = "YOUR_SERVICE_ACCOUNT_KEY"
- Place these files in the
.dltfolder of your project.
Additional Notes:
- Never commit
secrets.tomlto version control (add it to.gitignore). - Credentials can also be loaded via vaults, AWS Parameter Store, or custom setups.
For additional methods and detailed information, refer to the official dlt documentation
# Make DLT comply with the XDG Base Dir Specification
You can set the environment variable in your shell init script:
For Bash or ZSH:
export DLT_DATA_DIR=$XDG_DATA_HOME/dlt
For Fish (in config.fish):
set -x DLT_DATA_DIR "$XDG_DATA_HOME/dlt"
# Embedding dlt into Apache Airflow
To integrate a dlt pipeline into Apache Airflow, follow this example:
from airflow import DAG
from airflow.operators.python import PythonOperator
from datetime import datetime, timedelta
import dlt
from my_dlt_pipeline import load_data # Import your dlt pipeline function
default_args = {
"owner": "airflow",
"depends_on_past": False,
"start_date": datetime(2024, 2, 16),
"retries": 1,
"retry_delay": timedelta(minutes=5),
}
def run_dlt_pipeline():
pipeline = dlt.pipeline(
pipeline_name="my_pipeline",
destination="duckdb", # Change this based on your database
dataset_name="my_dataset"
)
info = pipeline.run(load_data())
print(info) # Logs for debugging
with DAG(
"dlt_airflow_pipeline",
default_args=default_args,
schedule_interval="@daily",
catchup=False,
) as dag:
run_dlt_task = PythonOperator(
task_id="run_dlt_pipeline",
python_callable=run_dlt_pipeline,
)
run_dlt_task
Ensure to replace "duckdb" with your actual database name and adjust the load_data function according to your specific dlt pipeline.
# Embedding dlt into Kestra
id: dlt_ingestion
namespace: my.dlt
description: "Run dlt pipeline with Kestra"
tasks:
- id: run_dlt
type: io.kestra.plugin.scripts.python.Commands
commands:
- |
import dlt
from my_dlt_pipeline import load_data # Import your dlt function
pipeline = dlt.pipeline(
pipeline_name="kestra_pipeline",
destination="duckdb",
dataset_name="kestra_dataset"
)
info = pipeline.run(load_data())
print(info)
# Loading dlt exports from GCS filesystems (compressed by default)
When using the filesystem destination, you may have issues reading the exported files because dlt compresses them by default. If you are using loader_file_format="parquet" then BigQuery should cope with the compression OK. If you want to use JSONL or CSV format, however, you may need to disable file compression to avoid issues with reading the files directly in BigQuery. To do this, set the following config:
[normalize.data_writer]
disable_compression = true
There is further information at the dlt docs on filesystem compression.
# How does dlt handle schema evolution?
dlt automatically detects and adapts to most schema changes during ingestion, so you usually don't need to manually alter tables.
What happens when the source schema changes:
- If new columns appear, dlt adds the new columns to the destination table.
- If new nested fields appear, dlt also creates the required child tables or columns.
- If existing columns disappear, the columns remain in the table (they are not dropped).
- If existing columns change their data type, dlt will try to safely coerce the data; if that's not possible, it raises an error so you can handle it explicitly.
How it works under the hood:
dlt infers the schema from the incoming data and it stores the schema and pipeline state locally (in the .dlt folder). On the next run, it compares the incoming data with the stored schema and applies the necessary migrations to the destination.
Why this is useful in the course:
- You can ingest evolving APIs or semi-structured JSON without writing DDL.
- Your pipelines keep working even when new fields appear.
- It's safe for incremental loading — schema updates don't require a full refresh.
When you may need to intervene:
- If a column changes to an incompatible type
- If you want to enforce a specific schema or data type
- If you want to drop or rename columns In those cases you can define the schema explicitly in your dlt resource.
Note: If you want to know more, there is a page dedicated to schema evolution in the official dlt documentation: https://dlthub.com/docs/general-usage/schema-evolution
# What is the difference between rest_api_source({...}) and @dlt.resource in dlt, and when should I use each?
rest_api_source({...})is declarative: JSON config, less custom code, and faster setup.@dlt.resourceis programmatic: a custom Python function, more flexible, and allows custom logic.
When to use rest_api_source({...}):
- API is simple and consistent
- Pagination/params/selectors are standard
- You want fast setup with less custom code
When to use @dlt.resource:
- Response schema is inconsistent or dynamic
- You need custom stop/retry/error rules
- You need custom preprocessing/validation logic
- You need fine-grained behavior for production scenarios
Quick summary:
rest_api_source({...})= faster and cleaner for standard APIs@dlt.resource= more flexible for real-world custom APIs
Execution lifecycle is the same for both:
pipeline.run(...)->extract + normalize + load
# How do I add the dlt MCP server in VS Code?
- Open the command palette in VS Code:
- Windows:
Ctrl + Shift + P - Mac:
Cmd + Shift + P
- Windows:
- Run MCP: Add Server...
- Select "Command (stdio)"
- Type
uv run --with dlt[duckdb] --with dlt-mcp[search] python -m dlt_mcpand press Enter. - Set the id to
dltand press Enter - Set the configuration target:
Remoteif you are using GitHub CodespacesWorkspaceotherwise
To verify that the MCP was added correctly:
- Open the command palette
- Type "MCP: List Servers"
- You should see "dlt Running" (like in the attached screenshot)
- If it is stopped, you can either:
- Start it by selecting it and choosing "Start Server"
- Prompt Copilot to use the mcp server (e.g. "list the dlt pipelines")
Lastly, make sure that when you initialize your dlt project (when you run dlt init dlthub:taxi_pipeline duckdb) you choose copilot as your agent.
# REST API pagination should start at page 1 and stop when the API returns an empty list
Problem:
- Some REST APIs paginate results using a page parameter where valid pages start at 1. Using page=0 can return an empty list, leading to incomplete ingestion.
Best practice:
- Start from page=1
- Continuously request subsequent pages until the API returns an empty list
- Do not rely on page=0 to fetch data; always test the API behaviour manually before implementing pagination logic
Implementation example (Python):
import requests
def fetch_all_pages(base_url, start_page=1, per_page=None):
page = start_page
all_items = []
while True:
params = {'page': page}
if per_page is not None:
params['per_page'] = per_page
resp = requests.get(base_url, params=params)
resp.raise_for_status()
data = resp.json()
if not data:
break
all_items.extend(data)
page += 1
return all_items
Manual testing steps:
- Call the endpoint with page=1 and verify that data is returned.
- Call the endpoint with page=0 and verify that it returns an empty list ([]).
- Increment the page number (2, 3, ...) until an empty list is returned, confirming ingestion completes when no more data is available.
- Add a note to adjust parameter names (e.g., per_page) if the API uses a different paging scheme.
Notes:
- If the API uses a different paging convention (e.g., cursor-based, or a different param name), adapt the logic accordingly while preserving the core rule: start at the initial page and stop when there is no data returned.
- Consider adding small unit/integration tests that mock API responses to verify this paging behavior in automated tests.
# How to query data when dlt normalizes column names to lowercase and snake_case?
DLT normalizes column names to lowercase and converts them to snake_case. For example, Trip_Pickup_DateTime becomes trip_pickup_date_time. When querying, use the normalized column names.
To discover the actual column names in a table, inspect the schema:
SELECT column_name
FROM information_schema.columns
WHERE table_schema = 'taxi_data'
Then use the normalized names in your queries, e.g.:
SELECT trip_pickup_date_time
FROM taxi_data.trips;
Notes:
- If you try to reference the original mixed-case column name (e.g., Trip_Pickup_DateTime) you may receive a "Referenced column not found" error because DLT has renamed the column.
- Ensure you are querying the correct schema and table. The information_schema query above can help confirm the exact column names.
If you need to work with a column that has a non-normalized name, you can still enclose the column in double quotes, but with DLT's normalization you typically should use the lowercase snake_case name.
# Why might some API response fields be missing after a dlt pipeline run, and how can I fix it?
Root cause:
- dlt infers column types from actual data in the current load. If a column contains only NULL values in that load, dlt cannot infer its type and the column will not be materialized in the destination table.
Fixes:
- Provide explicit type hints using the columns argument in the @dlt.resource decorator.
Example:
@dlt.resource(columns={
"rate_code": "STRING",
"mta_tax": "FLOAT64"
})
def api_records():
# your data loading logic here
return fetch_api()
- Ensure at least one non-null value exists for that column during ingestion.
- If possible, modify the API payload or add a preprocessing step to emit a non-null value for the field (e.g., default values).
- Example pre-processing (in Python):
def normalize(record):
if record.get("rate_code") is None:
record["rate_code"] = "UNKNOWN"
if record.get("mta_tax") is None:
record["mta_tax"] = 0.0
return record
After applying either fix, re-run the pipeline. The destination table will materialize the specified columns with the defined types.
Tips:
- Prefer explicit type hints when you know which fields to expect, especially for optional or nullable fields.
- If you cannot guarantee non-null values, always provide the explicit
columnsmapping to avoid missing columns.
# How do I generate the AGENTS.md file for Codex in dlt?
To generate the AGENTS.md file for Codex in dlt, follow these steps:
- Open a terminal and run:
dlt ai setup codex
- The command currently generates a file named
AGENT.md. Since Codex looks forAGENTS.md(plural) by default, rename it:
mv AGENT.md AGENTS.md